


MAP 600 – User’s Manual
Page 10
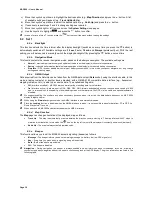
4.3.c
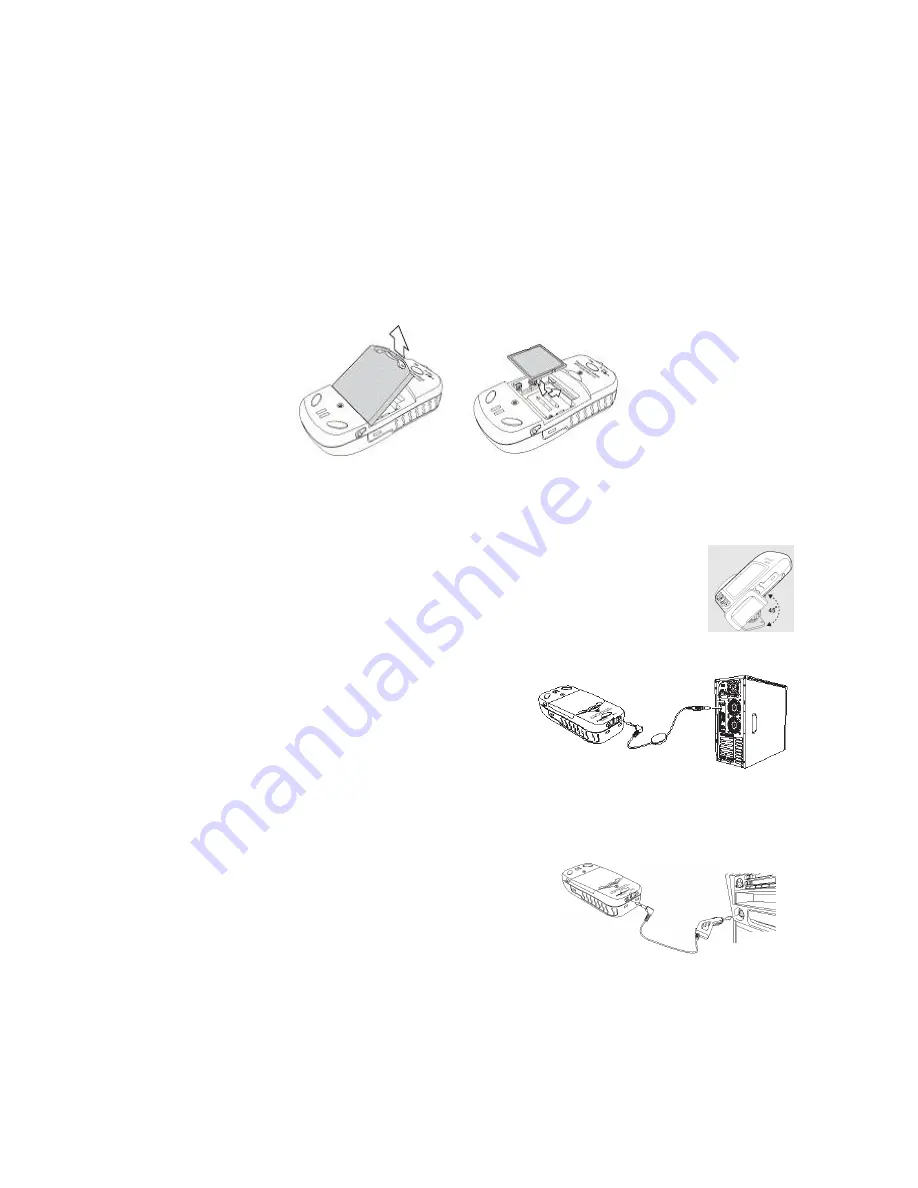
Installing a CF memory card
MAP 600 is equipped with a slot for CF (Compact Flash) cards to allow the downloading of detailed maps. To install the
card:
1. Ensure that MAP 600 is turned off.
2. Turn MAP 600 so that its rear panel is facing you and the lower part is facing downwards.
3. Move the lock lever on the battery cover to the centre and pull it outwards (diagram 1).
4. Remove the battery cover.
5. Remove the batteries (if installed) and align the CF card so that the two lateral reference notches are facing you
and the connector is facing downwards.
6. Insert the card into its slot inside the battery well, directly underneath the battery position (diagram 2).
7. Slightly press the card until it locks in place.
8. Replace the batteries into the well, as described from step 3 onwards of par.4.2.b.
4.4 Optional Accessories
1)
“Compact Flash” Memory (CF):
This memory card allows you to load maps inside Alan MAP600; the available sizes
of the CF memory card are: 64MB, 128MB, 256MB, 512MB, 1GB etc.
2)
Car Mounting Bracket:
By this convenient mounting bracket, it is possible to keep the navigator
stable and accessible when used in a car. For a better GPS signal acquisition, we suggest to use it in
conjunction with an external antenna.
3)
Data Cable:
It is possible to connect MAP600 to a PC through two different cables:
a) Serial Cable (RS232): This accessory, provided with Alan
MAP600 as standard, is used to connect the Navigator to the
serial output of the PC.
b) USB Cable (RS232): This optional accessory is used to connect
Alan MAP600 to the USB output of the PC (please note that in this
case the data transmission speed is the same of the serial port).
4)
External Antenna
: It is used to improve the satellite reception during mobile use inside vehicles. The darkened
windscreen may negatively influence the reception. In this case, the problem can be solved using an active antenna.
Insert the MCX male connector of the active antenna into the MAP600 external antenna socket and position the antenna
over the vehicle roof, on the sun visor, or in a place directly exposed to the sky.
5)
DC Car Adapter
(suitable for cigarette-lighter socket): When Alan
MAP600 is used on vehicles, it is possible to connect the GPS to the
cigarette-lighter socket (with a power supply from 12V to 26VDC) and
charge the batteries.
6)
Detailed Map:
The cartography of your own state as well as whole Europe is available on CD.
7)
Rechargeable Batteries:
You can find details about battery use and maintenance on par. 4.2
1
2
Содержание MAP600
Страница 1: ......


