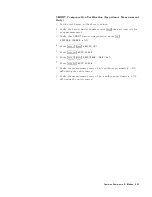
7.
V
erify
the
measurement
trace
of
j Zj
is
within
50
6250
m
during
the
entire
sweep
.
8.
V
erify
the
measurement
trace
of
z
is
within
65
mrad
(0.29
)
during
the
entire
sweep
.
Calibration
with
low-loss
capacitor
1.
Connect
50
termination
to
the
test
head.
2.
V
erify
that
all
of
OPEN/SHORT/LO
AD
xture
compensations
under
4
Cal
5
NNNNNNNNNNNNNNNNNNNNNNNNNNNNNNNNNNNNNNNNNNNN
FIXTURE
COMPEN
are
OFF
.
3.
Press
4
Meas
5
NNNNNNNNNNNNNNNNNNNNNNN
FIXTURE
NNNNNNNNNNNNNN
NONE
4.
Press
4
Chan
1
5
4
Meas
5
NNNNNNNNNNNNNNNNNNNNNNNNNNNNNNNNNNNNNNNNNNNNNNNNNNNNNNNNNNN
IMPEDANCE:
MAG
( j Z j )
.
5.
Press
4
Scale
Ref
5
NNNNNNNNNNNNNNNNNNNNNNNNNNNNNNNN
AUTO
SCALE
.
6.
V
erify
the
measurement
trace
of
j Zj
is
within
50
6250
m
during
the
entire
sweep
.
7.
Connect
low-loss
capacitor
to
the
test
head.
8.
Press
4
Chan
1
5
4
Meas
5
NNNNNNNNNNNNNNNNNNNNNNNNNNNNNNNNNNNNNN
D
FACTOR
(D)
.
9.
Press
4
Scale
Ref
5
NNNNNNNNNNNNNNNNNNNNNNNNNNNNNNNN
AUTO
SCALE
.
10.
V
erify
the
measurement
trace
of
D
is
within
65
m
above
100
MHz.
Note
The
0
S
termination
has
a
capacitance
of
82
fF
.
Therefore
,
if
you
measure
the
0
S
termination
after
calibration,
approximately
927
S
is
observed
at
1.8
GHz.
OPEN
Compensation
V
erication
(Impedance
Measurement
Only)
1.
Set
the
test
xture
to
the
open
condition.
2.
V
erify
the
xture
model
number
under
4
Meas
5
was
set
correctly
for
your
measurement.
3.
V
erify
that
OPEN
xture
compensation
under
4
Cal
5
NNNNNNNNNNNNNNNNNNNNNNNNNNNNNNNNNNNNNNNNNNNN
FIXTURE
COMPEN
is
ON.
4.
Press
4
Chan
1
5
4
Meas
5
NNNNNNNNNNNNNNNNNNNNNNNNNNNNNNNNNNN
CONDUCT
(G)
.
5.
Press
4
Scale
Ref
5
NNNNNNNNNNNNNNNNNNNNNNNNNNNNNNNN
AUTO
SCALE
.
6.
Press
4
Chan
2
5
4
Meas
5
NNNNNNNNNNNNNNNNNNNNNNNNNNNNNNNNNNNNNNNNNNNNNNNNNNNNNNNNNNN
CAPACITNCE:
PRL(Cp)
.
7.
Press
4
Scale
Ref
5
NNNNNNNNNNNNNNNNNNNNNNNNNNNNNNNN
AUTO
SCALE
.
8.
V
erify
the
measurement
trace
of
G
is
within
approximately
650
S
during
the
entire
sweep
.
9.
V
erify
the
measurement
trace
of
Cp
is
within
approximately
6200
fF
during
the
entire
sweep
.
6-24
Features
Common
to
All
Modes
Содержание 4291B
Страница 20: ......
Страница 24: ...Figure 2 1 Contents 2 4 Installation and Set Up Guide ...
Страница 26: ...Figure 2 2 Agilent Part Numbers of Power Cables 2 6 Installation and Set Up Guide ...
Страница 34: ...Figure 2 7 Connecting a Keyboard 2 14 Installation and Set Up Guide ...
Страница 60: ......
Страница 104: ......
Страница 130: ......
Страница 152: ......
Страница 158: ......

