P
erforming
User
Dened
Fixture
Compensation
USER
DEFINED
xture
compensation
reduces
the
error
caused
by
the
interpolation
used
in
a
FIXED
xture
compensation.
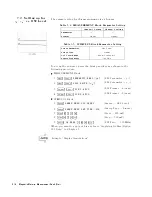
1.
Set
the
analyzer
to
your
required
setting.
2.
Press
4
CAL
5
NNNNNNNNNNNNNNNNNNNNNNNNNNNNNNNNNNNNNNNNNNNN
FIXTURE
COMPEN
.
3.
Press
NNNNNNNNNNNNNNNNNNNNNNNNNNNNNNNNNNN
COMPEN
MENU
.
4.
T
oggle
NNNNNNNNNNNNNNNNNNNNNNNNNNNNNNNNNNNNNNNNNNNNNNNNNNNNNNNNNNN
COMP
POINTS
[FIXED]
to
NNNNNNNNNNNNNNNNNNNN
[USER]
.
5.
P
erform
the
required
xture
compensation
using
the
FIXED
compensation
procedure
described
in
the
applicable
Quick
Start
chapter
.
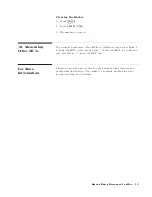
6.
Press
NNNNNNNNNNNNNNNNNNNNNNNNNNNNNNNNNNNNNN
DONE:
COMPEN
.
7.
V
erify
the
\Cmp "
notation
is
displayed
on
the
left
of
the
screen.
User
Dened
Fixture
Compensation
Description
After
a
FIXED
xture
compensation
(the
default
setting),
you
can
change
the
stimulus
(for
example
,
the
frequency
and
OSC
level)
as
long
as
you
measure
the
same
DUT
or
a
DUT
of
the
same
size
.
The
analyzer
performs
the
compensation
measurements
on
points
xed
across
the
full
sweep
range
.
The
eective
value
for
the
points
between
the
measured
points
is
calculated
using
the
interpolation
method.
On
the
other
hand,
after
a
USER
DEFINED
xture
compensation,
you
can
measure
more
accurately
.
The
analyzer
performs
the
compensation
measurements
on
the
same
points
as
your
current
stimulus
setting.
Therefore
,
the
error
caused
by
interpolation
is
reduced.
In
the
USER
DEFINED
xture
compensation,
if
you
change
the
stimulus
,
you
should
compensate
again.
Otherwise
,
the
analyzer
may
not
measure
correctly
.
Note
Y
ou
cannot
select
FIXED
POINT
Compensation,
when
you
have
done
User
Dined
calibration.
P
erforming
A
veraging
The
averaging
function
reduces
the
noise
.
There
are
two
averaging
functions
,
one
is
point
averaging
and
the
other
is
sweep
averaging.
P
erforming
P
oint
A
veraging
1.
Press
4
Bw/Avg
5
NNNNNNNNNNNNNNNNNNNNNNNNNNNNNNNNNNNNNNNNNNNNNNNNNN
POINT
AVG
FACTOR
.
2.
Enter
the
number
of
times
to
average
.
Then
press
4
x1
5 .
3.
T
oggle
NNNNNNNNNNNNNNNNNNNNNNNNNNNNNNNNNNNNNNNNNNNNNNNNNN
POINT
AVG
on
OFF
to
NNNNNNNNNNNNNNNNNNNN
ON
off
.
Features
Common
to
All
Modes
6-3
Содержание 4291B
Страница 20: ......
Страница 24: ...Figure 2 1 Contents 2 4 Installation and Set Up Guide ...
Страница 26: ...Figure 2 2 Agilent Part Numbers of Power Cables 2 6 Installation and Set Up Guide ...
Страница 34: ...Figure 2 7 Connecting a Keyboard 2 14 Installation and Set Up Guide ...
Страница 60: ......
Страница 104: ......
Страница 130: ......
Страница 152: ......
Страница 158: ......


