


583
ADOBE PHOTOSHOP CS2
User Guide
Note:
To distribute layer-based slices, distribute the contents of the layers.
1
Select three or more user slices you want to distribute.
2
Do one of the following:
•
Choose the Slice Select tool, and select a distribution option in the options bar.
A
B
C
D
E
F
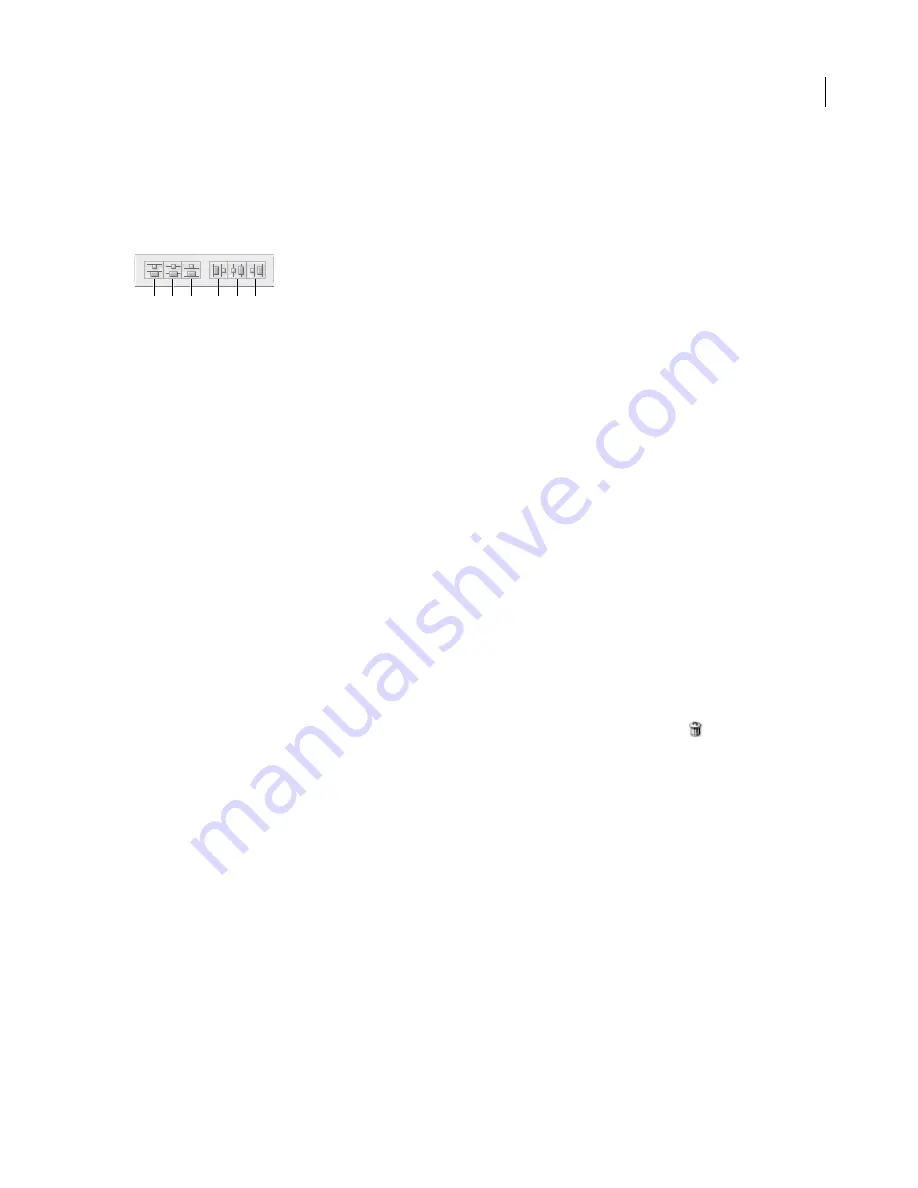
Distribute options
A.
Top
B.
Vertical Centers
C.
Bottom
D.
Left
E.
Horizontal Centers
F.
Right
•
Choose Edit > Distribute Slices, and choose a command from the submenu.
See also
“To align objects on different layers” on page 403
To delete a slice
When you delete a user slice or layer-based slice, auto slices are regenerated to fill the document area.
Deleting a layer-based slice does not delete the associated layer; however, deleting the layer associated with a layer
based slice does delete the layer-based slice.
Note:
You cannot delete auto slices. If you delete all user slices and layer-based slices in an image, one auto slice layer
remains.
1
Select one or more slices.
2
Do one of the following:
•
Choose the Slice or Slice Select tool and press the Backspace key or the Delete key.
•
(ImageReady) Choose Slices > Delete Slices, or choose Delete Slices from the Slice palette menu.
•
(ImageReady) Choose Delete Slice from the Web Content palette menu or click the Delete icon
in the Web
Content palette.
3
To delete all user slices and layer-based slices, do one of the following:
•
(Photoshop) Choose View > Clear Slices.
•
(ImageReady) Choose Slices > Delete All.
To lock all slices
Locking slices prevents you from resizing, moving, or otherwise changing them accidentally.
❖
Choose View > Lock Slice.
To optimize a slice
You can optimize image slices using the Save For Web dialog box (Photoshop) or the Optimize palette (ImageReady).
Содержание PHOTOSHOP CS2
Страница 1: ...Chapter 1 Copyright User Guide ...


