


475
ADOBE PHOTOSHOP CS2
User Guide
D
G
H
E
F
A B
C
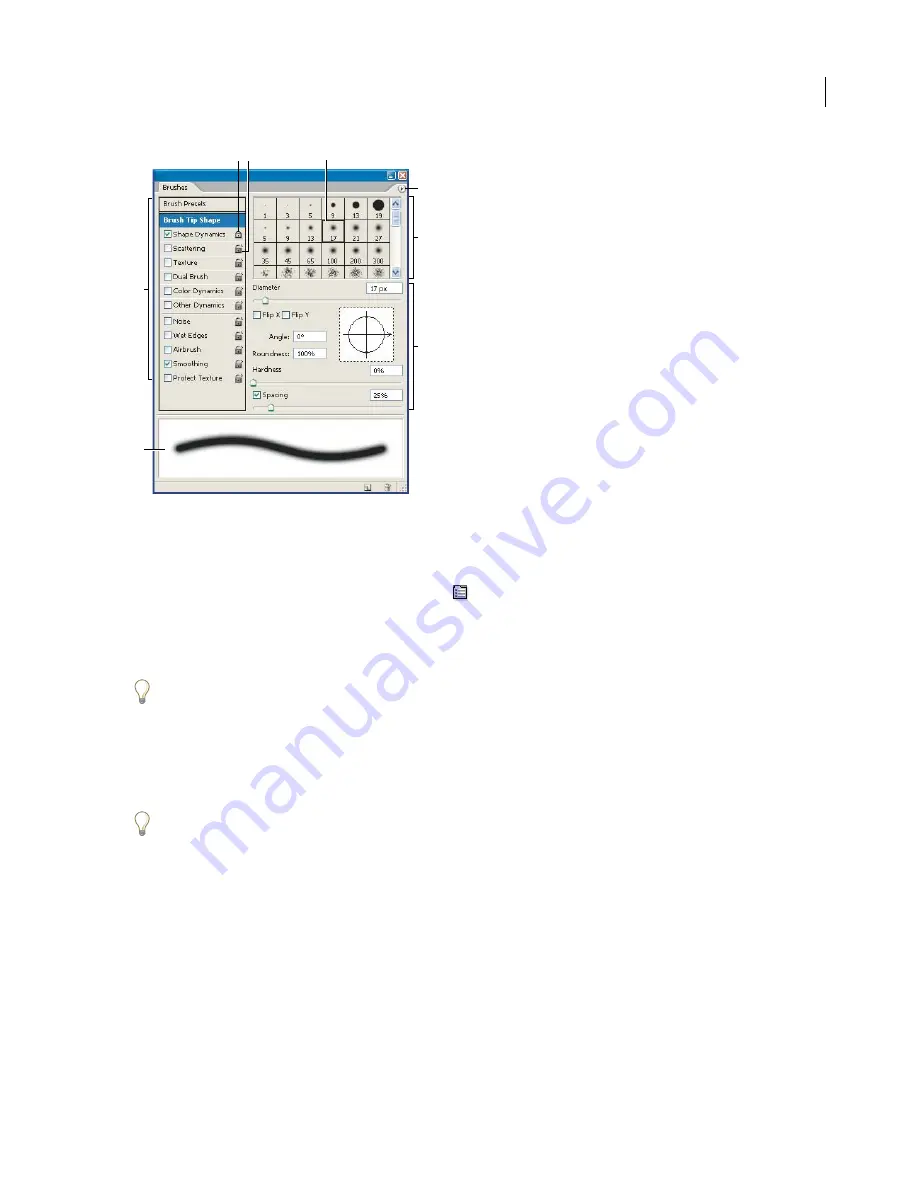
Brushes palette with Brush Tip Shape options displayed
A.
Locked
B.
Unlocked
C.
Selected brush tip
D.
Brush settings
E.
Brush stroke preview
F.
pop-up menu
G.
Brush tip shapes
(available when Brush Tip Shape option is selected)
H.
Brush options
To display the Brushes palette and brush options
1
Choose Window > Brushes, or click the palette button
on the right side of the options bar if you have a painting
tool, erasing tool, toning tool, or focus tool selected.
2
Select an item name on the left side of the palette. The available options for the selected item appear on the right
side of the palette.
Click the check box to the left of the item name to enable or disable the item without viewing its options.
To create a custom brush from an image
1
Use any selection tool to select a part of an image to use as a custom brush. Feather should be set to 0 pixels if you
want to create a brush with a sharp edge. The brush shape can be up to 2500 pixels by 2500 pixels in size.
If you want to define a brush with soft edges, select pixels with gray values. (Colored brush shapes appear as gray
values.)
2
Choose Edit > Define Brush Preset.
3
Name the brush, and click OK.
To create a brush and set painting options
1
Open the Brushes palette by clicking the brushes palette button in the options bar. Make sure the Brush tool is
selected to see the button.
2
In the Brushes palette, choose an existing brush preset to modify or select a brush shape from the Brush Tip Shape
panel of the Brushes palette. You can also create a new brush tip from an image.
Содержание PHOTOSHOP CS2
Страница 1: ...Chapter 1 Copyright User Guide ...


