212
Appendix B
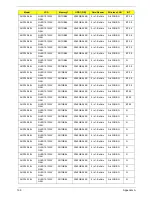
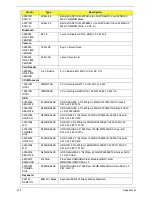
Windows XP Environment Test
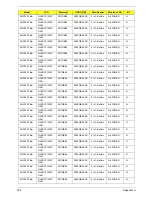
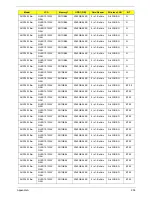
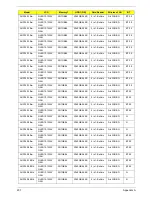
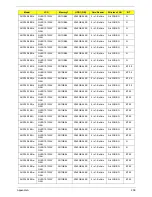
Vendor
Type
Description
3G Card
9999995
ONE TIME
VENDER
GTM380E
3G GTM380E
9999995
ONE TIME
VENDER
UNDP-1
3G UNDP-1
9999995
ONE TIME
VENDER
GTM380E
3G GTM380E
10000981
MISC
GTM382E
Option 3G GTM382EL
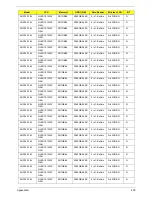
9999995
ONE TIME
VENDER
GTM380E
3G GTM380E
9999995
ONE TIME
VENDER
GTM380E
3G GTM380E
10000981
MISC
GTM382E
Option 3G GTM382EL
10000981
MISC
GTM382E
Option 3G GTM382EL
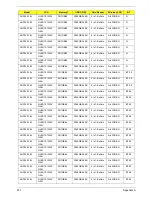
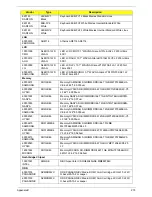
Adapter
10001081
DELTA
30W
Adapter DELTA 30W 19V 1.7x5.5x11 Black ADP-30JH BA LF
60003544
LITE-ON
OPT
30W
Adapter LITE-ON 30W 19V 1.7x5.5x11 Black PA-1300-04AC LF
60002015
HIPRO
30W
Adapter HIPRO 30W 19V 1.7x5.5x11 Black HP-A0301R3 B1LF LF
Audio Codec
9999995
ONE TIME
VENDER
ALC268
ALC268
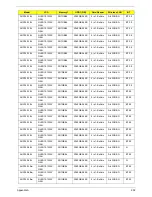
9999995
ONE TIME
VENDER
ALC268
ALC268
10001028
QUANTA
ALC272X
Realtek Audio Codec ALC272X
9999995
ONE TIME
VENDER
ALC268
ALC268
Battery
60001921
SANYO
3CELL2.2
Battery SANYO UM-2008A Li-Ion 3S1P SANYO 3 cell 2200mAh
Main COMMON Macles
60001921
SANYO
3CELL2.2
Battery SANYO UM-2008AW Li-Ion 3S1P SANYO 3 cell 2200mAh
Main COMMON Macles / White
60001535
PANASONIC
3CELL2.2
Battery PANASONIC UM-2008A Li-Ion 3S1P PANASONIC 3 cell
2200mAh Main COMMON Macles
Содержание Aspire One AOD150
Страница 6: ...VI ...
Страница 10: ...X Table of Contents ...
Страница 28: ...18 Chapter 1 ...
Страница 42: ...32 Chapter 2 5 Flash is complete when the message Flash programming complete displays ...
Страница 55: ...Chapter 3 45 4 Lift the Memory cover up to remove 5 Lift the WLAN cover up to remove ...
Страница 67: ...Chapter 3 57 7 Lift the Upper Cover clear of the computer ...
Страница 78: ...68 Chapter 3 4 Lift the USB Board clear of the computer rear edge first ...
Страница 80: ...70 Chapter 3 4 Turn the Bluetooth Module over and disconnect the Bluetooth cable ...
Страница 83: ...Chapter 3 73 9 Turn the Mainboard over and disconnect the Power Cable ...
Страница 85: ...Chapter 3 75 5 Remove the Speaker Module from the Lower Cover ...
Страница 106: ...96 Chapter 3 3 Press down around the edges of the bezel to secure it in place 4 Replace the four screws and screw caps ...
Страница 110: ...100 Chapter 3 4 Secure the Speaker Module cable in place with the adhesive strips ...
Страница 116: ...106 Chapter 3 8 The Lower Cover appears as follows when all the LCD cables are correctly placed ...
Страница 220: ...Appendix A 210 ...
Страница 228: ...218 Appendix C ...


