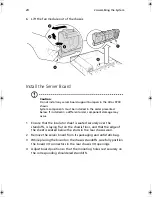


2 Assembling the System
38
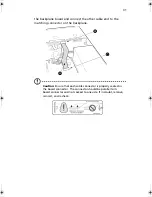
Caution
: To allow proper airflow and server cooling, all drive bays
must contain either a carrier with a hard drive installed or a carrier
with an air baffle installed.
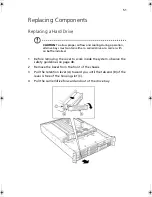
1
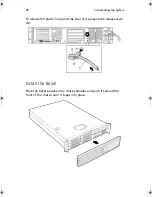
If present, remove the front bezel.
2
If the drive carrier is installed in the drive bay, remove it.
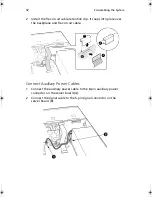
3
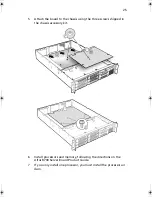
Remove the air baffle (A) from the drive carrier by removing the
four screws (B) from the slide track (C).
4
Store the air baffle for future reinstallation in the event you must
operate your server without a drive in one of the bays.
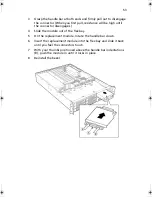
5
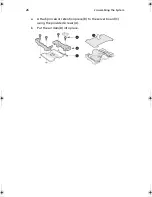
Remove the hard drive from its wrapper and place it on an anti-
static surface.
6
Set any jumpers and/or switches on the drive according to the
drive manufacturer’s instructions.
7
With the drive circuit-side-down (A), position the connector end
(E) so that it is facing the back of the carrier (B).
AR700-e.book Page 38 Tuesday, September 10, 2002 2:31 PM
Содержание Altos R700 Series
Страница 1: ...Altos R700 Chassis Subassembly Product guide...
Страница 9: ...1 Chassis Description...
Страница 22: ...1 Chassis Description 14...
Страница 23: ...2 Assembling the System...
Страница 51: ...3 Installing the System in a Rack...
Страница 54: ...3 Installing the System in a Rack 46...
Страница 55: ...4 Working Inside Your Server...
Страница 75: ...Appendix A Equipment Log and Worksheets...
Страница 77: ...69 DAT TApe Drive Item Manufacturer Name and Model Name Serial Number Date Installed...


