


2 Assembling the System
24
6
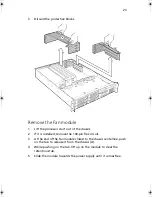
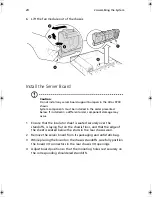
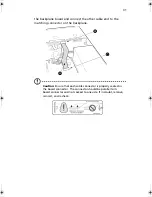
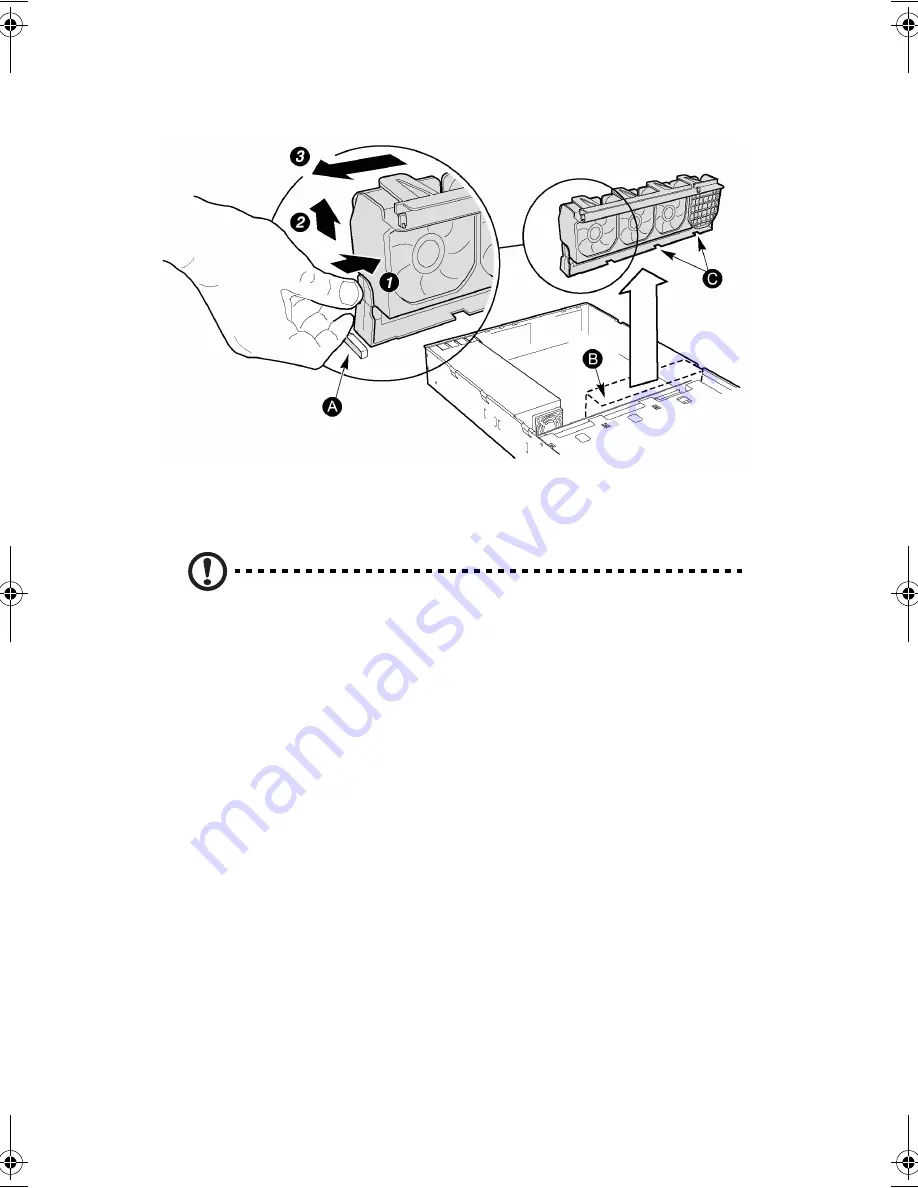
Lift the fan module out of the chassis.
Install the Server Board
Caution
:
Do not install any server board support bumpers in the Altos R700
chassis.
System components must be installed in the order presented
below. If installed in a different order, component damage may
occur.
1
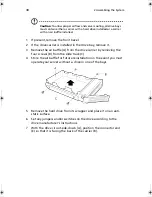
Ensure that the insulator sheet is seated securely over the
standoffs, is laying flat on the chassis floor, and that the edge of
the sheet is seated below the studs in the rear chassis wall.
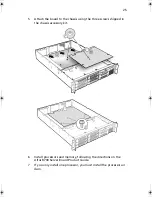
2
Remove the server board from its packaging and antistatic bag.
3
While placing the board on the chassis standoffs, carefully position
the board I/O connectors in the rear chassis I/O openings.
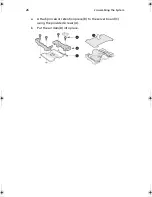
4
Adjust board position so that the mounting holes rest securely on
the corresponding shouldered standoffs.
AR700-e.book Page 24 Tuesday, September 10, 2002 2:31 PM
Содержание Altos R700 Series
Страница 1: ...Altos R700 Chassis Subassembly Product guide...
Страница 9: ...1 Chassis Description...
Страница 22: ...1 Chassis Description 14...
Страница 23: ...2 Assembling the System...
Страница 51: ...3 Installing the System in a Rack...
Страница 54: ...3 Installing the System in a Rack 46...
Страница 55: ...4 Working Inside Your Server...
Страница 75: ...Appendix A Equipment Log and Worksheets...
Страница 77: ...69 DAT TApe Drive Item Manufacturer Name and Model Name Serial Number Date Installed...


