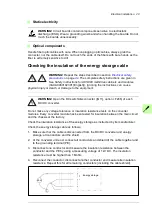


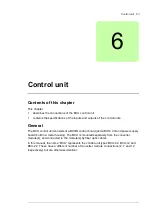
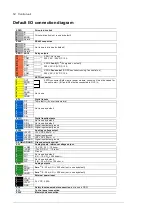

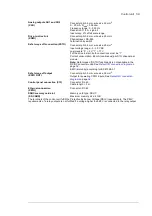


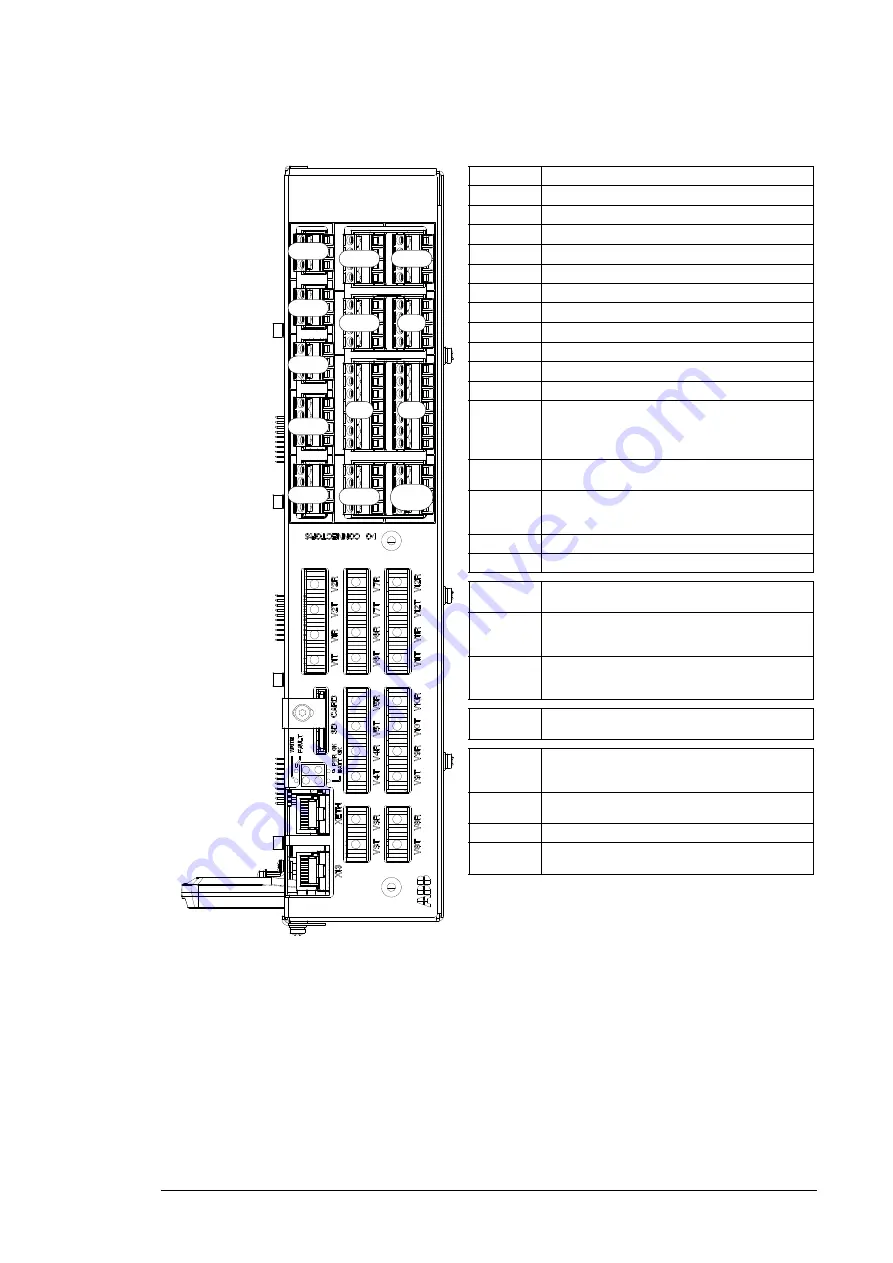
Control unit 57
Description
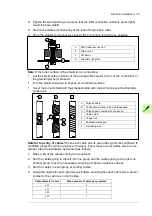
XAI
Analog inputs
XAO
Analog outputs
XDI
Digital inputs, Digital input interlock (DIIL)
XDIO
Digital input/outputs
XD2D
Drive-to-drive link
XD24
+24 V output (for digital inputs)
XETH
Ethernet port (eg. for PC communication)
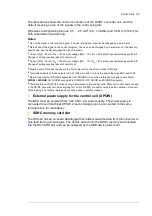
XPOW
External power input
XRO1
Relay output RO1
XRO2
Relay output RO2
XRO3
Relay output RO3
XSTO
Safe torque off connection (input signals). Safe
torque off functionality is not available in the
DC/DC converter units. See
on page
XSTO OUT Safe torque off connection (output for powering
XSTO inputs)
X12
(On the opposite side) Connection for FSO-xx
safety functions module (optional, not in use in
DC/DC converter units).
X13
Control panel connection
X485
Not in use
V1T/V1R,
V2T/V2R
Fiber optic connection to converter modules 1
and 2 (VxT = transmitter, VxR = receiver)
V3T/V3R
…
V7T/V7R
Fiber optic connection to converter modules 3…7
(BCU-12/22 only)
(VxT = transmitter, VxR = receiver)
V8T/V8R
…
V12T/V12R
Fiber optic connection to converter modules
8…12 (BCU-22 only)
(VxT = transmitter, VxR = receiver)
SD CARD
Data logger memory (SD) for converter module
communication
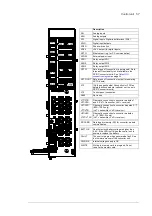
BATT OK
Real-time clock battery voltage is higher than
2.8 V. If the LED is off when the control unit is
powered, replace the battery.
FAULT
The control program has generated a fault. See
the firmware manual of the converter unit.
PWR OK
Internal voltage supply is OK
WRITE
Writing to memory card in progress. Do not
remove the memory card.
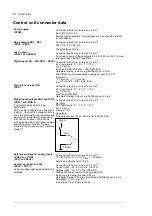
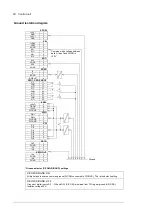
XDI
XSTO
X485
XD2D
XRO1
XRO2
XRO3
XDIO
XD24
XSTO
OUT
XAI
XAO
XPOW
Содержание ACS880-1607
Страница 1: ...ABB industrial drives Hardware manual ACS880 1607 DC DC converter units ...
Страница 4: ......
Страница 12: ...12 Introduction to the manual ...
Страница 34: ...34 Mechanical installation ...
Страница 40: ...40 Guidelines for planning electrical installation ...
Страница 52: ...52 Electrical installation ...
Страница 68: ...68 Start up ...
Страница 80: ...80 Maintenance 7 3 4 5 6 ...
Страница 82: ...82 Maintenance 3 4 5 6 7 8 9 9 ...
Страница 85: ...Maintenance 85 12 Install and tighten the two screws 10 11 12 ...
Страница 92: ...92 Maintenance 3 6 4 5 4 7a 7b 7b ...
Страница 93: ...Maintenance 93 9 8 8 10 11 ...
Страница 96: ...96 Maintenance 4 8 6 7 5 3 ...
Страница 97: ...Maintenance 97 9 ...
Страница 118: ...118 Dimensions Dimension drawings Frame 1 R8i bottom cable entry ...
Страница 119: ...Dimensions 119 Frame 1 R8i top cable entry ...
Страница 120: ...120 Dimensions Location and size of input terminals Frame 1 R8i bottom cable entry Frame 1 R8i top cable entry ...
Страница 122: ...www abb com drives www abb com drivespartners 3AXD50000023644 Rev B EN 2017 01 30 Contact us ...


