i.Profiler
plus
Instructions for use – Part 1
Version 1.5
Page 1: ...i Profiler plus Instructions for use Part 1 Version 1 5 ...
Page 2: ...mark or registered trademark of THIRD PARTY LEGAL ENTITY TRADEMARK OWNER All other trademarks software and hardware names used in this Instructions for use may be subject to trademark or copyright protection and are the property of their respective owners This document is protected by copyright If not expressly approved in writing the transmission duplication or other use or disclosure of their co...
Page 3: ...et up 23 Electrical installation 24 Touch screen calibration 25 Connecting an external monitor 25 Connecting the i Profiler plus to an existing network with DHCP 26 Connecting the i Profiler plus to an existing local network 27 Printer installation for the i Profiler plus 28 Connect printer directly to the i Profiler plus peer to peer 29 Connect printer via an existing network 30 Configuring a net...
Page 4: ... 46 Other Warnings due to hardware or software failure 46 Safety Warnings regarding unwanted behavior 46 Measurement problems 47 Exchanging fuses 49 Maintenance 50 Exchanging the printer paper role 50 Care and cleaning 50 Technical data 52 Electromagnetic compatibility 54 Environment of intended uses Home Healthcare Environment 55 Abbreviations Glossary 60 Figures 61 List of keywords 62 ...
Page 5: ...1005 825 while the Instruction for use Part 2 describes the Software of the device Correct handling of the system is essential to ensuring safe and successful operation Before commissioning and using the i Profiler plus please read both Instructions for use carefully and familiarize yourself thoroughly with their contents Both Instructions for use and other documentation delivered with the i Profi...
Page 6: ...gnated in these Instructions for use Part 1 and on the device Information tips and notifications for better understanding process instructions during device operation WARNING Indicates a hazardous situation which could result in death or serious injury if appropriate safety measures are not taken CAUTION Indicates a hazardous situation which could result in slight injury if appropriate safety meas...
Page 7: ... rest Printer paper roll Stylus for use on the touch screen Test eye device Dust protection cover A current complete list of accessories is available from Carl Zeiss Vision GmbH and authorized service partners WARNING GENERAL HAZARD Only accessories and software may be used that conform to the requirements described in this instruction manual ...
Page 8: ...ufacturer The product is RoHS compliant under Directive 2011 65 EU Intended use The i Profiler plus is a diagnostic device for the measurement and analysis of imaging errors in the human eye Normal Use Indication The i Profiler plus can be used on humans to measure and analyse the imaging errors of the human eyes The patient shall be awake and collaborative during measurement as he she shall be ab...
Page 9: ...entice The following user profiles must be considered User profile I Measurements with the i Profiler plus The user should have experience in the following areas Procedures and handling of customers patients in the healthcare sector Standard anamnesis and screening procedures in ophthalmology and or optometry Standard patient instructions during a measuring procedure on the human eye for optimizat...
Page 10: ...lus the following skills Handling of standard test records and measurement results in optics optometry such as refraction values sphere cylinder axis higher order aberrations Zernike polynomials ophthalmometer readings corneal radii and corneal topography data axial local and height representation etc Evaluation of the quality of readings with the aid of evaluation criteria for measurement quality...
Page 11: ...n resulting diagnoses prescription of visual aids or therapeutic treatment etc Corneal pathologies associated with corneal topography The applied therapy method in the interpretation of readings for therapy planning and implementation Consequences of incorrect or inaccurate readings and careful validation of readings quality evaluation multiple readings test of consistency with other diagnostic re...
Page 12: ...ase contact your local dealer or the manufacturer or their legal successor Upon resale of the product or its components the seller must notify the buyer that the product must be disposed of in accordance with the currently applicable national regulations CAUTION ENVIRONMENTAL CONTAMINATION HAZARD The packaging material should be stored in case of relocation or repair If you want to dispose of the ...
Page 13: ...EN 20_070_0009I v1 5 Country specific information and exterior labeling 11 Exterior labeling 1 i Profiler plus type plate 2 Notification sign Date of manufacture Fig 1 Type plate on i Profiler plus ...
Page 14: ...ed part EU conformity slip with ID number for the notified body Manufacturer Fuse Date of manufacture Alternating current Catalog number part number Serial number Disposal notification for the EU TÜV Rheinland permit for the USA and Canada Medical Device Unique device identifier Data Matrix Code according to GS1 2 Notification sign Observe the Instructions for use ...
Page 15: ...ype B applied part EU conformity slip with ID number for the notified body Manufacturer Fuse Alternating current Catalog number part number Serial number Disposal notification for the EU TÜV Rheinland permit for the USA and Canada 2 Date of manufacture sign Date of manufacture Date of manufacture YYYY MM Notification sign Observe the Instructions for use ...
Page 16: ...r plus offers two basic measurement options Precision wavefront measurement with Shack Hartmann technology Placido disc based corneal topography with central and peripheral keratometry Wavefront measurement 1 Eye 2 Beam splitter 3 Microlens array 4 Camera Fig 2 Measurement principle for the Shack Hartmann sensor ...
Page 17: ...lens array and video camera CCD camera Each microlens in the array generates a point of light on the chip of the camera creating a pattern of light points Fig 3 The positions of the points of light are evaluated using software algorithms An eye focusing on a distant point without aberrations optically perfect creates an even wavefront which is represented as a completely regular grid of light poin...
Page 18: ...lities higher order aberrations result in characteristic irregular structures in the wavefront map A wavefront measurement is only a snapshot of the optical condition of the customer s eye It is not a constant picture of the eye and depends on accommodations Topography measurement The topography of the cornea is measured using a process involving a Placido disc The diagram Fig 4 provides a simplif...
Page 19: ...adius of curvature of the cornea the narrower the rings are and the closer they move together The flatter the cornea is the wider the rings are and the farther they are apart If the shape of the corneal surface differs from the shape of a spherical surface the shape of the rings also changes B Fig 5 Software algorithms evaluate the shape and position of the rings to obtain more detailed informatio...
Page 20: ...ns may only be made by professional technician trained by the manufacturer The device may only be serviced and repaired by the manufacturer The device may not be repaired during use Unauthorized modifications will void the warranty Modifications to the product or failing to observe the manufacturer s instructions could significantly shorten the expected service life and greatly increase the hazard...
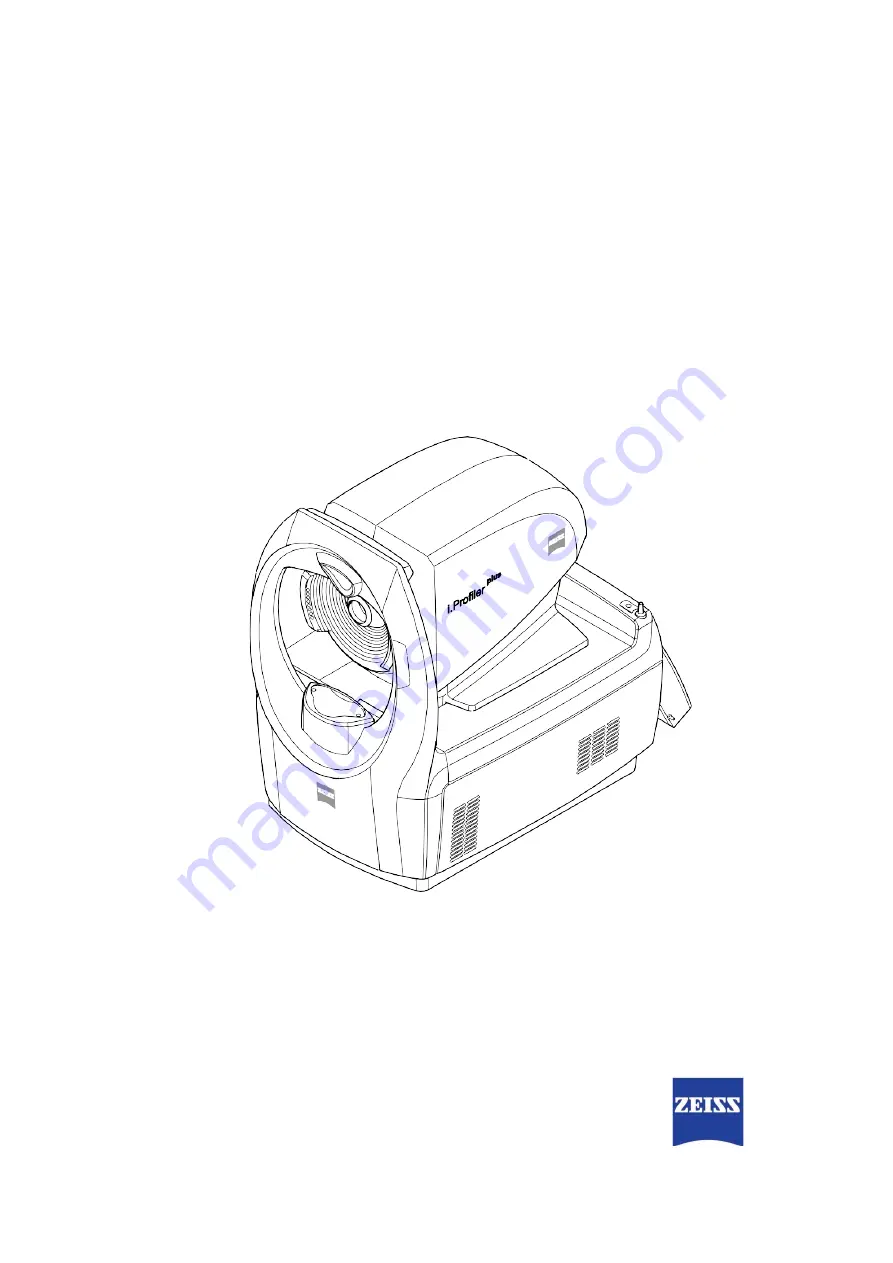
Page 21: ...2 LCD touch screen swiveling 3 On off switch Standby 4 Stylus Fig 6 i Profiler plus operating side view Fig 6 and Fig 7 show the i Profiler plus from the operating and customer sides The asymmetrical arrangement of the measuring heads is a functional feature and does not indicate a defect ...
Page 22: ...0 Device description 1 Base device with computer and electronics 2 Motorized chin rest 3 Double sided dual button control for the chin rest 4 Measurement optic aperture 5 Forehead rest Fig 7 i Profiler plus customer sideview ...
Page 23: ...k with a protective conductor Ensure that the plug on the power cable is suitable and permitted for the local connection If the included power cable is replaced at least the following specifications must be complied with Maximum protective conductor resistance 0 2 Ohm Local permit for the power cable to connect to medical devices Device side plug C19 according to IEC 60320 Diameter at least 0 75 m...
Page 24: ... use the Windows on screen keyboard input aid for this purpose Alternatively you can connect an external keyboard with USB connection to the device CAUTION HAZARD DUE TO FALLING PARTS When using a suitable table ensure that the selected combination of table and device is stable up to a tilt of 10 In addition the table must be designed to handle 4x the mass of the set up device configuration If mob...
Page 25: ...ndalone i Profiler plus We recommend not setting the i Profiler plus on a refraction unit with fixed headrests Installing it on a refraction unit without fixed headrests is possible with an appropriate minimum table size Set up the device on a horizontal surface Connect the device to the power network using the power cable CAUTION PROPERTY DAMAGE To move the device always use two persons to lift t...
Page 26: ...Installed printer paper printing 9 USB port Fig 9 Connector panel on the i Profiler plus WARNING DANGER OF ELECTRICAL SHOCK When connecting external devices to the interfaces of the i Profiler plus the operator must comply with the safety requirements of IEC 60601 1 2005 Refer to page 37 Device Operation When exchanging data via external USB devices with a separate power supply a USB isolator min ...
Page 27: ...interface 4 Fig 9 First switch on the monitor and then the i Profiler plus After starting the i Profiler plus use the Close application button in the Power down window to switch to the Windows desktop Administrator rights required Click the pictogram on the right side of the taskbar Select Graphics Properties from the menu bar The Intel Graphics Media window opens Under Multiple Display on the Dis...
Page 28: ...h DHCP Connect the i Profiler plus to the practice network LAN using a network cable After starting the i Profiler plus use the Close application button in the Power down window to switch to the Windows desktop Administrator rights required Double click on the Network Configurator pictogram on the desktop The Network Configuration Tool window opens select the Ethernet connection you are using in t...
Page 29: ...ction you are using in the Network Adapter field The left connection is designated with 00000000 and the right with 00000001 Enter the new IP address in the IP address field The first three number blocks must match those of the network The last number block is freely selectable however the numbers may not already be assigned Change the subnet mask in the Subnet Mask field Press the Change IP butto...
Page 30: ...eady The process for configuring the printer must conform to the instructions in your printer s or printer server s manual CAUTION HAZARD DUE TO INCORRECT DATA Only a postscript capable network printer may be used WARNING DANGER OF ELECTRICAL SHOCK The printer must be set up out of the customer s range 1 5 m from the customer s seat on the device and connected to a separate outlet The operator may...
Page 31: ...nce window see Software description for the i Profiler plus select the option Printer configuration administrator rights required The Message window opens Confirm with Yes The Printer Setup dialog to configure the printer appears Press the Add New Printer button The Printer Configuration dialog appears Follow the instructions in the dialog Enter the IP address set on the network printer or printer...
Page 32: ...n Printer configuration administrator rights required The Message window opens Confirm with Yes The dialog to configure the printer appears Press the Add New Printer button The Printer Configuration dialog appears Follow the instructions in the dialog Enter the IP address of the printer Press the Test button A green check will appear if the connection is successful Confirm the entries by pressing ...
Page 33: ...h connection options are described in this manual After the NAS device has been installed and configured for use with the i Profiler plus it will function as a network server and be used primarily for archiving purposes The instructions for using a network server therefore also apply to the NAS device WARNING DANGER OF ELECTRICAL SHOCK If the NAS device is not supplied with power via an isolating ...
Page 34: ...m in length so that the NAS device can be set up outside of the reach of the customer see the safety information above Recommendations for the NAS device Memory capacity This should be at least as large as the memory capacity of the i Profiler plus harddrive Data backup To ensure permanent redundancy in data backups we recommend using a data backup software of your choice with the NAS device You c...
Page 35: ...r plus Often a light on the front of the NAS device changes color to indicate that initialization is complete Further information is provided in the manufacturer s operating instructions Installing the Carl Zeiss Meditec CZM NAS device Switch on the i Profiler plus After starting the device click the Close application button in the Power down window and switch to the Microsoft Windows desktop Admi...
Page 36: ...down window and switch to the Windows desktop Administrator rights required It is possible that an indicator of the LAN connection may be displayed on the taskbar at the bottom right if there is a connection to a NAS device Ignore this notification temporarily Open Windows Explorer and select the menu option Tools in themenu bar Select the Map Network Drive The Map Network Drive window appears Sel...
Page 37: ...ible that an indicator of the LAN connection may be displayed on the taskbar at the bottom right if there is a connection to a NAS device Ignore this notification temporarily Open Windows Explorer In the Address field enter the characters and then the IP address or name of the NAS device Confirm by pressing Enter The released directories on the NAS device are displayed Select an existing folder or...
Page 38: ...n The ventilation slots on the housing may not be covered o r blocked Functional testing of measurement function using the test eye de vice WARNING DANGER OF ELECTRICAL SHOCK Please ensure that the following requirements are fulfilled before each commissioning and that they continue to be fulfilled during ongoing operations The device is connected with the power cable intended for the device If an...
Page 39: ...he i Profiler plus Software description Power switch ON I OFF 0 6 Fig 9 lights up blue when the device is ready for operation CAUTION HAZARD DUE TO MEASURING ERRORS Calibration must be reviewed using the test eye device each day before beginning measurements with customers A printout of measured values may be created and filed for documentation purposes If measured values on the test eye device ar...
Page 40: ...pacing recommended in chapter Electromagnetic compatibility page 53 et seqq The user may not rely only on measurement results from the i Profiler plus but must instead also rely on their own professional expertise and judgment when making decisions on adjusting or prescribing visual aids or treatment procedures etc The user should compare the measurement results of the i Profiler plus with other d...
Page 41: ... position self in a sitting position in front of the medical device Refractive medium of the eye not sufficiently transparent for wavefront refraction measurements e g cataract with lens opacity higher than degree NO1 according to LOCS III Lens Opacities Classification System III Disrupted specular reflection of the cornea for topography or wavefront measurements such as disruptions to the tear fi...
Page 42: ...ce geometry of the cornea and thus the optical properties of the eye Therefore during topography and wavefront measurements for soft lens wearers a waiting period of at least two weeks must be observed from when the lens is removed until the time of themeasurement If the customer wears hard lenses the waiting period from the time the lens is removed to the time of the measurement must be atleast t...
Page 43: ...n the balloon to switch off the accommodation If the customer does not see the balloon at first ask the customer to continue looking until the balloon appears Shortly before starting the measurement process ask the customer not to move during the measurement and to keep their eyes wide open Start the measurement in the Measurement window by pressing the Measure button The automatic measurement pro...
Page 44: ...work it to unplug the power plug from the mains power supply WARNING GENERAL HAZARD If one of the following incidents occurs immediately switch off the device using the power switch unplug the power cable from the mains power shut down the device and hang a clearly visible sign on it and inform Carl Zeiss Vision of the problem Electric shock Penetration by foreign materials Errors that cannot be c...
Page 45: ...f the main switch on the building installation until the blue light beside the Standby switch has gone out If you switch off the device using the power switch pull out the power plug or activate the main switch on the building installation during ongoing operation the program cannot be ended and the operating system cannot be properly shut down This may result in the loss of saved data and or defe...
Page 46: ...e Support and authorized service partners The device does not start up or the application does not launch Computer problem Switch off the device and switch it on again after one minute If the problem continues contact your local Service Support and authorized service partners The device unintentionally and abruptly shuts down Voltage interruptions E g mains failure power outage Restart the device ...
Page 47: ...oblem Switch off the device and switch it on again after one minute If the problem continues contact your local Service Support and authorized service partners The optical measuring head does not move correctly Poor motor initialization Optoswitch problem Controller problem Cable problem Switch off the device and switch it on again after one minute If the problem continues contact your local Servi...
Page 48: ... Troubleshooting Code No ID 001 002 003 004 005 006 007 008 009 010 011 012 013 014 015 016 017 018 019 020 037 038 MapPatientFailed 104 105 112 115 180 181 182 183 125 136 137 140 148 152 153 155 156 157 170 CalibrateShMotorError ShMotorError ToLongMeas 160 161 162 163 164 165 Warn_MotorZ1 Hardware or software malfunction of device Restart the application and try again If problem persists contact...
Page 49: ...is set too low Correct the chin rest height The customer s eye is off center in a right or left direction and cannot be centered using the touch screen error message appears The customer s head is offset to one side The customer s head is tilted Correct the position of the head on the chin rest Correct the angle of the head relative to the head support e g turn head or normal measurement mode The ...
Page 50: ...Increase the sensor sensitivity in small increments The device does not complete measurements at all The customer has a cataract Increase the sensor sensitivity in small increments Electrical problem Switch off the device and switch it on again after one minute If the problem continues contact your local Service Support and authorized service partners Measurement results are incorrect The illumina...
Page 51: ... plug It will only be possible to open the fuse compartment once the power plug has been unplugged Open the cover on the fuse compartment 3 Fig 10 Remove the red fuse carrier 2 Fig 10 with the two fuses 1 Fig 10 Replace the defective fuses and re insert the fuse carrier Close the cover on the fuse compartment Only use the fuses indicated in chapter Technical data page 51 WARNING DANGER OF ELECTRIC...
Page 52: ...ter paper CAUTION HAZARD DUE TO CROSS CONTAMINATION Clean contaminated parts with which the customer comes into contact during the examination chin rest forehead rest with a disinfecting agent permitted for this application These parts are resistant to wiping with Low category agents such as washing lyes quaternary ammonium compounds and Intermediate category agents such as alcohol Javel water iod...
Page 53: ...te that some cleaning and disinfecting agents may cause negative changes in plastic components Damage caused by such disinfecting measures are not covered by our warranty conditions The surfaces of the product have been tested to withstand frequent treatment with disinfecting and cleaning agents containing alcohol over the long term Please note that some cleaning and disinfecting agents may cause ...
Page 54: ...ainst penetration by water and foreign objects IP 20 Degree of protection against electric shock B Laser data at device output Laser class at device output 1 Wavelength 785 nm Maximum beam power 393 µW Laser data for the internal laser source Laser class 3R Wavelength 785 nm Maximum beam power 3 mW LED sources Photopic illumination Wavelength 525 µm Maximum beam power 39 µW Infrared illumination 2...
Page 55: ...rement ranges Wavefront Sphere effective range 20 dpt to 20 dpt 3 5 mm pupils Sphere effective range 15 dpt to 15 dpt 5 5 mm pupils Cylinder effective range 0 dpt to 8dpt Axis 0 to 180 Measurement surface 2 0 mm to 7 0 mm three zones Number of measurement points up to 1 500 Recording time 0 2s Methods Hartmann Shack Reference wavelength 1 555 nm according to ISO 24157 Corneal topography Number of ...
Page 56: ...rbances for the expected service life Replacement cables may only be obtained from Carl Zeiss Vision Use of accessories transducers of all types and cables not specified in this manual or sold by Carl Zeiss Vision as replacement parts may cause increased emissions or reduced immunity of the device CAUTION OBSERVE WHEN USING OTHER DEVICES With the exception of the device combinations described in t...
Page 57: ...ons are very low and are not likely to cause any interference in nearby electronic equipment RF emissions according to CISPR 11 Class B The device or system is suitable for use in all establishments including those in the home and those directly connected to the public low voltage network which also supplies buildings used for residential purposes The device has a power consumption of 200 W Emissi...
Page 58: ...t Surge voltage IEC 61000 4 5 1 kV line s to line s 2 kV line s to earth 1 kV line to line 2 kV line s to earth Mains power quality should be that of a typical commercial or hospital environment Voltage dips short interruptions and voltage variations on power supply input lines IEC 61000 4 11 0 UT 100 dip in UT for 0 5 cycle for 10 msec and 20 msec 70 for 500 msec 0 for 5 s 0 UT 100 dip in UT for ...
Page 59: ...ance calculated from the equation applicable to the frequency of the transmitter Recommended protection distance where P is the maximum output power rating of the transmitter in watts W according to the transmitter manufacturer and d is the recommended separation distance in metres m Field strengths from fixed RF transmitters as determined by an electromagnetic site survey should be less than the ...
Page 60: ...nded separation distance for transmitters in these frequency ranges c Field strengths from fixed transmitters such as base stations for radio cellular cordless telephones and land mobile radios amateur radio AM and FM radio broadcast and TV broadcast cannot be predicted theoretically with accuracy To assess the electromagnetic environment due to fixed RF transmitters an electromagnetic site survey...
Page 61: ...ansmitters with maximum output power rating not specified above the recommended separation distance d in meters m can be determined using the transmitter s equation where P is the transmitter s maximum output power rating in watts W according to the transmitter producer NOTE 1 At 80 MHz and 800 MHz the separation distance applies to the higher frequency range NOTE 2 The ISM industrial scientific a...
Page 62: ...an Union IEC International Electrotechnical Commission LAN Local Area Network Local network LOCS III Lens Opacities Classification System III Classification system for lens opacity NAS Network Attached Storage Network attached storage device RJ 45 Registered Jack Standardized plug connector for data lines USB Universal Serial Bus Standard interface for peripheral PC equipment UTP CAT Unshielded Tw...
Page 63: ...measurement device with a Placido disc A light beam starting at point P is reflected by the reflective convex surface of the cornea The virtual point P is depicted on the camera P via a lens 16 Fig 5 The image of the rings of the Placido disc on the camera for a normalcornea 17 Fig 6 i Profiler plus operating side view 19 Fig 7 i Profiler plus customer side view 20 Fig 8 Recessed grips on the bott...
Page 64: ...r Explanation 41 Customer Positioning 39 D Decommissioning 42 Device class 6 Device description 19 E Electromagnetic compatibility 53 F Figures 60 Functional description 14 Functional test 37 Fuses 48 K Keyboard 22 M Maintenance 44 49 Manufacturer s statement 6 N NAS device 31 Network attached storage device 31 ...
Page 65: ...erformance specification 15 Printer installation 28 Proper use 7 R Recessed grips 23 S Service life 18 Software description 38 Symbols 6 T Technical data 51 Topography measurement 16 Troubleshooting 44 W Warning labels 6 Wavefront measurement 15 ...
Page 66: ...Carl Zeiss Vision GmbH Turnstrasse 27 73430 Aalen Germany Tel 49 0 7361 598 5003 Fax 49 0 7361 591 475 EN 20_070_0009I v1 5 Mat No REF 2358 727 1005 825 Subject to technical changes ...