


CHASSIS
3-17
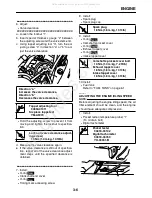
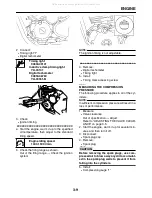
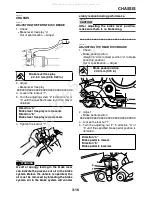
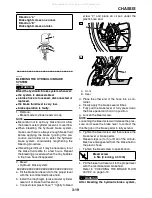
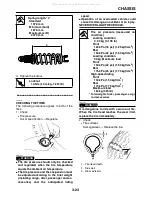
c. Tighten the locknut “1” to specification.
WARNING
EWA5UXB005
A soft or spongy feeling in the brake pedal
can indicate the presence of air in the brake
system. Before the vehicle is operated, the
air must be removed by bleeding the brake
system. Air in the brake system will consid-
erably reduce braking performance and
could result in loss of control and possibly
an accident. Therefore, check and, if neces-
sary, bleed the brake system.
CAUTION:
ECA13510
After adjusting the brake pedal position,
make sure there is no brake drag.
▲▲▲▲▲▲▲▲▲▲▲▲▲▲▲▲▲▲▲▲▲▲▲▲▲▲▲▲▲▲▲▲
3. Adjust:
●
Rear brake light switch
Refer to “ADJUSTING THE REAR BRAKE
LIGHT SWITCH” on page 3-20.
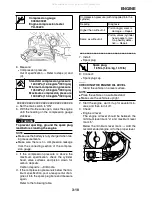
EAS21240
CHECKING THE BRAKE FLUID LEVEL
1. Stand the vehicle on a level surface.
NOTE:
●
Place the vehicle on a suitable stand.
●
Make sure the vehicle is upright.
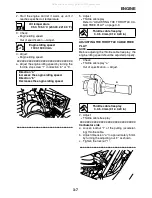
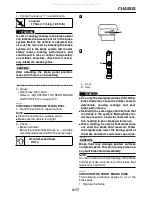
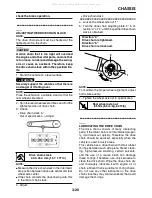
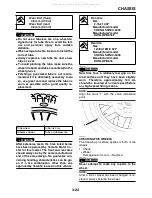
2. Check:
●
Brake fluid level
Below the minimum level mark “a”
→
Add the
recommended brake fluid to the proper level.
WARNING
EWA13090
●
Use only the designated brake fluid. Other
brake fluids may cause the rubber seals to
deteriorate, causing leakage and poor
brake performance.
●
Refill with the same type of brake fluid that
is already in the system. Mixing brake flu-
ids may result in a harmful chemical reac-
tion, leading to poor brake performance.
●
When refilling, be careful that water does
not enter the brake fluid reservoir. Water
will significantly lower the boiling point of
the brake fluid and could cause vapor lock.
CAUTION:
ECA13540
Brake fluid may damage painted surfaces
and plastic parts. Therefore, always clean up
any spilt brake fluid immediately.
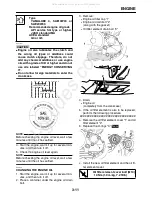
NOTE:
In order to ensure a correct reading of the brake
fluid level, make sure the top of the brake fluid
reservoir is horizontal.
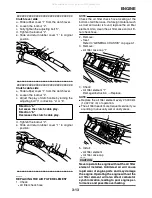
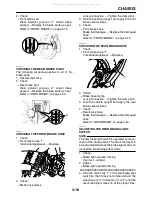
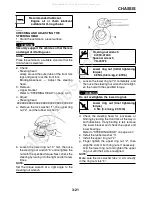
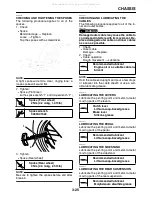
EAS21250
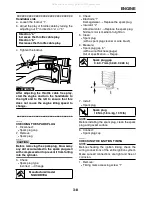
CHECKING THE FRONT BRAKE PADS
The following procedure applies to all of the
brake pads.
1. Operate the brake.
Locknut
17 Nm (1.7 m•kg, 12.5 ft•lb)
Recommended fluid
DOT 4
T
R
.
.
A. Front
B. Rear
a
A
a
B
All manuals and user guides at all-guides.com
Summary of Contents for XT250X 2008
Page 2: ...All manuals and user guides at all guides com...
Page 8: ...All manuals and user guides at all guides com...
Page 54: ...CABLE ROUTING 2 35 All manuals and user guides at all guides com...
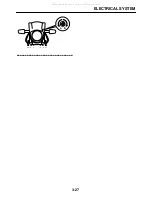
Page 82: ...ELECTRICAL SYSTEM 3 27 a b All manuals and user guides at all guides com...
Page 170: ...VALVES AND VALVE SPRINGS 5 24 All manuals and user guides at all guides com...
Page 224: ...AIR INDUCTION SYSTEM 6 13 All manuals and user guides at all guides com...
Page 239: ...CHARGING SYSTEM 7 14 All manuals and user guides at all guides com...
Page 243: ...LIGHTING SYSTEM 7 18 All manuals and user guides at all guides com...
Page 249: ...SIGNALING SYSTEM 7 24 All manuals and user guides at all guides com...
Page 253: ...CARBURETOR HEATING SYSTEM 7 28 All manuals and user guides at all guides com...
Page 279: ...All manuals and user guides at all guides com...