ENGINE
3-13
▼▼▼▼▼▼▼▼▼▼▼▼▼▼▼▼▼▼▼▼▼▼▼▼▼▼▼▼▼▼▼▼
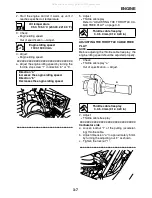
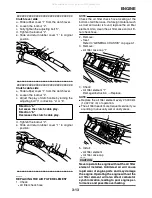
Clutch lever side
a. Slide rubber cover “1” from the clutch lever.
b. Loosen the locknut “2”.
c. Fully tighten the adjusting bolt “3”.
d. Tighten the locknut “2”.
e. Slide and return rubber cover “1” to original
position.
▲▲▲▲▲▲▲▲▲▲▲▲▲▲▲▲▲▲▲▲▲▲▲▲▲▲▲▲▲▲▲▲
▼▼▼▼▼▼▼▼▼▼▼▼▼▼▼▼▼▼▼▼▼▼▼▼▼▼▼▼▼▼▼▼
Clutch cable side
a. Slide rubber cover “1” from the clutch lever.
b. Loosen the locknut “2”.
c. Adjust the play of clutch cable by turning the
adjusting bolt “3” in direction “a” or “b”.
d. Tighten the locknut “2”.
e. Slide and return rubber cover “1” to original
position.
▲▲▲▲▲▲▲▲▲▲▲▲▲▲▲▲▲▲▲▲▲▲▲▲▲▲▲▲▲▲▲▲
EAS20961
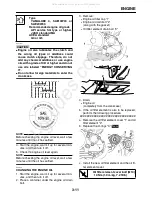
REPLACING THE AIR FILTER ELEMENT
1. Check:
●
Air filter check hose
NOTE:
Check the air filter check hose locating at the
bottom of air filter case. If a foreign material such
as dust and water is found, replace the air filter
element. Also, clean the air filter case and air fil-
ter check hose.
2. Remove:
●
Seat
Refer to “GENERAL CHASSIS” on page 4-1.
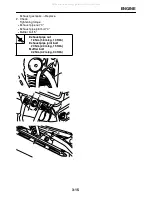
3. Remove:
●
Air filter case cap “1”
4. Check:
●
Air filter element “1”
Damage/obstruction
→
Replace.
NOTE:
●
Replace the air filter element every 20.000 km
(12,427.42 mi) of operation.
●
The air filter needs more frequent service if you
are riding in unusually wet or dusty areas.
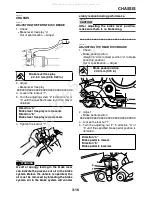
5. Install:
●
Air filter element
●
Air filter case cap
CAUTION:
ECA14401
Never operate the engine without the air filter
element installed. Unfiltered air will cause
rapid wear of engine parts and may damage
the engine. Operating the engine without the
air filter element will also affect carburetor
synchronization, leading to poor engine per-
formance and possible overheating.
Direction “a”
Increases the clutch cable play.
Direction “b”
Decreases the clutch cable play.
3
1
2
2
1
3
b
a
1
1
All manuals and user guides at all-guides.com
Summary of Contents for XT250X 2008
Page 2: ...All manuals and user guides at all guides com...
Page 8: ...All manuals and user guides at all guides com...
Page 54: ...CABLE ROUTING 2 35 All manuals and user guides at all guides com...
Page 82: ...ELECTRICAL SYSTEM 3 27 a b All manuals and user guides at all guides com...
Page 170: ...VALVES AND VALVE SPRINGS 5 24 All manuals and user guides at all guides com...
Page 224: ...AIR INDUCTION SYSTEM 6 13 All manuals and user guides at all guides com...
Page 239: ...CHARGING SYSTEM 7 14 All manuals and user guides at all guides com...
Page 243: ...LIGHTING SYSTEM 7 18 All manuals and user guides at all guides com...
Page 249: ...SIGNALING SYSTEM 7 24 All manuals and user guides at all guides com...
Page 253: ...CARBURETOR HEATING SYSTEM 7 28 All manuals and user guides at all guides com...
Page 279: ...All manuals and user guides at all guides com...

