background image

words, that single voice can then
be played with varying pitch by
an external keyboard or se-
quencer.

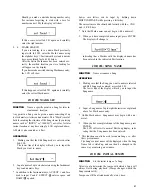
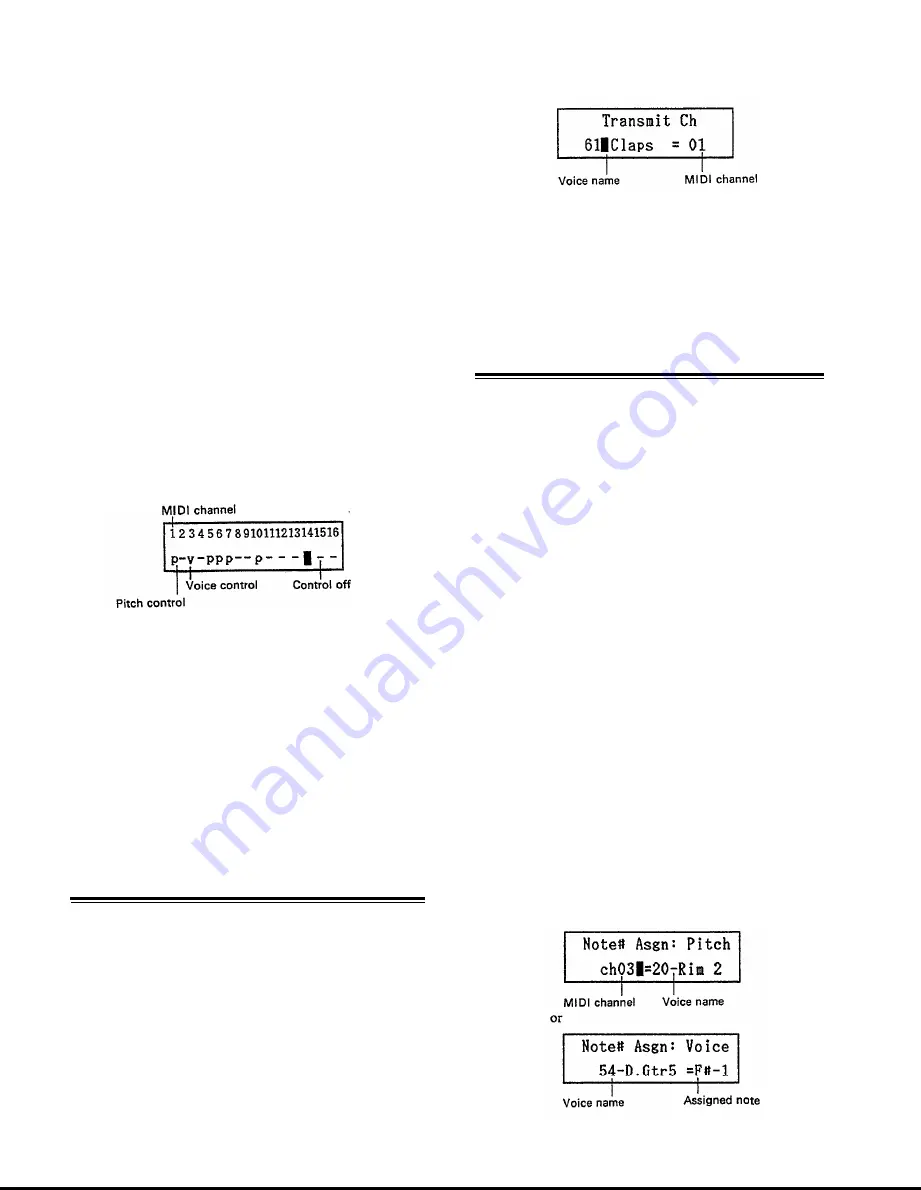
Voice assignment (v) . . . . . . . . .“v” indicates that note numbers

received on this MIDI channel
control the individual RX7 voices
according to their note number
assignment. A keyboard, for in-
stance, can be used to play a
different RX7 voice from each
key.

* Any or all channels can be set to “p” for pitch control,

but only one channel can be used for voice control “v”.

How to assign MIDI channels and note numbers to voices
is explained under Job #04, Note Number Assignment.

OPERATION

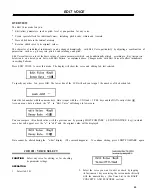
1. Making sure that “MIDI Information” is displayed,

select Job #02.
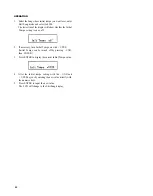
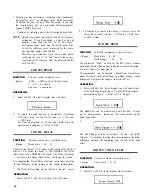
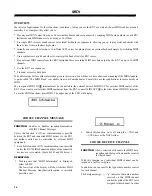
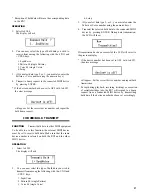
The LCD will show the following type of display:

2. Using the -1/NO and +1/YES keys to move the cursor

between channels, select the type of note number control
as follows:

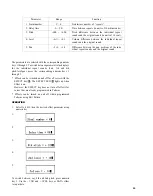
“v”

. . . . . . . . . . . . . .  Repeatedly pressing numeric key 1 switches

the respective channel between “v” and OFF

( “ - ” ) .

“p” . . . . . . . . . . . .  . . Repeatedly pressing numeric key 2 switches

the respective channel between “p” and OFF
( “ - ” ) .

*  Attempting to specify “v” for more than one channel turns

data reception off (“-”) for the previously selected “v”-
channel.

JOB #03: TRANSMIT CHANNEL

FUNCTION 

Selection of channels for MIDI data trans-

mission according to voice.

This function lets you specify a MIDI transmission channel
for each individual RX7 voice. During data transmission from
the RX7 to other MIDI equipment, the note number assigned
to that voice with Job #04 will be output on the selected

MIDI channel. This allows you to use the RX7 as a sequencer.

OPERATION

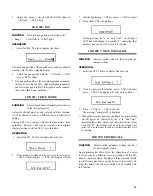
1. Select Job #03.

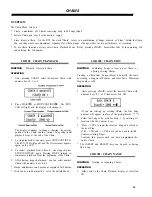
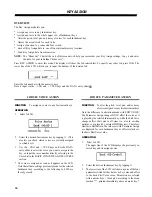
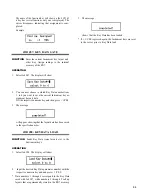
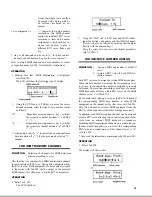
The LCD will show

2. Using the -1/NO and +1/YES keys and DATA slider.

input the desired voice names and their MIDI channel.
(Voices can also be selected by entering their number
directly with the numeric keys.)
Move the cursor between voice and channel parameters
with ACCENT 2.

JOB #04: NOTE NUMBER ASSIGN

FUNCTION 

1. Assign a MIDI note number to each RX7

voice.

2 .

Assign a RX7 voice to each MIDI re-
ception channel.

Each RX7 voice can be assigned a certain MIDI note number.
When this note number is received, the corresponding voice
(or voices, if the same note number is assigned to several)
will sound. These settings determine which keys of external
MIDI keyboards will play which RX7 voices on the MIDI
channel set to “v” with Job #02.

By the same token, playing a voice on the RX7 will transmit
the corresponding MIDI note number to other MIDI
equipment on the channel set for that voice with Job #03.

This lets you control external MIDI equipment from the

RX7 as with a sequencer (if all other settings are correct).

In addition, each MIDI reception channel can be assigned

a single RX7 voice, allowing you to control the pitch of that
voice from an external MIDI keyboard or sequencer.
Switching MIDI transmission channels on a connected syn-
thesizer would then allow you to select the corresponding

RX7 voice as a sound source (if that channel is set to “p”

with Job #02).

* Also read the information concerning Jobs #02 and #03.

OPERATION

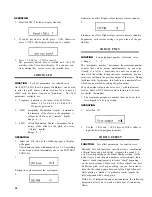
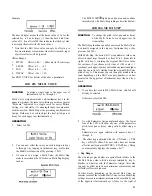
1. Select Job #04.

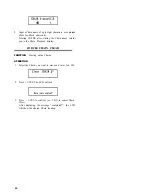
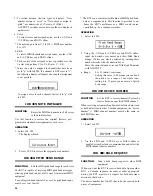
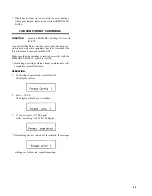
The display will show either

35

Summary of Contents for RX-7

Page 1: ...YAMAHA AUTHORIZED PRODUCT MANUAL DIGITAL RHYTHM PROGRAMMER ...

Page 2: ...YAMAHA DIGITAL RHYTHM PROGRAMMER OWNER S MANUAL ...

Page 3: ... fine musical instrument and should be treated as such Though it is ruggedly constructed and offers the reliability of solid state circuitry handle it with care and common sense Keep the following points in mind and your RX7 will give you years of reliable service Location Avoid exposure to direct sunlight or other sources of heat Vibration excessive dust cold low or high humidity can also cause m...

Page 4: ... Songs 6 Add Finishing Touches Editing 6 Save Your Sequences 6 SOUND DATA AND MEMORY CONFIGURATION 7 PATTERNS 8 PATTERN SELECTION 8 PATTERN PLAYBACK 8 TEMPO 9 CLICK 9 QUANTIZE 9 REAL TIME WRITE 9 STEP WRITE 10 REAL TIME WRITE 10 TIME SIGNATURE AND PATTERN LENGTH 10 WRITING A PATTERN 10 Writing with the Instrument Keys 10 Writing with a MIDI Keyboard 11 DAMP 11 QUANTIZE EXAMPLE 11 STEP WRITE 12 SWI...

Page 5: ...SAVE 33 JOB 08 KEY DATA LOAD 33 M I D I 34 JOB 01 CHANNEL MESSAGE 34 JOB 02 RECEIVE CHANNEL 34 JOB 03 TRANSMIT CHANNEL 35 JOB 04 NOTE NUMBER ASSIGN 35 JOB 05 NOTE INITIALIZE 36 JOB 06 PITCH BEND RANGE 36 JOB 07 DEVICE NUMBER 36 JOB 08 BULK REQUEST 36 JOB 09 BULK TRANSMIT 36 SYNC 38 UTILITY 39 JOB 01 REMAINING PATTERN MEMORY 39 JOB 02 REMAINING SONG MEMORY 39 JOB 03 MEMORY PROTECT 39 JOB 04 VOICE C...

Page 6: ...UME You are now ready to hear an RX7 demonstration per formance but be sure to adjust the volume first While tapping any of the instrument keys slide the master VOLUME fader up or down until you get an acceptable listening level DEMONSTRATION PERFORMANCES Press the PATTERN SONG key on the upper left in the PATTERN SONG key group The display will change to informing you that the Song No 00 Get Funk...

Page 7: ...cept that the RX7 Quantize feature explained later makes sure that it is actually the easiest to record For now remember that the default Quantize setting is 1 16 This means that up to 16 notes can be recorded per measure for each voice Therefore you can t make a mistake with the hi hat part which consists of 16 sixteenth notes even if you try To prove this tap the HI HAT key marked T as fast as y...

Page 8: ... single note in a rhythm pattern can be in dividually adjusted n n VOICES In the tradition of Yamaha s DX7 synthesizers the 100 in dividual RX7 sounds are referred to as voices used syn onymously with instruments in this manual Each voice has a number for easy access VOICE LIST Voice No Type 00 08 Bass Drums 09 18 Snare Drums 19 20 Rim Shots 21 37 Toms 38 40 FM Percussion 41 44 Hi hats open closed...

Page 9: ...p by step Songs are put together by determining the order in which Patterns are played by the RX7 Chains are simply further combinations of Songs feature allows the creation of arrangements which are vi brantly alive Songs can be made more expressive by adding tempo and volume changes n n CONTROLS Functional Groups Take a look at the RX7 control panel illustrated below It has been organized into f...

Page 10: ...fer to musical time ACCENT 2 moves the cursor between multiple param eters during data entry displays Certain inputs are fi nalized by pressing ENTER Depending on the current function SHIFT COMPARE lets you compare altered data with the previous setting or input lower case letters for Song and Mark names n n WRITING ON THE RX7 Three distinct ways of writing programming recording Patterns are possi...

Page 11: ...um set you can start recording your first Patterns in real time or step by step In many cases you will want to combine several often very similar versions of the same basic Pattern for a Song Instead of programming each one separately it saves a lot of time to COPY the basic Pattern and then add new instruments notes use CLEAR to delete unnecessary notes or voices exchange instruments with UTILITY...

Page 12: ...SOUND DATA AND MEMORY CONFIGURATION 7 ...

Page 13: ...such numbers when you want to create write a new Pattern OPERATION Patterns can be selected using the 1 NO and 1 YES keys or the numeric key pad 1 1 NO and 1 YES KEYS Convenient for selecting Patterns adjacent or nearby to the one currently displayed or to locate empty patterns 1 NO selects the next lower 1 YES the next higher Pattern number Holding down either key rapidly scrolls through the numb...

Page 14: ...ing Real Time Write OPERATION 1 Press CLICK TEMPO CHANGE The lower line of the display will show the current Click rate and whether the Click metronome is on or off 2 To turn Click on or off for playback press 1 NO OFF or 1 YES ON 3 Set the Click rate with the numeric key pad The Click rates are shown as fractions on the keys next to their usual numeric value 4 Click volume is adjusted with the CL...

Page 15: ... CONTINUE OPERATION n n TIME SIGNATURE AND PATTERN LENGTH 1 Making sure the PTN LED is lit and the Pattern location you wish to write to is selected press REAL TIME 10 WRITE If the location is empty the following display will appear Time signature Pattern length This shows the default setting time signature 4 4 pattern length 1 bar The cursor indicates that you can change these values as required ...

Page 16: ...ED lights up You can now damp any recorded voice by pressing its Instrument key ex actly when you want the sound to STOP If you have a MIDI keyboard available damping is possible DURING the initial Real Time programming of Patterns Just press DAMP causing the DAMP LED to light Any sounds played on the MIDI keyboard will now sound only as long as the key is pressed As soon as you release the key th...

Page 17: ...rummers for instance often achieve an exciting feeling of tension by slightly delaying their off beat on the snare drum This is easy to do with Step Write In the following example the SD is entered using a Quantize rate of 1 96 OFF To obtain the desired delay input the SD notes one step later than the 2nd beat 25 and 4th beat 73 quarter notes i e on beats 26 and 74 Hi HAT Quantize 1 8 SD Quantize ...

Page 18: ...bar will normally occur at 50 By delaying this off beat by a certain amount a swing feel is obtained Five swing rates with differing delays are available from 54 for a very subtle effect to 71 for a very pronounced swing ON OFF ON BEAT BEAT BEAT SWING OFF SWING 71 A setting of 67 creates a triplet type shuffle effect SWING 67 OPERATION 1 In Pattern Mode before or during Real Time Write press SWING...

Page 19: ...Pattern while retaining the original one or if you want to organize Patterns in a particular memory lo cation order 14 APPEND With this function you can create new larger Patterns by joining existing ones appending one Pattern to the end of the other Only Patterns with the same time signature can be joined OPERATION PATTERN COPY 1 Making sure Memory Protect is off select the Pattern you want to co...

Page 20: ...he parameter value this indicates that the selected voice is not used in this Pattern dmp displayed as parameter value means that the cor responding Instrument key was pressed during Real Time Write while DAMP was on No sound will be heard for this note If you want to select an instrument currently not played by the Instrument keys assign it using KEY ASSIGN Job 01 The clock number indicates on wh...

Page 21: ...ED is lit showing that the RX7 is in Song Mode The PATTERN SONG key switches the RX7 between Pattern and Song Mode To enter Song Mode press this key until the SONG LED lights Remaining Song memory space can be checked with UTILITY Job 02 SONG SELECTION SONG PLAYBACK FUNCTION Selects a Song for playback editing etc This function is always selected when Song mode is entered The RX7 can store up to 2...

Page 22: ...RTING OPERATION 1 Select the Part of the Song where you wish to insert a new Part and press STEP WRITE INSERT The prompt mark will appear asking you to input the contents of the inserted Part 2 Input either a Pattern or any other of the possibilities a repeat symbol a tempo or volume change command or a search mark To cancel data entry press 1 NO DELETE 2 Input the number of the Pattern you want t...

Page 23: ...opy destination point will be erased In effect this means you can copy only to the end of a Song COPYING TO END OF SONG BEFORE COPYING AFTER COPYING ACTUAL PLAYING SEQUENCE COPYING TO DESTINATION BEFORE END OF SONG Input of the Repeat commands is often easiest when done in combination with Insert after having programmed the Song without repetitions OPERATION 1 Select the Part of the Song from whic...

Page 24: ...ng Insert NOTE Unless you balance accelerandi with ritardandi your Song will end in a different tempo than it started with If you have not set an initial tempo for the Song and start to play it again immediately it will commence at this previous final tempo It is there fore recommended that you use Job 04 to specify an initial tempo OPERATION 1 Select the Part of the Song from which you want the t...

Page 25: ...el Song Clear After displaying the message completed the LCD will show the cleared Song location JOBS The Song functions listed on the extreme left of the front panel Job Menu under SONG and EDIT SONG are selected by entering the respective Job number i e by pressing JOB and then inputting a two digit number with the numeric keys Except for Job 01 Mark Search which is also available in Song Select...

Page 26: ...CTION Name a specific point in a Song for later in stantaneous location Any point in a Song can be given a name consisting of up to six characters letters and numerals This Mark is useful both for making the structure ofthe Song clearer by entering names such as INTRO or 1 MELO as well as for later instant location at any time using Job 01 explained above A Mark is also counted as a Part OPERATION...

Page 27: ...n or off 2 If necessary turn Initial Tempo on with 1 YES Initial Tempo can be turned off by pressing 1 NO then ENTER 3 Press ENTER to display the current Initial Tempo value 4 Alter the initial tempo setting with the 1 NO and 1 YES keys or by entering the new value directly with the numeric keys 5 Press ENTER to input the new value The LCD will change to the Edit Song display 22 ...

Page 28: ...ith numeric keys 0 1 or 2 then access Job 02 The display continues to change showing the current position in the Chain and the current Song Step until playback stops at the end of the Chain 3 To stop playback at any time press STOP CONTINUE The RUN LED will go out and the first measure appears again on the LCD 4 To restart playback from where it was stopped press STOP CONTINUE again Pressing START...

Page 29: ... returns you to the Chain Playback display JOB 04 CHAIN CLEAR FUNCTION Erasing entire Chains OPERATION 1 Select the Chain you want to erase and enter Job 04 2 Press 1 YES The LCD will ask 3 Press 1 YES to confirm or 1 NO to cancel Chain Clear After displaying the message completed the LCD will show the cleared Chain location 24 ...

Page 30: ...de The display will show the voice and editing Job last selected To specify any other Job press JOB The lower line of the LCD will ask you to input the numbe r of the desired Job Enter the Job number with the numeric keys Data is input with the 1 NO and 1 YES keys and the DATA entry slider As soon as any data is altered the E in Edit Voice will change to lower case You can compare this altered val...

Page 31: ...decay the HIGHER the Decay Rate value the SHORTER the sound The slower the decay the lower the Decay Rate value the longer the sound Try changing the Decay Rates ofvarious voices to get a feeling for the influence of this setting on the sound characteristics The Decay Rate setting has no effect on reverse voices OPERATION 1 Select Job 03 The lower display line will show 2 2 To lengthe n or shorte ...

Page 32: ...u chose YES the message will appear and the e in edit Voice on the upper LCD line will change to a capital E indicating that another voice can now be selected for editing JOB 08 VOICE INITIALIZE FUNCTION Restores edited voices to their original pa rameter settings OPERATION 1 Select Job 08 The lower display line asks you 2 If you do not want to initialize press 1 NO Otherwise press 1 YES The displ...

Page 33: ...f the pos sibilities JOB 11 POLY FUNCTION Sets polyphonic number of selected voice Range 1 8 The polyphonic number determines the maximum number of notes that can be output simultaneously by one voice Usually it is left at 1 Since only one note can sound at a time with this setting hitting the same Instrument key con secutively will damp the previous output of that voice During fast drum rolls for...

Page 34: ...rresponding numeric keys 1 through 5 To switch between parametervalue displays for the individual repeat sounds 2nd 3rd and 4th pitch level pan press the corresponding numeric keys 3 through 5 Effects can be switched on and off for all voices with the EFFECT key The EFFECT LED lights up when Effect is on However the EFFECT key does not turn off effects for voices that are already programmed in Pat...

Page 35: ...and or the DATA entry slider to select the voice you want to assign to the key or input the voice number directly referring to the Voice List in the BASIC CONCEPTS AND FEATURES section The voice is assigned as soon as it appears on the LCD Note that all data settings previously made for the selected Instrument key according to the following Job 02 are thereby erased FUNCTION To alter the pitch lev...

Page 36: ...ce for each upper row In strument key The Multi Step function can only be accessed ifa Multi Voice is currently assigned to the top row Instrument keys See previous Job 03 With Multi Step the basic Edit Voice parameter values are offset in equal steps for each key from B to L from left to right with key A retaining the original Edit Voice value For instance if you choose pitch steps of 100 cents 1...

Page 37: ...h L for in stance representing a major or minor scale JOB 05 ACCENT LEVEL 2 Select the voice whose Accent you wish to program with its Instrument key All current Accent levels can be checked by pressing various Instrument keys in succession 3 To switch between Accent 1 and 2 press the corre sponding ACCENT button 4 Input the Accent value with the 1 NO and 1 YES keys or the DATA slider The Accent v...

Page 38: ...e display will show 2 You can now choose to which Key Data number from 1 to 4 you want to save the current Instrument key as signment layout data Hit the respective numeric key and then press 1 YES 3 The message will appear showing that the layout data has been saved to the specified number JOB 08 KEY DATA LOAD FUNCTION Loads Key Data voice layouts etc to the Instrument keys OPERATION 1 Select Job...

Page 39: ...cted to the external device s MIDI OUT for external MIDI control of the RX7 Ifyou want to control other MIDI equipment from the RX7 connect MIDI OUT to the other device s MIDI IN terminal To use the MIDI functions press MIDI The upper line of the LCD will display JOB 01 CHANNEL MESSAGE FUNCTION Enables or disables reception transmission of MIDI Channel Messages Unless this function is ON no commun...

Page 40: ...04 will be output on the selected MIDI channel This allows you to use the RX7 as a sequencer OPERATION 1 Select Job 03 The LCD will show 2 Using the 1 NO and 1 YES keys and DATA slider input the desired voice names and their MIDI channel Voices can also be selected by entering their number directly with the numeric keys Move the cursor between voice and channel parameters with ACCENT 2 JOB 04 NOTE...

Page 41: ...nd control of a voice its pitch bend range must be set to at least 01 36 The RX7 can not memorize this kind of MIDI pitch bend data as a sequence data This function is provided to en hance the RX7 s usefulness as a MIDI sound source controlled e g by a sequence recorder OPERATION 1 Select Job 06 2 Using the 1 NO and 1 YES keys and DATA slider input the desired voice names and their Pitch Bend Rang...

Page 42: ...sure that the same device number is selected on both the RX7 and the other MIDI device OPERATION 1 Select Job 09 The display will ask 4 Setup 3 If you select data type 2 or 3 you must also enter the Pattern or Voice number using the numeric keys 4 Transmit the selected bulk data to the connected MIDI device by pressing ENTER During data transmission the LCD will show If transmission has been succe...

Page 43: ...DI the RX7 Clock rate is controlled by the MIDI signal received at the MIDI IN terminal from other MIDI equipment Start Stop and Tempo then depend on the external master device with the RX7 acting as slave By using the optional Yamaha MIDI Converter YMC10 which converts MIDI sync signals to tape sync signals FSK and vice versa FSK signals can be recorded onto tape from the RX7 via its MIDI OUT ter...

Page 44: ...Select Job 03 2 Turn Memory Protect off with 1 NO and on with 1 YES JOB 04 VOICE CHANGE FUNCTION Exchanges voices in one or all Patterns This is a very helpful function when you want to try out different voice combinations for Patterns after having pro grammed them If you only want to change voices in a single Pattern it must be selected before using this Job JOB 05 ALL PATTERNS CLEAR OPERATION 1 ...

Page 45: ...group l The Songs in group three consist of popular rock 16 beat and latin per cussion patterns which you can use for your own arrange ments NOTE Loading demo Songs will erase all present Patterns and Songs Therefore make sure your own Patterns and Songs are saved before loading List of Demonstration Songs Demo l SONG00 GET FUNK SONG01 TROPICAL Demo 2 SONG00 DOO WAP SONG01 NOISE SONG02 ROCK Demo 3...

Page 46: ...CARTRIDGE to enter this mode The same key also switches between Cassette and Cartridge op erations Cassette and Cartridge operations are basically the same and will be discussed here together They are distinguished on the LCD by a different upper line CARTRIDGES When using a RAM4 cartridge make sure it is inserted firmly into the CARTRIDGE slot on the rear panel with the list of contents facing up...

Page 47: ...cept single Patterns to a cartridge already containing that kind of data the previous data will be erased Setup data which can be saved on cassette only includes the following data The 5 sets of Key Data currently stored in the RX7 The accent levels of all voices The MIDI transmit receive channels note numbers and pitch bend ranges of all voices GENERAL SAVE OPERATION 1 Select the desired Job 01 0...

Page 48: ... Press 1 YES again to confirm The display will show then indicating that the data has been loaded to the RX7 LOADING SINGLE PATTERNS FROM A CARTRIDGE 1 Select Job 13 in Cartridge Mode The display will ask you to confirm 2 Press 1 YES The display will change to 3 You can now specify the cartridge location you wish to load from as well as the Pattern number you want to load it to Use ACCENT 2 to swi...

Page 49: ...firm The display will show then indicating that the data has been verified VERIFYING SINGLE PATTERNS SAVED TO A CARTRIDGE 1 Select Job 23 in Cartridge Mode The display will ask you to confirm 2 Press 1 YES The display will change to 44 3 You can now specify the Pattern number and cartridge location you want to verify Use ACCENT 2 to switch between them 4 Press 1 YES The LCD will ask you to confirm...

Page 50: ...s Job before it can used with the RX7 Make sure that the cartridge is inserted correctly with the MEMORY PROTECT switch set to OFF Formatting a cartridge which already contains data will completely erase all such data OPERATION 1 In Cartridge Control mode select Job 30 The display will ask 2 Press 1 YES The display will ask you to confirm 3 If you are press 1 YES again After executing the LCD will...

Page 51: ...OFF using UTILITY data by entering or loading new data and the JOB 03 Then carry out the data operation again Memory Protect function is turned on The RX7 s MIDI Buffer is full because too much Press any key to clear the LCD Send less dense data data has been sent too rapidly from an external de or send at a slower tempo vice MIDI BUFFER FULL The MIDI Buffer is a kind of waiting room for MIDI data...

Page 52: ...long Pattern you were trying to create Then use the Edit Song Mode to combine these Patterns into a continuous sequence 1 Write a new Pattern which will have a time sig nature equivalent to the two original Patterns combined For example if you had wanted to append a 4 4 Pattern with a 3 4 Pattern write a new 7 4 Pattern 3 4 4 4 7 4 2 Rewrite the same two Patterns using longer bars then append them...

Page 53: ...imum polyphonic number 8 16 MEM0RY CAPACITY l 100 Patterns Max length 99 measures l 20 Songs Max length 999 parts l 3 Chains Max length 90 steps l 10 Sets of Key Data incl 5 user programmable sets CONTROLLERS l SLIDERS Master Volume Click Volume Tempo Data Entry l BUTTONS Accent 1 Accent 2 Stop Continue Shift Compare Start Enter In strument Keys A through X 24 l KEYS PATTERN AND SONG OPERATION KEY...

Page 54: ...o i c e s o u n d s b y e a c h c h a n n e l Note range 36 96 D e f a u l t 3 3 M o d e M e s s a g e s x x A l t e r e d x N o t e 0 127 0 127 36 96 1 Number T r u e v o i c e x V e l o c i t y N o t e O N 9nH v 1 127 o v 1 127 Note OFF x 9nH v 0 x A f t e r K e y s x x T o u c h C h s x x Pitch Bender x o N o t e a s g n p i t c h 10 x o Pan N o t e a s g n p i t c h C o n t r o l Change D i g ...

Page 55: ...ding instrument keys PAN POSITIONS PAN VALUE A B C D E F G H I J K L M N O P Q R S T U V W X JOB 02 JOB 03 JOB 04 JOB 05 JOB 06 KEY PITCH DECAY BEND VOICE LEVEL PAN PITCH LEVEL PAN DECAY See p 33 for reference JOB 02 write offset values OR combined values ...

Page 56: ... SYNC TEMPO MULTI EFFECT Mode Job keys DAMP Numeric key pad RUN 1 NO 1 YES keys LCD STOP CONTINUE START Instrument keys ACCENT 1 2 Pattern Song keys Job Menu REAR PANEL POWER ON OFF DC 12V IN MIDI THRU MIDI OUT MIDI IN CASSETTE FOOT SW CLICK OUTPUT R OUTPUT L PHONES DATA CARTRIDGE 51 ...

Page 57: ......

Page 58: ... does appear to be the source of the interference you should try to correct the situation by using one or more of the following measures Relocate either the equipment or the electronic device that is being affected by the interference Utilize power outlets for the professional music equipment and the device being affected that are on different branch circuit breaker or fuse circuits or install AC ...

Page 59: ...YAMAHA YAMAHA CORPORATION P O Box 1 Hamamatsu Japan VE17510 88 04 1 0 R3 ...

Page 60: ... YAMAHA Yamaha Corporation of America RX7 OM 6600 Orangethorpe Avenue P O Box 6600 Buena Park CA 90622 6600 Recycled 11 17 98 98109 Recyclable ...

Reviews: