background image

Safety Instructions

S-6


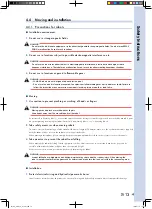
Warming label 8 (controllers RCX240, controllers RCX340, controllers RCX340XE)

w

WARNING 

These are precautions for YAMAHA and distributors' service personnel. 
Customers must not attempt to open the covers.

w

WARNING 

Wait at least 100 seconds after power-off before opening the covers.

Instructions on this label

•  Wait at least 100 seconds after power-off 

before opening the covers (*).

•  Some parts in the controller still retain a high 

voltage even after power-off, so electrical 
shock may occur if those parts are touched. 

Potential hazard to human body

Electrical shock

To avoid hazard

Wait at least 100 seconds after power-off before opening the covers (*).

* These are precautions for YAMAHA and distributors' service personnel. Customers must not attempt to open the covers.

90K41-001390


Warning label 9 (single-axis linear motor robots)

c

CAUTION 

A magnetic scale is located inside this cover. Bringing a magnet close to it may cause malfunction.

Instructions on this label

•  To prevent the robot from operating improperly due 

to magnetic scale malfunction, do not bring a strong 
magnet to the cover.

•  Do not bring tools close to the magnetic scale.

90K41-001510


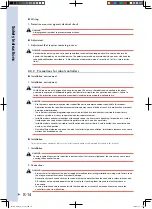
Warning label 10 (single-axis linear motor robots)

c

CAUTION 

Powerful magnets are installed in the robot. 
Do not attempt to disassemble the robot to avoid possible injury. 
Do not bring any device that may malfunction due to magnetic fields close to the robot.

Instructions on this label

Be sure to read "6. Cautions regarding strong magnetic 
fields" in "Safety Instructions" and make sure you fully 
understand its contents before handling or operating 
the robot.

Potential hazard to human body

Injury or death may result in some cases.

To avoid hazard

Make you understand the precautions regarding strong magnetic fields.

90K41-001500

FLIP-X_maint_E_V1.50.indb   6

18/05/15   15:01

Summary of Contents for FLIP-X Series

Page 1: ...A SINGLE AXIS ROBOT Maintenance Manual FLIP X Series T4L T4LH T5L T5LH T6L T9 T9H F8 F8L F8LH F10 F10H F14 F14H F17 F17L F20 F20N GF14XL GF17XL N15 N15D N18 N18D B10 B14 B14H R5 R10 R20 FLIP X_maint_E...

Page 2: ...FLIP X_maint_E_V1 50 indb 2 18 05 15 15 00...

Page 3: ...ation S 13 4 4 1 Precautions for robots S 13 4 4 2 Precautions for robot controllers S 14 4 5 Safety measures S 16 4 5 1 Safety measures S 16 4 5 2 Installing a safety enclosure S 17 4 6 Operation S 1...

Page 4: ...0H F14 F14H F17 F17L F20 F20N GF14XL GF17XL 2 9 3 3 F8 F8L F8LH 2 10 3 4 N15 N15D N18 N18D 2 11 3 5 B10 B14 B14H 2 12 Chapter 3 Adjustment 1 Adjusting the alignment B10 B14 B14H 3 1 2 Adjusting the ti...

Page 5: ...der 4 23 5 1 B10 B14 B14H 4 23 5 2 F20N 4 24 6 Replacing the coupling GF14XL GF17XL 4 25 7 Replacing the bushings GF14XL GF17XL 4 27 8 Maintenance parts 4 28 8 1 Consumable parts 4 28 Chapter 5 Wiring...

Page 6: ...Cables for SR1 X 5 9 3 1 3 Cables for RDV X robot with brake and sensor 5 10 3 1 4 Cables for RDV X robot without brake 5 12 3 2 Multi robot cables 5 13 3 2 1 Cables for single axis multi robot 5 13 3...

Page 7: ...ns for robots S 13 4 4 2 Precautions for robot controllers S 14 4 5 Safety measures S 16 4 5 1 Safety measures S 16 4 5 2 Installing a safety enclosure S 17 4 6 Operation S 18 4 6 1 Trial operation S...

Page 8: ...7 5 KC mark S 29 7 5 1 EMC standards S 29 7 5 2 Examples of EMC countermeasures S 29 FLIP X_maint_E_V1 50 indb 2 18 05 15 15 00...

Page 9: ...y with the instructions Warning labels attached to the robots are written in English Japanese Chinese and Korean This manual is available in English or Japanese or some parts in Chinese Unless the rob...

Page 10: ...d then read this manual w DANGER This indicates an immediately hazardous situation which if not avoided will result in death or serious injury w WARNING This indicates a potentially hazardous situatio...

Page 11: ...re Instructions on this label Always install a safety enclosure to keep all persons away from the robot movement range and prevent injury from contacting the moving part of the robot Install an interl...

Page 12: ...injury To avoid hazard Before installing or operating the robot read the manual and instructions on the warning labels and understand the contents 90K41 001290 Warning label 4 SCARA robots This label...

Page 13: ...P w WARNING Before touching the terminals or connectors on the outside of the controller turn off the power and wait at least 10 minutes to avoid burns or electrical shock Motors and heatsinks become...

Page 14: ...le axis linear motor robots c CAUTION A magnetic scale is located inside this cover Bringing a magnet close to it may cause malfunction Instructions on this label To prevent the robot from operating i...

Page 15: ...oller read the manual carefully and make checks before beginning the work Connectors have an orientation Insert each connector in the correct direction 93005 X0 00 Warning label 12 single axis robots...

Page 16: ...should be affixed to an easy to see location on the door or gate of the safety enclosure Warning label comes supplied with the robot and should be affixed to an easy to see location SCARA robots Cart...

Page 17: ...o not touch them Instructions by this symbol This indicates the area around this symbol may become very hot Motors heatsinks and regenerative units become hot during and shortly after operation To avo...

Page 18: ...ent intended to carry or transport people In environments which are subject to vibration such as onboard ships and vehicles 2 Qualification of operators workers Operators or persons who perform tasks...

Page 19: ...en grounding the linear conveyor module and installing the termination module Do not touch the motor of the linear conveyor module when it is on Always comply with the instructions in the manual when...

Page 20: ...c is shut off or power fluctuations occur If the object gripped by the end effector might possibly fly off or drop then provide appropriate safety protection taking into account the object size weight...

Page 21: ...the robot As instructed in Warning label 2 use caution to prevent hands or fingers from being pinched or crushed by movable parts when transporting or moving the robot For details on warning labels se...

Page 22: ...ation that is outside the robot safety enclosure yet where it is easy to operate and view robot movement Install the robot controller in locations with enough space to perform work teaching inspection...

Page 23: ...specified by the connector manufacturer c CAUTION When disconnecting the cable from the robot controller detach by gripping the connector itself and not by tugging on the cable Loosen the screws on t...

Page 24: ...be taken as needed to prevent hazardous situations due to sudden or unexpected robot operation or faulty robot operation as listed below Place a display sign on the operator panel Ensure the safety of...

Page 25: ...damage and malfunction Do not touch or operate the robot controller or programming box with wet hands Touching or operating them with wet hands may result in electrical shock or breakdown 6 Do not dis...

Page 26: ...other personnel from entering within the movement range of the robot w WARNING Use sturdy stable posts which will not fall over easily The rope or chain should be easily visible to everyone around the...

Page 27: ...e precautions and procedure described in Setting the standard coordinates Soft limit settings SCARA robots Follow the precautions and procedure described in Setting the soft limits Cartesian robots Si...

Page 28: ...Place a sign on the start switch indicating that the robot is being inspected in order to keep other persons from restarting the robot 4 6 3 Precautions during operation 1 When the robot is damaged or...

Page 29: ...rom peripheral equipment the Z axis may move suddenly after the obstruction is removed causing injury such as pinched or crushed hands Turn off the controller and reduce the air pressure before attemp...

Page 30: ...ge and skills and may also involve hazards if attempted by an unskilled person This adjustment must be performed only by persons who have the required qualifications described in 2 Qualification of op...

Page 31: ...se injury Devices that may malfunction due to magnetic fields must be kept away from this robot See 6 Cautions regarding strong magnetic fields for detailed information on strong magnetic fields 5 Use...

Page 32: ...ns or entrust disposal to a licensed industrial waste disposal company We do not collect and dispose of the used batteries 2 Disposal of packing boxes and materials When disposing of packing boxes and...

Page 33: ...ting strong magnetic fields which may cause bodily injury death or device malfunction Always comply with the following instructions Persons wearing medical electronic devices such as cardiac pacemaker...

Page 34: ...the solenoid valves attached to the robot arms move To make the robot motion easier to understand the figures below only show the movement ranges of the tool attachment section tool and workpiece Plea...

Page 35: ...es robots do not have mechanical stoppers intended to protect the human body due to the product characteristic of the orbit movement When it is necessary to restrict the arm rotation angle so as to en...

Page 36: ...ob correctly and safely They must also read the manual carefully to understand its contents before attempting the robot operation or maintenance Tasks related to industrial robots teaching programming...

Page 37: ...to the EMC standards KC mark The YAMAHA robots controllers are registered in the National Radio Research Agency RRA as conformed by self test and KC marks are affixed to the controllers Related stand...

Page 38: ...ded descriptions of soft limits mechanical stoppers and work performed with vertical axis brake released were changed and residual risk description was added Ver 1 03 Dec 2012 Warning on restricting t...

Page 39: ...not the fault or responsibility of YAMAHA The following cases are not covered under the warranty 1 Products whose serial number or production date month year cannot be verified 2 Changes in software o...

Page 40: ...FLIP X_maint_E_V1 50 indb 2 18 05 15 15 01...

Page 41: ...Chapter 1 Overview Contents 1 Overview 1 1 FLIP X_maint_E_V1 50 indb 1 18 05 15 15 01...

Page 42: ...FLIP X_maint_E_V1 50 indb 2 18 05 15 15 01...

Page 43: ...bot starts to operate during work Never attempt to perform work other than those described in this manual Place a conspicuous sign indicating the robot is being adjusted to prevent others from touchin...

Page 44: ...FLIP X_maint_E_V1 50 indb 2 18 05 15 15 01...

Page 45: ...Three month inspection 2 3 2 3 Six month inspection 2 5 2 4 Three year inspection 2 6 3 Applying the grease 2 7 3 1 T4L T4LH T5L T5LH T6L 2 8 3 2 T9 T9H F10 F10H F14 F14H F17 F17L F20 F20N GF14XL GF1...

Page 46: ...FLIP X_maint_E_V1 50 indb 2 18 05 15 15 01...

Page 47: ...to use the lubricant specified by your distributor Be sure to use the parts specified by your distributor when replacing parts Take sufficient care not to allow any foreign matter to contaminate them...

Page 48: ...nt If this occurs clean the shutter top surface with a cloth rag moistened with alcohol cleaning agent If this trouble occurs frequently contact your distributor 2 Some robot controller models cannot...

Page 49: ...ng the robot is being adjusted Place a sign indicating the robot is being inspected to keep others from operating the controller switch 3 Perform the inspection Enter the safety enclosure and check th...

Page 50: ...at rear of controller Check if the fan rotates normally Check if objects blocking the fan are located and remove if any are found Check for abnormal noise from the rotating fan If abnormal noise is he...

Page 51: ...ase N18 Daphne Eponex SR2 Idemitsu Other than N18 Alvania grease S2 Showa Shell Alvania No 2 Showa Shell Daphne Eponex No 2 Idemitsul Common LG2 NSK For Clean Specification See 3 Applying the grease i...

Page 52: ...emove if any are found Check for abnormal noise from the rotating fan If abnormal noise is heard visually check and remove the cause If no cause is found contact your distributor Check for dust on the...

Page 53: ...ce this could lead to sparks and fires Emergency Treatment If this grease gets in the eyes wash liberally with pure water for about 15 minutes and consult a physician for treatment If this grease come...

Page 54: ...er surface is not scratched 6 Wipe off the contaminated grease First wipe off the contaminated grease with a clean cloth rag 7 Apply the grease Apply an adequate amount of grease to the ball screw or...

Page 55: ...s moved by hand accidentally Apply grease by either of the following methods Linear guide 5 Apply the grease Use the grease gun to apply the grease to the grease nipple of the linear guide through the...

Page 56: ...stick c CAUTION Do not put your finger in the slider movement range to prevent your finger from being caught in if the slider is moved by hand accidentally Apply grease by either of the following meth...

Page 57: ...a clean cloth rag c CAUTION Do not put your finger in the slider movement range to prevent your finger from being caught in if the slider is moved by hand accidentally Apply grease by either of the f...

Page 58: ...lace a sign indicating the robot is being adjusted to keep others from operating the controller or operation panel 3 Enter the safety enclosure 4 Wipe off the contaminated grease First wipe off the co...

Page 59: ...nsion 3 3 2 2 Adjusting the speed reduction belt tension 3 4 3 Adjusting the timing belt tension F20N 3 6 3 1 Installing and removing the cover 3 6 3 1 1 Stroke cover 3 6 3 1 2 Belt cover 3 8 3 1 3 Mo...

Page 60: ...FLIP X_maint_E_V1 50 indb 2 18 05 15 15 01...

Page 61: ...rn away or damaged by the edge of the upper cover Be sure to wear safety gloves before starting the work If you touch any steel material part with bare hands this may cause rust Be careful not to drop...

Page 62: ...y w WARNING The motor and speed reduction gear casing are extremely hot after automatic operation so burns may occur if these are touched Before touching these parts turn off the controller wait for a...

Page 63: ...to the belt Applying a tension Step 6 Belt stay bolt Belt stay Tension adjusting bolt 53305 AC 00 7 Apply a load Move the slider by hand to a position at which the distance from the slider edge to the...

Page 64: ...4 258 25 4 0 2 2 Adjusting the speed reduction belt tension 1 Turn off the controller power 2 Place a sign indicating the robot is being adjusted Place a sign indicating the robot is being adjusted to...

Page 65: ...on again When the measured value is within the range shown in the table the belt tension adjustment is completed If the measured value is beyond the range repeat Steps 5 to 7 9 Tighten the motor plate...

Page 66: ...during teaching or burn due to hand in contact with hot surface So be sure to tighten all the screws and bolts securely c CAUTION Be sure to wear safety gloves before starting the work If you touch a...

Page 67: ...ck 5 Secure the cover to the end block Move the table slider to the center of the stroke and make sure that the table slider does not interfere with the cover If the table slider interferes with the c...

Page 68: ...t the cover upward Removing the belt cover Step 5 Hex socket head bolt M4 2 M4 screw 2 53305 A9 00 Installing the belt cover 1 Turn off the controller power 2 Place a sign indicating the robot is bein...

Page 69: ...r Remove the hex socket head bolts M4 2 and pull out the motor cover Pulling out the motor cover Step 5 53307 A9 00 Installing the motor cover 1 Turn off the controller power 2 Place a sign indicating...

Page 70: ...enclosure 4 Temporarily tighten the motor installation bolt 5 Install the adjustment bolt Remove the belt cover and install the adjustment bolt M5 6 Apply a tension to the belt Applying a tension to t...

Page 71: ...1 Turn off the controller power 2 Place a sign indicating the robot is being adjusted Place a sign indicating the robot is being adjusted to keep others from operating the controller or operation pan...

Page 72: ...FLIP X_maint_E_V1 50 indb 12 18 05 15 15 01...

Page 73: ...grid position 4 17 3 Replacing the insert T4L T4LH T5L T5LH T6L 4 18 4 Replacing the drive and speed reduction belts B10 B14 B14H 4 20 4 1 Replacing the drive belt 4 20 4 2 Replacing the speed reducti...

Page 74: ...FLIP X_maint_E_V1 50 indb 2 18 05 15 15 01...

Page 75: ...act with hot surface So be sure to tighten all the screws and bolts securely c CAUTION Be sure to wear safety gloves before starting the work If you touch any steel material part with bare hands this...

Page 76: ...the end block side at this time Fully tighten these screws after adjusting for shutter looseness in Step 9 9 Secure the shutter Tighten the screws while pulling on the shutter with your fingers so th...

Page 77: ...removing the parts check and mark the part positions versus each other so you can correctly reassemble the parts later Be sure to wear safety gloves before starting the work If you touch any steel ma...

Page 78: ...olts securing the motor Removing the bolts securing the motor Step 6 M5 bolt 2 pcs 53415 A1 00 7 Remove the motor Removing the motor Step 7 53416 A1 00 8 Install a new motor 9 Assemble in the reverse...

Page 79: ...securely c CAUTION Since a positional shift occurs after replacing the motor return to origin must be performed again and the point data must be re specified When removing the parts check and mark the...

Page 80: ...motor side Remove the screws 4 securing the end cover on the motor side and remove the cover Removing the end cover on the motor side Step 6 End cover 53403 A5 00 7 Remove the motor cover Remove the...

Page 81: ...aution Removing the wave washer and flat washer Step 10 Wave washer Flat washer 53406 A5 00 q Pull out the rotor Remove the bolts 4 securing the rotor and pull out the rotor Pulling out the rotor Step...

Page 82: ...art with bare hands this may cause rust Be careful not to drop any screw or bolt during cover removal work 1 Turn off the controller power 2 Place a sign indicating the robot is being adjusted Place a...

Page 83: ...ions versus each other so you can correctly reassemble the parts later Be sure to wear safety gloves before starting the work If you touch any steel material part with bare hands this may cause rust B...

Page 84: ...motor Take care to the orientation and order of the rings at this time Installing the motor Step 11 53405 A9 00 q Install the motor onto the block Temporarily tighten the mounting bolts Attaching the...

Page 85: ...n removing the parts note their positional relation and assembly order Provide a space of at least 300mm between each end of the robot and the wall Do not pull out the ball screw nut section from the...

Page 86: ...direction of arrow to a position that allows access to the motor unit The N18 robot has no side cover so skip this Step Moving the side cover Step 9 Side cover Side cover mounting screw 53404 AA 00 0...

Page 87: ...securing the ball screw on the opposite side Loosening the bolts securing the ball screw Step 12 Ball screw mounting bolts 53407 AA 00 e Remove the bolts 3 securing the holder and remove the ball scr...

Page 88: ...socket head bolt M5 60kgf cm to 90kgf cm N18 Hex socket head bolt M6 100kgf cm to 130kgf cm u Assemble in the reverse order of disassembly Proceed while making sure the positional relation and assemb...

Page 89: ...st be performed again and the point data must be re specified When removing the parts check and mark the part positions versus each other so you can correctly reassemble the parts later Be sure to wea...

Page 90: ...7 Remove the motor Remove the screws 4 securing the motor and remove the motor 53404 AN 00 Step 7 Motor unit securing screws Do not remove the screws Motor Motor Removing the motor Motor unit securing...

Page 91: ...reen Step 1 54401 A0 00 2 Press ORG Operation mode Step 2 54402 A0 00 3 Press yes to perform return to origin To cancel the operation press no Return to origin Step 3 4 54403 A0 00 4 This screen appea...

Page 92: ...erial part with bare hands this may cause rust Be careful not to drop any screw or bolt during cover removal work 1 Turn off the controller power 2 Place a sign indicating the robot is being adjusted...

Page 93: ...19 7 Remove the insert Removing the insert Step 7 Insert Consumable part 53420 A1 00 8 Install a new insert 9 Assemble in the reverse order of disassembly Step 6 g Step 4 FLIP X_maint_E_V1 50 indb 19...

Page 94: ...and mark the part positions versus each other so you can correctly reassemble the parts later Be sure to wear safety gloves before starting the work If you touch any steel material part with bare han...

Page 95: ...ive pulley Then use a narrow rod or similar tool to make the belt edge face upwards 3 Finally while making the belt mesh between the drive pulley and drive pulley idler turn the drive pulley so the be...

Page 96: ...he part positions versus each other so you can correctly reassemble the parts later Be sure to wear safety gloves before starting the work If you touch any steel material part with bare hands this may...

Page 97: ...e a sign indicating the robot is being adjusted Place a sign indicating the robot is being adjusted to keep others from operating the controller or operation panel 3 Enter the safety enclosure 4 Remov...

Page 98: ...th hot surface So be sure to tighten all the screws and bolts securely c CAUTION Be sure to wear safety gloves before starting the work If you touch any steel material part with bare hands this may ca...

Page 99: ...to origin must be performed again and the point data must be re specified When removing the parts check and mark the part positions versus each other so you can correctly reassemble the parts later Be...

Page 100: ...screws 4 securing the motor unit and remove the motor unit Removing the motor unit Step 7 Motor securing screws Do not remove the screws Motor unit 53405 AN 00 n NOTE Do not remove the motor securing...

Page 101: ...before starting the work If you touch any steel material part with bare hands this may cause rust Be careful not to drop any screw or bolt during cover removal work 1 Move the slider to around the cen...

Page 102: ...Remarks Belt KY1 M225E xxx BELT Motor drive unit KY1 M225F xxx BELT STROKE 150 to 2250 Movable part KY1 M225G xxx BELT STROKE 200 to 2500 Movable part B14 Part name Part number Remarks Belt KY1 M225E...

Page 103: ...ot cables 5 7 2 1 1 Cables for ERCD 5 7 3 Robot cables 200V specifications 5 8 T4LH T5LH T6L T9 T9H F8 F8L F8LH F10 F10H F14 F14H F17 F17L F20 B10 B14 B14H R5 R10 R20 3 1 Single axis robot cables 5 8...

Page 104: ...FLIP X_maint_E_V1 50 indb 2 18 05 15 15 01...

Page 105: ...eceptacle housing 5557 04R MOLEX 1 CN2 4 polarities 5 Receptacle 5556T MOLEX 4 CN2 Connector wiring Connector Pin No Signal Wire Color Connection CN1 1 S2 Yellow CN1 1 2 S4 Blue 2 3 S1 Red 3 4 S3 Blac...

Page 106: ...tacle housing 5557 04R MOLEX 1 CN2 4 polarities 5 Receptacle 5556T MOLEX 4 CN2 Connector wiring Connector Pin No Signal Wire Color Connection CN1 1 S2 Yellow CN1 1 2 S4 Blue 2 3 S1 Red 3 4 S3 Black 4...

Page 107: ...6 Receptacle housing SMR 02V B JST 1 CN2 2 polarities 7 Plug housing SMP 02V BC JST 1 CN4 2 polarities 8 Socket contact SHF 001T 0 8BS JST 2 CN4 Connector wiring Connector Pin No Signal Wire Color Co...

Page 108: ...sing SMR 02V B JST 1 CN2 2 polarities 7 Plug housing SMP 02V BC JST 1 CN4 2 polarities 8 Socket contact SHF 001T 0 8BS JST 2 CN4 9 Round terminal R1 25 4 1 Connector wiring Connector Pin No Signal Wir...

Page 109: ...4 polarities 5 Receptacle 175156 2 AMP 4 CN3 Connector wiring Connector Pin No Signal Wire Color Connection CN1 1 S2 Yellow Motor 2 S4 Blue 3 S1 Red 4 S3 Black 5 R1 White Red White 6 R2 Green Yellow W...

Page 110: ...01T P0 6 JST 2 CN1 Connector wiring Connector Pin No Signal Wire Color Connection CN1 1 BK Yellow Black 1 2 BK Yellow Black 2 The wire colors in show the motor wiring of the T9 T9H F10 F10H F14 F14H r...

Page 111: ...n PIN Parts Wire Controller CN1 FG 4 9 Resolver Drain wire S2 8 1 0 3sq Black Red S4 16 2 Yellow White S1 7 3 Blue Green S3 15 4 Orange White R1 6 5 Green Yellow R2 14 6 Brown White Faulty wiring dete...

Page 112: ...lver P 0 3sq Blue Red S4 2 2 Orange White S1 3 3 Green S3 4 4 Brown White R1 5 5 Grey Yellow R2 6 6 Red White FG 7 7 Drain wire Grey Heat shrinkable tube BK 13 1 Brake BK Black Blue BK 14 2 Yellow Whi...

Page 113: ...ite R1 5 5 Grey Yellow R2 6 6 Red White FG 9 7 Grey Heat shrinkable tube BK 17 1 Brake BK Black Blue BK 18 2 Yellow White ORG 12 2 ORG Pink Purple 24V 13 1 White Blue GND24 15 3 Blue Red Brown The wir...

Page 114: ...1 5 Grey Yellow R2 2 6 Red White FG 7 Drain wire Grey Heat shrinkable tube Brake BK 1 1 Brake BK 0 3sq Blue Red BK 2 2 Orange White ORG 24V 3 1 0 3sq Green ORG 4 2 Grey Yellow GND24 5 3 Red White The...

Page 115: ...s ORG BK wires To controller To robot 53506 N1 00 Parts Signal PIN Connection PIN Parts Wire Controller I O BK 13 1 To robot 0 3sq Black BK 31 2 Black 24V 1 3 Black ORG 8 4 Black GND24V 10 5 Black FLI...

Page 116: ...d S4 6 2 Orange White S1 7 3 Green S3 8 4 Brown White R1 1 5 Grey Yellow R2 2 6 Red White FG 7 Drain wire Grey Heat shrinkable tube The wire colors in show the flexing cable Power cable Power cable To...

Page 117: ...Resolver P3 0 3sq Red ZR S4 2 2 White S1 3 3 Green S3 4 4 White R1 5 5 Yellow R2 6 6 White FG 7 7 Drain wire MB 14 1 Brake BK3 0 3sq Blue MB 16 2 White 24V 9 1 ORG3 Purple ORG 12 2 Blue GND24 13 3 Br...

Page 118: ...ables for two axis multi robot 1 Robot combination 1st axis is FLIP X and 2nd axis is FLIP X Connection controller RCX221 222 240 340 Cables for multi robot To controller To robot 53501 R2 00 FLIP X_m...

Page 119: ...Resolver P2 Red S4 20 2 White S1 21 3 Green S3 22 4 White R1 23 5 Yellow R2 24 6 White DG 25 7 Drain wire Grey Heat shrinkable tube MB 32 1 Brake BK2 Blue MB 34 2 White 24V ORG2 27 1 Purple ORG 30 2 B...

Page 120: ...ications 5 16 2 Robot combination 1st axis is PHASER and 2nd axis is FLIP X Connection controller RCX221 240 340 Cables for multi robot To controller To robot 53501 R0 00 FLIP X_maint_E_V1 50 indb 16...

Page 121: ...R1 23 5 Yellow R2 24 6 White FG 25 7 Drain wire Grey Heat shrinkable tube MB 32 1 Brake BK2 0 3sq Blue MB 34 2 White 24V ORG2 27 1 Purple ORG 30 2 Blue GND24 31 3 Brown HLIM 28 0 3sq Gray GND24 29 Con...

Page 122: ...ications 5 18 3 Robot combination 1st axis is FLIP X and 2nd axis is PHASER Connection controller RCX221 240 340 Cables for multi robot To controller To robot 53503 R0 00 FLIP X_maint_E_V1 50 indb 18...

Page 123: ...2 4 White Z 2 5 Yellow Z 29 6 White V5 24 7 Blue DG 23 8 White FG 25 9 Drain wire Grey Heat shrinkable tube FG 0 75sq Gray 24V ORG2 27 1 Purple ORG 30 2 Blue GND24 31 3 Brown HLIM 10 Grey GND24 11 Con...

Page 124: ...ction PIN Parts Wire Encoder P1 S2 1 1 Resolver 0 3sq Red S4 2 2 White S1 3 3 Green S3 4 4 White R1 5 5 Yellow R2 6 6 White D G 7 7 Drain wire Grey Heat shrinkable tube Power cable Power cable To cont...

Page 125: ...S1 3 3 Green S3 4 4 White R1 5 5 Yellow R2 6 6 White D G 7 7 Drain wire Grey Heat shrinkable tube Brake BK 24V 1 1 Brake BK 0 3sq Blue GND24 2 2 White Power cable Power cable To controller To robot 53...

Page 126: ...cable KX7 M4751 1 Power cable KX7 M4752 0 Flexing cable KX7 M4720 0 Signal cable KX7 M4755 0 Power cable KX7 M4752 0 Cables for RDV X robot with brake and sensor Cable type Set model number Individual...

Page 127: ...40 Cable type Robot combination Cable model number 1st axis 2nd axis Flexing cable FLIP X FLIP X KX7 M4753 1 Connection controller RCX221 240 340 Cable type Robot combination Cable model number 1st ax...

Page 128: ...Replacing the insert was added to Chapter 4 Erroneous descriptions were corrected Ver 1 02 Dec 2012 Descriptions of Safety Instructions were changed Ver 1 03 May 2014 Descriptions of Safety Instructi...

Page 129: ...FLIP X_maint_E_V1 50 indb 2 18 05 15 15 01...

Page 130: ...downloaded from our company website Please use the following for more detailed information YAMAHA MOTOR CO LTD Robotics Operations 127 Toyooka Kitaku Hamamatsu Shizuoka 433 8103 Japan Tel 81 53 525 8...

Reviews: