4
Replacement
4-17
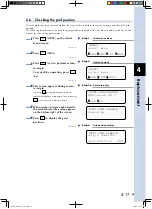
2.6 Checking the grid position
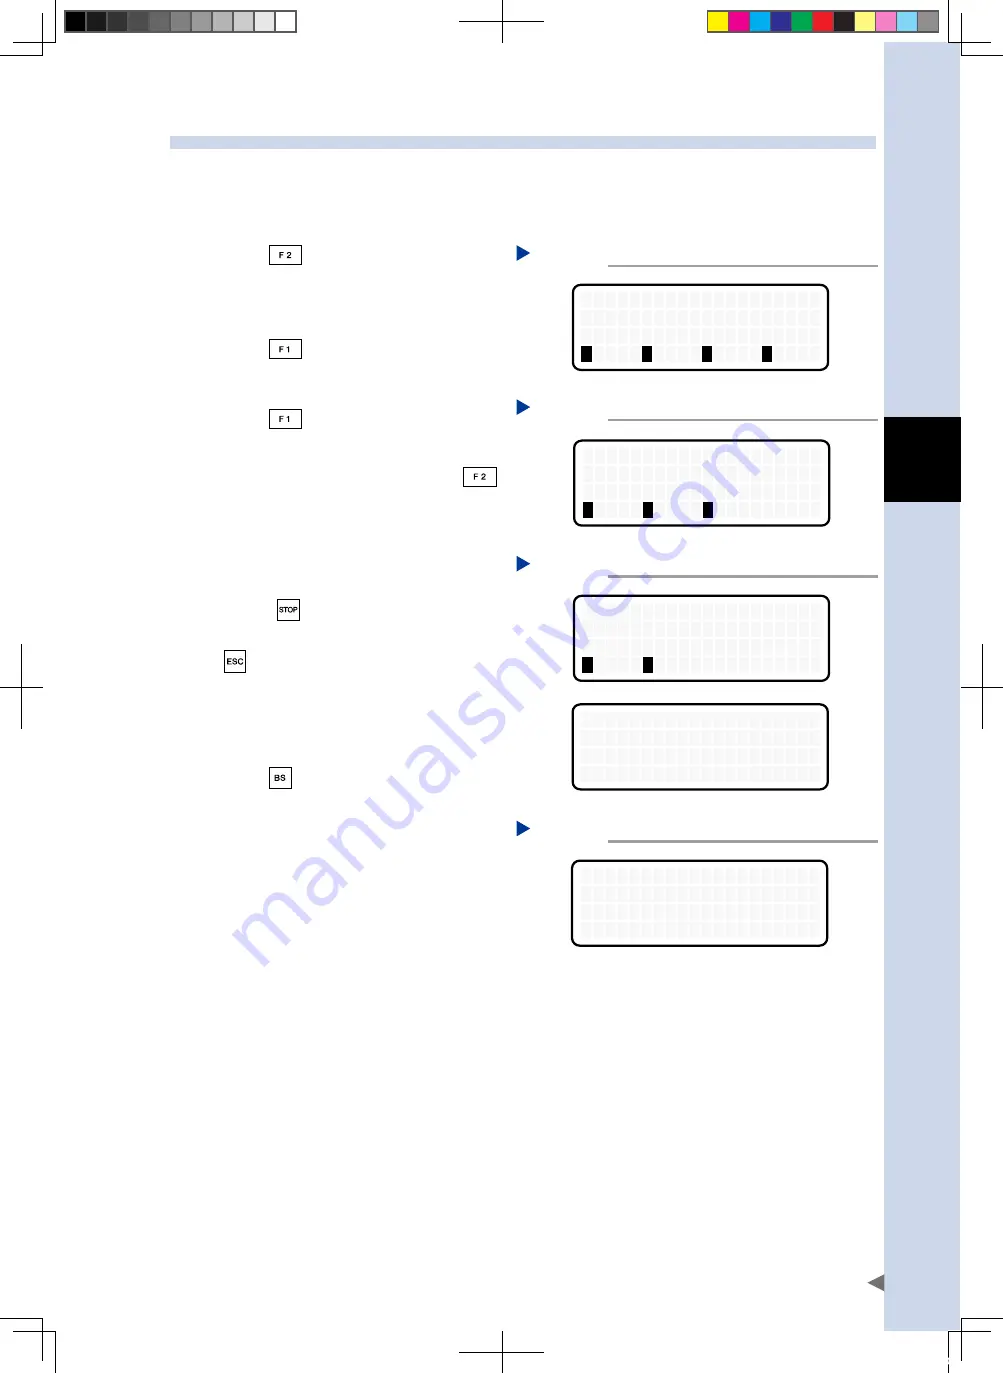
After the motor has been replaced, follow the steps below to perform the return-to-origin and check the grid
position.
The following describes how to check the grid position of the model SR1. For other controller models, see the
manual for relevant controller model.
1
Press
(OPRT) on the initial
menu screen.
Initial menu screen
Step 1
[MENU]
select menu
1
EDIT
2
OPRT
3
SYS
4
MON
54401-A0-00
2
Press
(ORG).
Operation mode
Step 2
[OPRT]
select menu
1
ORG
2
STEP
3
AUTO
54402-A0-00
3
Press
(yes) to perform return-
to-origin.
To cancel the operation, press
(no).
Return-to-origin
Step 3-4
[OPRT-ORG-SEARCH]
ORG search OK ?
1
yes
2
no
[OPRT-ORG-SEARCH]
searching ...
54403-A0-00
4
This screen appears during return-
to-origin.
Pressing
during operation stops the
robot and displays a message. Then pressing
returns to the screen of Step 2.
5
When return-to-origin ends normally,
the machine reference value appears
on the bottom right of the screen.
6
Press
to display the grid
position.
Grid position display
Step 6
[OPRT-ORG-SEARCH]
origin complete
grid position 50%
54404-A0-00
FLIP-X_maint_E_V1.50.indb 17
18/05/15 15:01
Summary of Contents for FLIP-X Series
Page 2: ...FLIP X_maint_E_V1 50 indb 2 18 05 15 15 00...
Page 40: ...FLIP X_maint_E_V1 50 indb 2 18 05 15 15 01...
Page 41: ...Chapter 1 Overview Contents 1 Overview 1 1 FLIP X_maint_E_V1 50 indb 1 18 05 15 15 01...
Page 42: ...FLIP X_maint_E_V1 50 indb 2 18 05 15 15 01...
Page 44: ...FLIP X_maint_E_V1 50 indb 2 18 05 15 15 01...
Page 46: ...FLIP X_maint_E_V1 50 indb 2 18 05 15 15 01...
Page 60: ...FLIP X_maint_E_V1 50 indb 2 18 05 15 15 01...
Page 72: ...FLIP X_maint_E_V1 50 indb 12 18 05 15 15 01...
Page 74: ...FLIP X_maint_E_V1 50 indb 2 18 05 15 15 01...
Page 104: ...FLIP X_maint_E_V1 50 indb 2 18 05 15 15 01...

