Version 1.0
PartPro150 xP Operation Manual
35
KEYBOARD SHORTCUTS AND MOUSE CONTROLS
To work more efficiently in the software, you can use the following keyboard shortcuts and mouse controls:
Ctrl + A
: Select all objects on the workspace
Alt + drag the right or left button
: Move the object on X/Y axis
Delete
: Delete the selected objects from the platform.
Ctrl + left click:
Multiple selection
Drag the mouse wheel
: Pan the workspace
Drag the right or left button
: Change the view
CONNECTING TO THE PRINTER
After plugging in the USB cable between the printer and the computer or completing the configuration of wireless
or Ethernet network on the printer, initial the connection with the following procedures:
1.
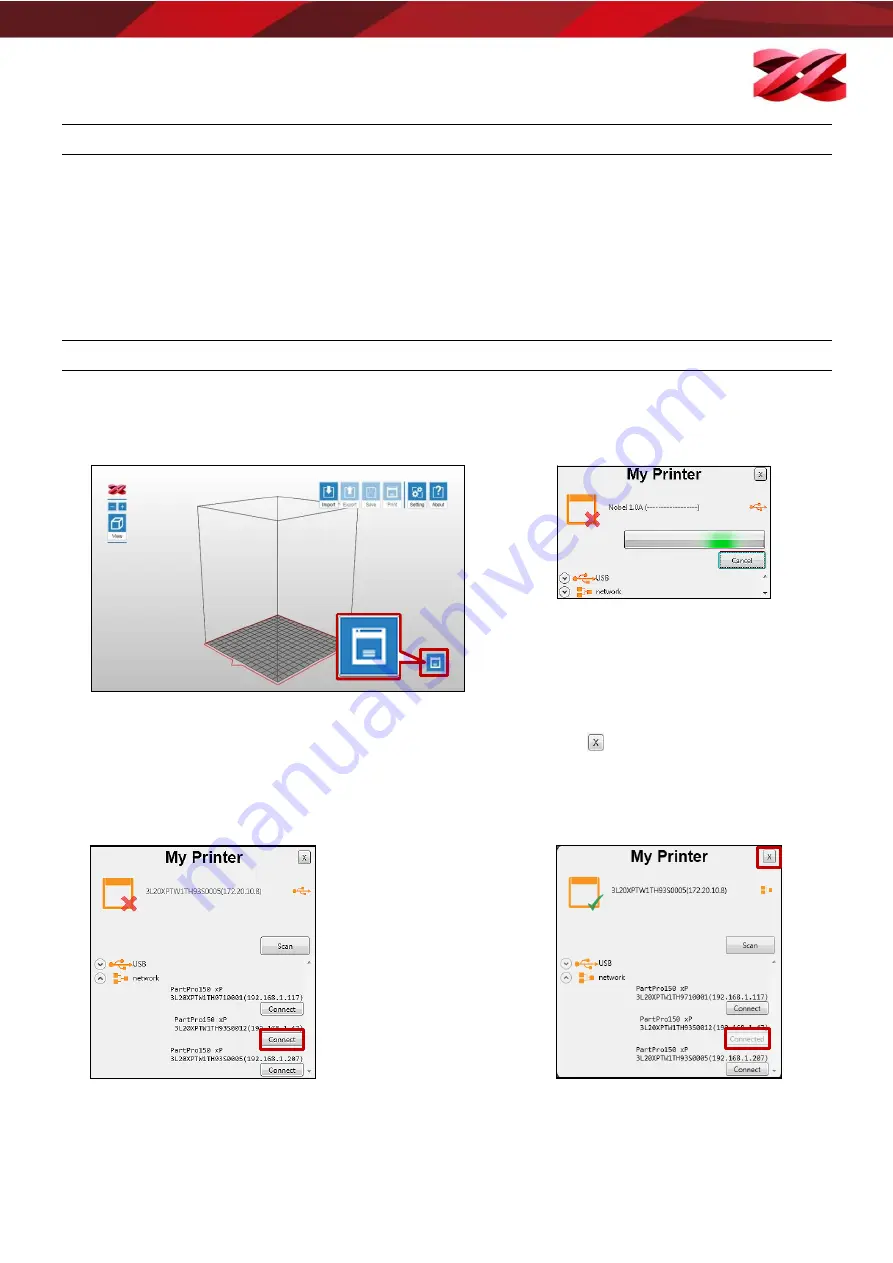
Click the printer monitor on the lower right corner.
2.
Wait while the software is scanning for the
available printers.
3.
All available printers will be listed at the bottom of [My Printer].
Cable connected printers will be listed under [USB] while other
machines connected through wireless or Ethernet network under
[Network].
Find the targeted printer with its serial number or IP address, and
click [Connect] to initial the connection.
If the target device does not appear here, click [Scan] button to retry
searching for the device.
4.
When the connection is set, [Connect]
button will change to [Connected]. You can
click
to close the window and begin
other operation.


