Version 1.0
PartPro150 xP Operation Manual
25
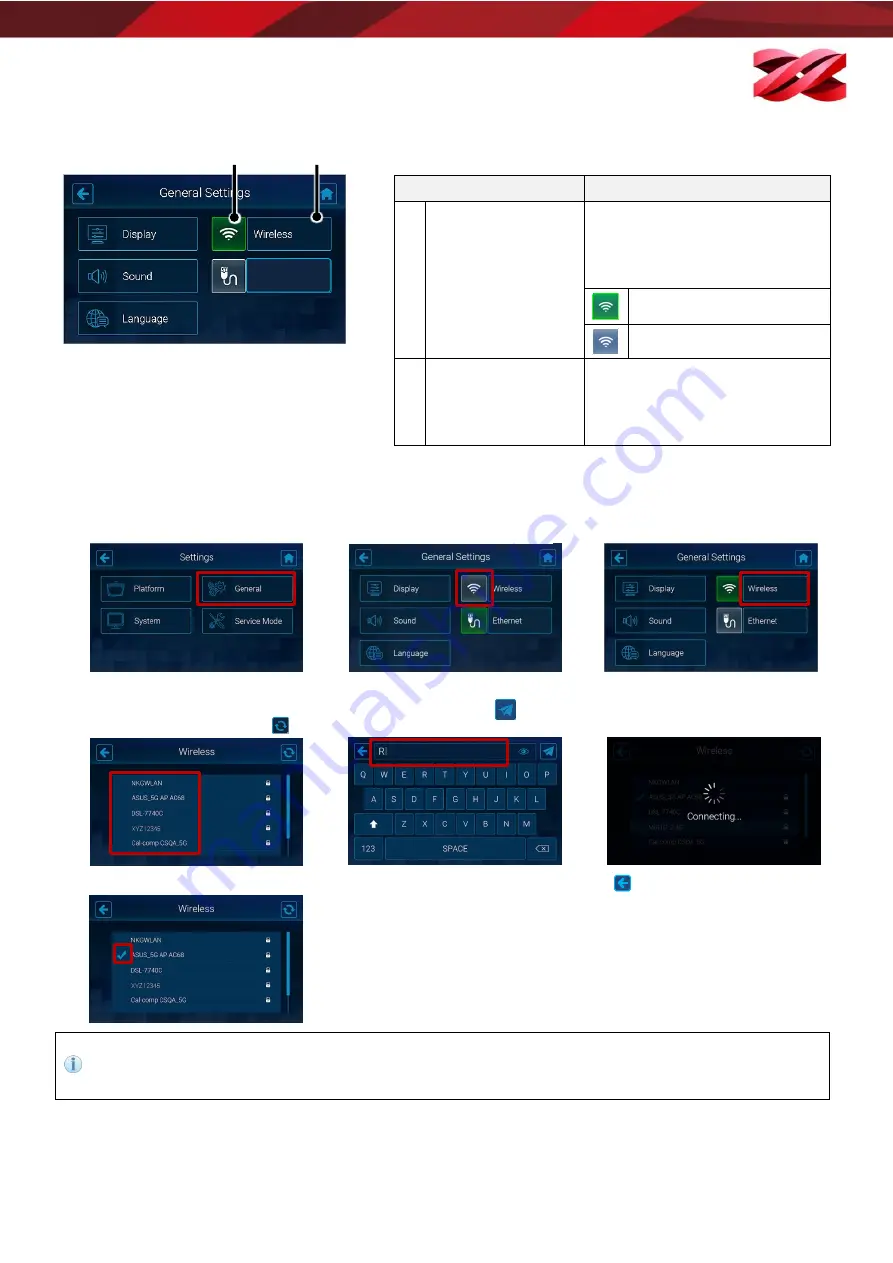
Structure of the Wireless icon
Connecting to a Wi-Fi network
1.
From the main menu, go to
[SETTINGS] > [General].
2.
Tap the wireless connection icon
to enable the function. Skip this
step if the icon is shown in green.
3.
Tap [Wireless] to enter the setting.
4.
Tap a WiFi SSID from the list of
available Wi-Fi networks. To
rescan available network, tap
5.
Enter the password for the secure
Wi-Fi network, and tap
to join
the network.
6.
Wait while the system is
connecting to the selected Wi-Fi
network.
7.
Connection is set up when a tick appears at the left side of the selected network. Tap
to exit the function.
The Wireless communication is only effective when your computer is connected to the same network,
Wireless and Ethernet connectivity are unable to go live at the same time. Ethernet will be disabled
automatically when Wireless connectivity is enabled.
Item
Description
A
Switch of Wireless
connectivity
Tap on this icon to switch on/off
the Wireless connectivity. The
icon displays in different color for
showing current status.
Wireless configuration enabled.
Wireless configuration disabled.
B
Wireless Setup
When Wireless configuration is
enabled with the icon shown in
green, you can press this button
to set up the Wireless connection.
A
B
Ethernet


