Version 1.0
PartPro150 xP Operation Manual
27
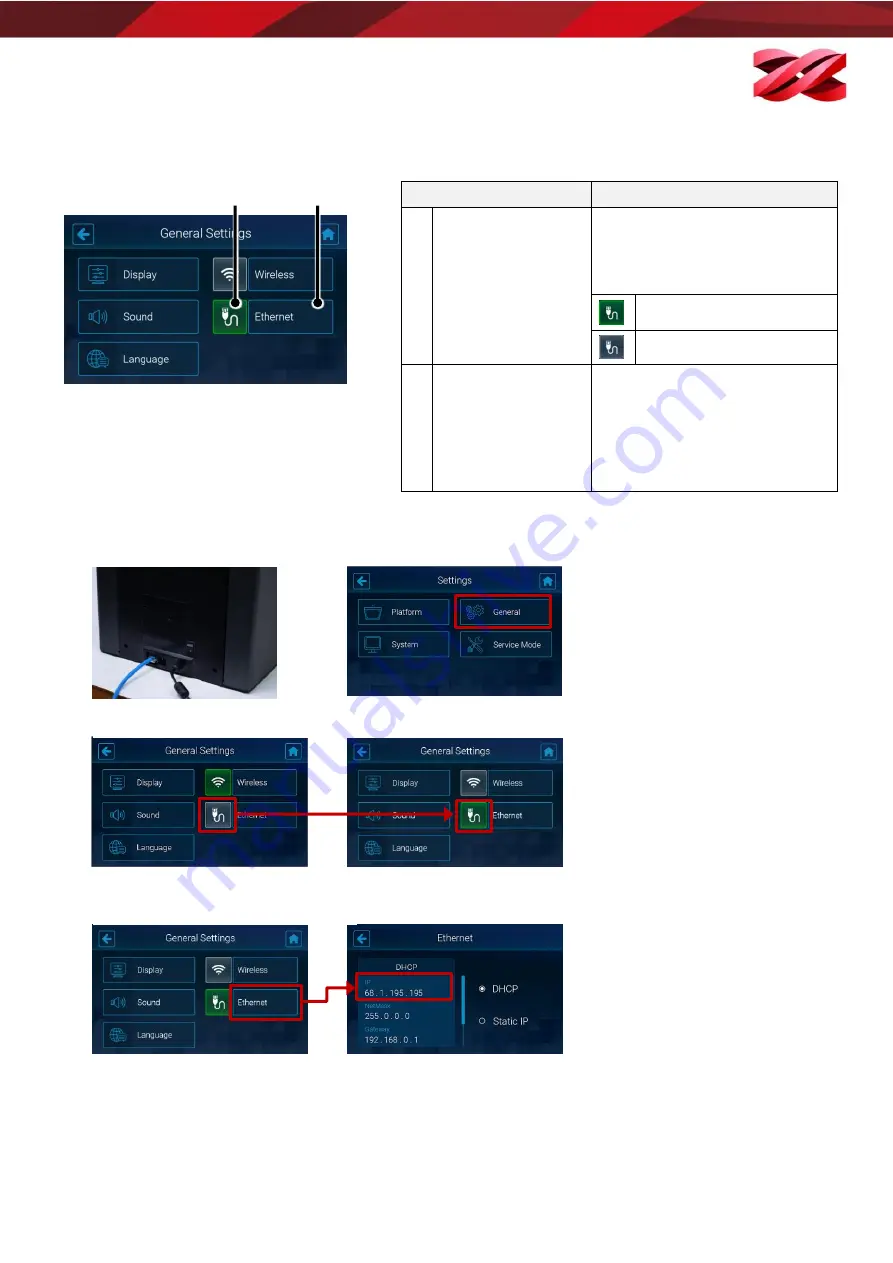
Structure of the Ethernet icon
Enabling Ethernet connection
1.
Plug in the Ethernet cable to the
Ethernet Port at the back of the
printer.
2.
From the main menu, go to
[SETTINGS] > [General].
3.
Tap the Ethernet connection icon to enable the function. Skip this step if the icon is shown in green.
4.
The printer will obtain an IP address automatically. Tap [Ethernet] to view the IP settings. When IP settings are
available in this page, the network is ready.
Item
Description
A
Switch of Wireless
connectivity
Tap on this icon to switch on/off
the Ethernet connectivity. The
icon displays in different color for
showing current status.
Ethernet configuration enabled.
Ethernet configuration disabled.
B
Ethernet Setup
When Ethernet configuration is
enabled with the icon shown in
green, you can press this button
to view the auto-assigned IP
address or set up the Ethernet
connection.
A
B


