recorded data of the earliest days when there is no enough space.
Note:
When there is no enough space of HDD, system will delete the record
data according to the length of saving time of each camera. E.g.: there are four
cameras, the 1
st
camera saves 2 days, the 2
nd
camera saves 5 days, the 3
rd
camera saves 10 days, and the 4
th
camera we set “auto” mode. If there is
enough space, the 4
th
camera’s record data will save in HDD, while there are
no enough space, system will delete data automatically. If the 4
th
camera’s
record data has been saved more than 10days, system will delete the 4
th
camera’s data. If the 4
th
camera’s record data has been saved less than 10
days, but the 3
rd
camera’s data is more than 10 days, system will delete the 3
rd
camera’s data. So, even if you set the 3
rd
camera’s record data saving 10 days,
the data that is saved less than 10 days become possible. System will delete
the record data from the earliest date.
Recording Schedule Setup
(Set for cameras of local board cards and IP
Cameras.)
Tips:
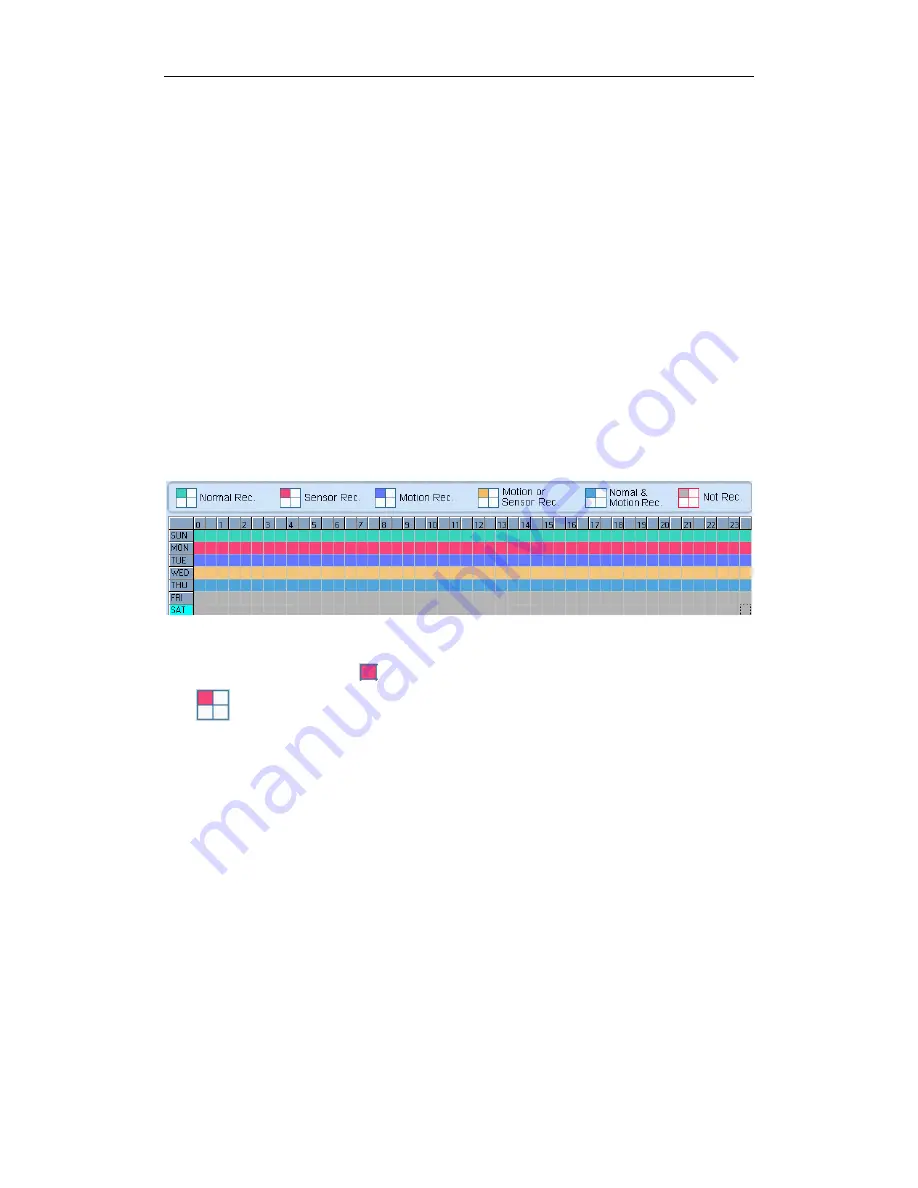
One block of pane
means half an hour. Firstly click record mode
icon
, then click schedule diagram, hold down the mouse and move it to
select large area (Drag & Drop).
1. Normal Record (green): Hybrid NDVR system always record video
(e.g. Sun.);
2. Sensor Record (red): Hybrid NDVR system begins to record video
only when there are POS or ACU actions(e.g. Monday);
Note:
The time setup must be corresponding with Check Alarm setups in Sensor
setup otherwise it can
’t work properly.
3. Motion Record (Blue): Hybrid NDVR system begins to record video
only when it detects moving object (e.g. Tuesday.);
4. Motion or Sensor Record (yellow): Combine with above 2 and 3
function (e.g. Wednesday);
5. Normal & Motion Record (light blue): Hybrid NDVR system records in
motion detection record when it detects moving object and in normal


