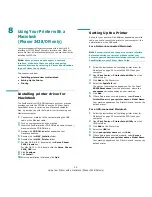
Using Your Printer with a Macintosh (Phaser 3428/DN only)
25
8
Using Your Printer with a
Macintosh
(Phaser 3428/DN only)
Your printer supports Macintosh systems with a built-in USB
interface or 10/100 Base-TX network interface card. When you
print a file from a Macintosh computer, you can use the driver by
installing the PPD file.
N
OTE
:
Some printers do not support a network
interface. Make sure that your printer supports a
network interface by referring to Printer Specifications
in your Printer User’s Guide.
This chapter includes:
• Installing printer driver for Macintosh
• Setting Up the Printer
• Printing
Installing printer driver for
Macintosh
The PostScript driver CD-ROM that came with your machine
provides you with the PPD file to use the PS driver, Apple
LaserWriter driver, for printing on a Macintosh computer.
Also, it provides you with the Twain driver for scanning on a
Macintosh computer.
1
Connect your machine to the computer using the USB
cable or the Ethernet cable.
2
Turn on your computer and the machine.
3
Insert the PostScript driver CD-ROM which came with your
machine into the CD-ROM drive.
4
Double-click
CD-ROM icon
that appears on your
Macintosh desktop.
5
Double-click the
MAC_Installer
folder.
6
Double-click the
MAC_Printer
folder.
7
For Mac OS 8.6~9.2, double-click the
Xerox Phaser
3428
_
Classic
icon.
For Mac OS 10.1~10.4, double-click the
Xerox Phaser
3428_OSX
icon.
8
Click
Continue
.
9
Click
Install
.
10
After the installation is finished, click
Quit
.
Setting Up the Printer
Set up for your printer will be different depending on which
cable you use to connect the printer to your computer—the
network cable or the USB cable.
For a Network-connected Macintosh
N
OTE
:
Some printers do not support a network interface.
Before connecting your printer, make sure that your
printer supports a network interface by referring to Printer
Specifications in your Printer User’s Guide.
1
Follow the instructions on “Installing printer driver for
Macintosh” on page 25 to install the PPD file on your
computer.
2
Open
Print Center
or
Printer Setup Utility
from the
Utilities folder.
3
Click
Add
on the Printer List.
4
Select the
AppleTalk
tab.
The name of your machine appears on the list. Select
XRX000xxxxxxxxx
from the printer box, where the
xxxxxxxxx
varies depending on your machine.
5
Click
Add
.
6
If Auto Select does not work properly, select
Xerox
in
Printer Model
and
your printer name
in
Model Name
.
Your machine appears on the Printer List and is set as the
default printer.
For a USB-connected Macintosh
1
Follow the instructions on “Installing printer driver for
Macintosh” on page 25 to install the PPD file on your
computer.
2
Open
Print Center
or
Printer Setup Utility
from the
Utilities folder.
3
Click
Add
on the Printer List.
4
Select the
USB
tab.
5
Select
your printer name
and click
Add
.
6
If Auto Select does not work properly, select
Xerox
in
Printer Model
and
your printer name
in
Model Name
.
Your machine appears on the Printer List and is set as the
default printer.

