Service Parts Disassembly
Phaser 3330 and WorkCentre 3335/3345
Xerox Internal Use Only
Service Manual
4-66
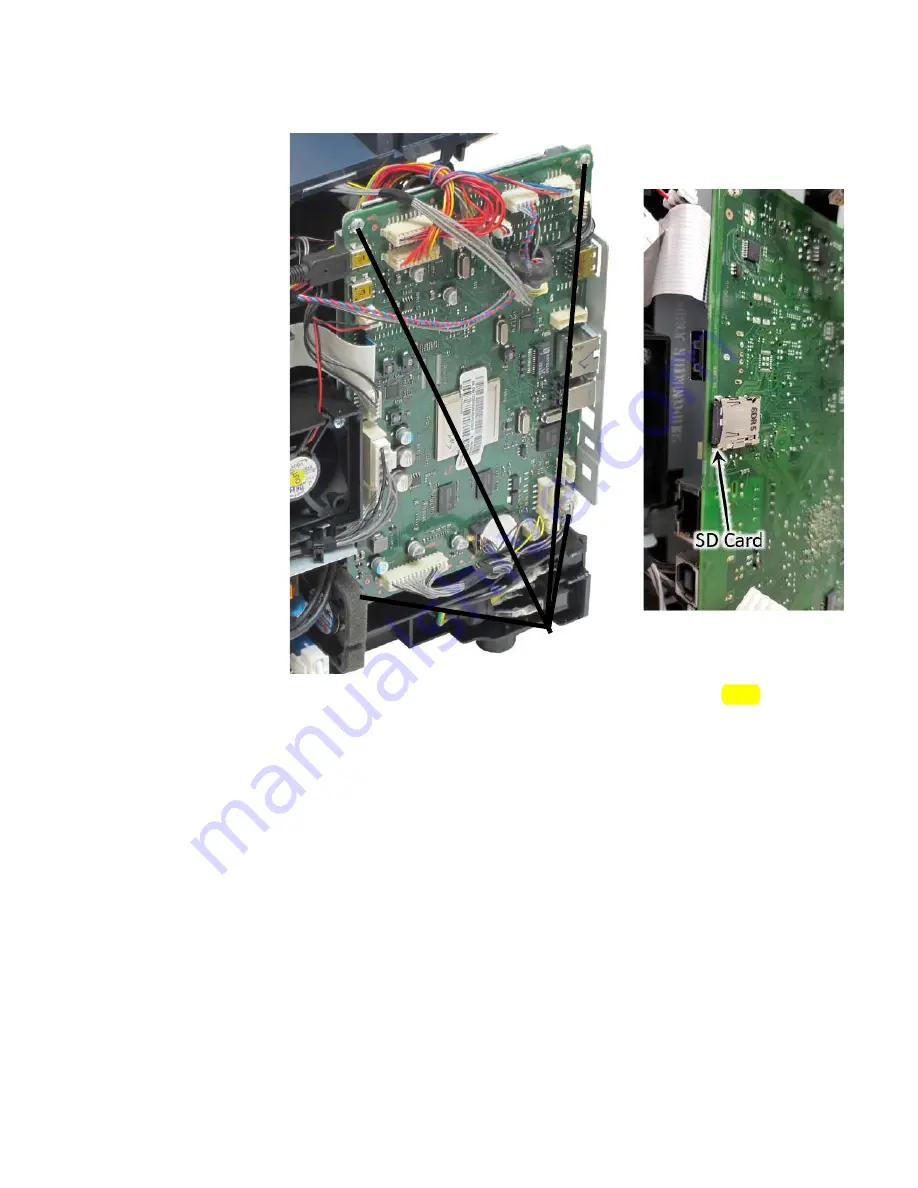
12. Remove 4 screws (silver, flanged, tapping 10mm)
13. Remove SD card (
Parts List 6.1 WorkCentre 3335/3345 Main
, PL 6.1) from slot on the back of the
defective Main PWB and install into the slot on the back of the new Main PWB.
14. Install new Main PWB into the device.
15. Power on the device - a power on Memory Clear will be triggered. The message ‘No configuration
is present in device, self-recovering’ will show on the UI for a few seconds. After self-recovery, the
UI will show the Home screen.
16. At the Home screen, reboot the device and the Installation Wizard appears.
17. Walk through the Installation Wizard.
18. Re-input machine serial number (original serial number is lost with Main PWB replacement).
•
For
WC3335/WC3345
: Enter
Diagnostics
-
Copier Diagnostics
-
Serial Number Reset
•
For
P3330
: Enter
Diagnostics
-
Other Routines
-
Set Machine Serial Number
19. Update the Firmware (FW) to the latest general release or SMP, or to the specific FW that may be
authorized for the use by the customer. Refer to (
) for Firmware upgrade instructions.
20. If the device billing plan is SOLD, then proceed to Step 21.
If device billing plan should be Metered, then follow the steps below for converting the machine
back to Metered (all spare Main PWB’s are configured as SOLD):
a.
WC3335/WC3345:
SCREWS (4)
Summary of Contents for Phaser 3330
Page 3: ...Phaser 3320 and WorkCentre 3315 3325 Xerox Internal Use Only Service Manual 1 2...
Page 11: ...Contents Phaser 3330 and WorkCentre 3335 3345 Xerox Internal Use Only Service Manual x...
Page 409: ...Parts Lists Phaser 3330 and WorkCentre 3335 3345 Xerox Internal Use Only Service Manual 5 64...
Page 425: ...Wiring Data Phaser 3330 and WorkCentre 3335 3345 Xerox Internal Use Only Service Manual 7 6...
Page 431: ...Wiring Data Phaser 3330 and WorkCentre 3335 3345 Xerox Internal Use Only Service Manual 7 12...


