background image

C H A P T E R   F O U R  

4-4


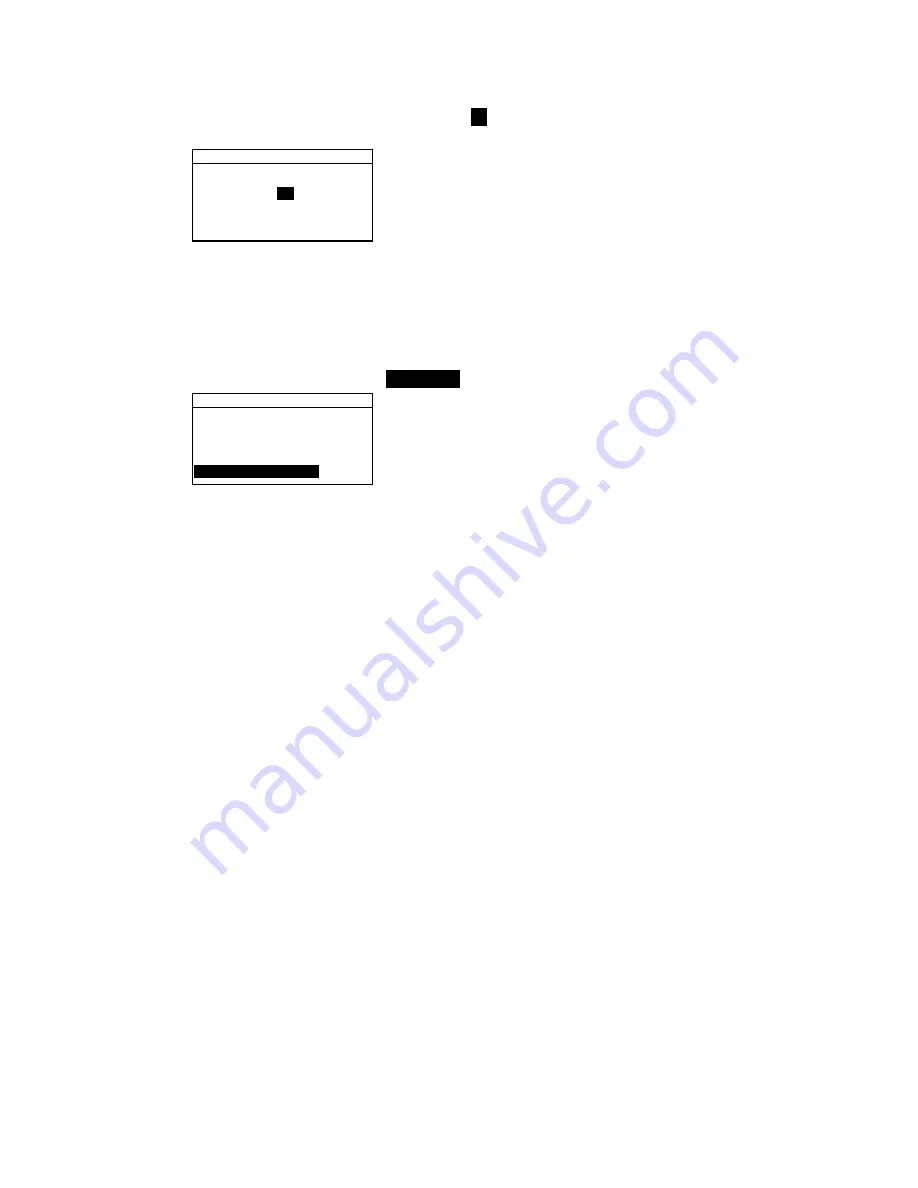
3.


Use the Tab keys 

$@

 to highlight the averaging 

##

.

 Press 

the Enter key 

#

 to access the alphanumeric editor. 

E d i t   A v e r a g i n g   #  

                C L E A R  


↓  


0 1


↑  

 
       Save & Exit 

4.


Use the Tab keys 

$@

 to highlight desired number and press 

the Enter 

#

 key to exit editor. 

5.


Use the Tab keys 

$@

 to highlight 

Save & Exit

 and press 

Enter 

#

 key. 

Diff Disp 

To set the Difference Display Option: 
1.


Use the Tab keys 

$@

 to highlight 

Diff Disp

M e a s u r e   O p t i o n s  

S t o r e   S a m p l e s   i s   O f f  

P a s s / F a i l   i s   O f f  

A u t o   S t d   i s   O n  

A v e r a g i n g     : 1  

D i f f   D i s p     : O f f


2.


Press the Enter key 

#

 to open the 

Diff Display

 menu. 

3.


Use the Tab keys 

$@

 to highlight the desired display 

method: 

Off

Numbers

, or 

Words

4.


Press the Enter 

#

 key to save your setting and return to the 

Measure Options menu. 

Color Options 

The Color Options configuration allows you to determine the 
following settings: 


Active Functions

 –Allows you to select the colorimetric 

functions and indices that are available in the color data 
parameters. An arrow (>) indicates the function is active.


Active Illum/Obs

 – Allows you to select the illuminant/ 

observer combinations that are available in the color data 
parameters. An arrow (>) indicates the illum/obs 
combination is active.


Opacity 

– Determines the data display method for opacity 

measurements, and allows k1 and k2 value editing. 

Data Display

 – Select Over White, Over Black, or 

Color at 100%. 

Summary of Contents for 939

Page 1: ...939 S P E C T R O D E N S I T O M E T E R Operator s Manual ...

Page 2: ...chnology As a result your X Rite instrument is a rugged and reliable instrument whose performance and design exhibit the qualities of a finely engineered instrument which is not surpassed To fully appreciate and protect your investment we suggest that you take the necessary time to read and fully understand this manual If the need arises please don t hesitate to call us Thank you for your trust an...

Page 3: ...e la classe A est conforme à la norme NMB 003 du Canada AVERTISSEMENT Des câbles d interface blindés doivent être utilisés afin de se conformer aux règlements européens et FCC USA sur l émission ACHTUNG Um das Produkt innerhalb der FCC Vereinigten Staaten und den europäischen Emissions Richtlinien zu halten müssen geschirmte Schnittstellenkabel verwendet werden AVISO Para satisfacer las deseadas r...

Page 4: ...77 100 240 V Veillez aussi à utiliser uniquement la batterie X Rite SP62 79 33 d autres batteries pouvant exploser et causer des blessures AVVERTENZA Non usare un altro caricabatterie che non è del pezzo X Rite SE30 77 100 240V per evitare il rischio di malfunzionamento dell apparecchio Usare solamente gli accumulatori SP62 79 33 di X Rite è possibile che altri tipi possano scoppiare e causare dan...

Page 5: ...s Conformance EMC 89 336 EEC LVD 73 23 EEC Warning This is a class A product In a domestic environment this product may cause radio interference in which case the user may be required to take adequate measures WEEE As of August 13 2005 X Rite products meet the European Union Waste Electrical and Electronic Equipment WEEE directive Please refer to www xrite com for more information on X Rite s comp...

Page 6: ...ce 1 6 Attaching the Wrist Strap 1 6 2 User Interface 2 1 What to Expect 2 1 Navigation Basic Key Operation 2 1 Tab Down key 2 2 Tab Up key 2 2 Enter key 2 2 Escape key 2 2 Main Menu key 2 2 Read key 2 2 Colorimetric Screens 2 3 Data Storage Information 2 3 Color Data Parameters 2 3 Color Data 2 3 Densitometric Screens 2 4 Function and Status 2 4 Color Option 2 4 User Dialog 2 4 Measurement List 2...

Page 7: ...rument on the Reference 3 2 Calibration Procedure 3 3 4 Setting Instrument Configuration 4 1 General Information 4 1 Language 4 1 Measure Options 4 2 Store Samples 4 3 Pass Fail 4 3 Auto Std 4 3 Averaging 4 3 Diff Disp 4 4 Color Options 4 4 Active Functions 4 5 Active Illum Obs 4 6 Opacity 4 6 Strength 4 7 Metamerism Index 4 8 Ecmc Factors 4 9 E94 Factors 4 9 Shade Sort 4 10 Density Options 4 10 C...

Page 8: ...eper 4 23 Clock Adjust 4 23 Display 4 25 Main Menu Options 4 26 Load Factory Defaults 4 27 5 Instrument Operation 5 1 Standards 5 1 Selecting Standard Number 5 2 Entering Standard Data 5 2 Entering Standard Name 5 5 Setting Tolerance Limits 5 5 Setting Shade Sort Options 5 7 Locking Unlocking Standard 5 9 Deleting the Standard 5 10 Projects 5 11 Selecting Project Number 5 11 Assigning Standards to...

Page 9: ...nce Graph 5 21 Strength 5 22 Strength Measurement 5 23 Opacity 5 24 Opacity Measurement 5 25 Analyze 5 26 Compare 5 27 Density 5 28 Selecting Color 5 28 Measuring Paper 5 28 Measuring a Sample 5 29 Viewing the Density Graph 5 30 Dot Tone 5 31 Selecting Color 5 32 Measuring Paper 5 32 Measuring Dot Tone Procedure 5 33 Trap 5 34 Measuring Paper 5 34 Measuring Trap Procedure 5 35 Hue Grayness 5 36 Me...

Page 10: ...intenance 6 1 Repair Information 6 1 Reading Lamp Replacement Information 6 1 Cleaning the Instrument 6 1 General Cleaning 6 1 Cleaning the Optics 6 2 Cleaning the Calibration Reference 6 2 Replacing the Battery Pack 6 3 7 Appendices 7 1 Instrument Specifications 7 1 8mm aperture Error Messages 7 1 Changing the Aperture 7 3 ...

Page 11: ...t names mentioned are the properties of their respective holders Warranty Information X Rite Incorporated X Rite warrants each instrument manufactured to be free of defects in material and workmanship excluding battery pack for a period of one year unless different local regulations apply This warranty shall be fulfilled by the repair or replacement at the option of X Rite of any part or parts fre...

Page 12: ...Serial Interface 1 7 Attaching the Wrist Strap 1 7 Instrument Description The X Rite 939 Spectrodensitometer s compact spectral engine utilizes X Rite s DRS Dynamic Rotational Sampling technology allowing accurate and precise measurements This instrument has intuitive keys and a high contrast graphic display Target Window Graphic Display I O Port Power Input Escape Key Tab Key Tab Key Main Menu Ke...

Page 13: ...status of measurements Quick Color Compare An operator can take a quick measurement and comparison of two colors This allows the instrument to be used for taking quality control readings in a time efficient manner without the necessity of creating tolerances Unpack and Inspect After removing the instrument from the shipping carton inspect it for damage If any damage has occurred during shipping im...

Page 14: ...n the shoe perpendicular to the instrument housing 2 Carefully rotate the instrument over and rest it on its top 3 Slide the battery pack into the compartment with the battery connector facing down and to the back of the instrument 4 Press down on the pack until the connector is properly seated and the tabs click into position Apply Power The Battery switch located on the back of the instrument tu...

Page 15: ...e battery pack must remain in the instrument at all times to operate Before initial remote use of the instrument charge the battery pack for approximately four hours However if immediate use is required the instrument can be operated tethered to the AC adapter during battery charging To attach the AC adapter 1 Verify that the voltage indicated on the adapter complies with the AC line voltage in yo...

Page 16: ...then activated using the Read key see Instrument Configuration for more details on the Read key NOTE The instrument must be calibrated with the target window removed when using the instrument with the shoe extended To Unlatch the Instrument Shoe 1 Hold the shoe next to the instrument housing and lift upward on the spring loaded latch 2 Slowly allow the shoe to pivot toward the back of the instrume...

Page 17: ... Insert the modular end of the interface cable into the I O port located on the back of the instrument The cable connector clicks when properly attached 2 If required attach an additional adapter to the other end of the cable Attaching the Wrist Strap A security wrist strap is included to safeguard against accidentally dropping of the instrument The strap is attached to the instrument by simply se...

Page 18: ...sts all available modes The right side of the screen lists instrument model and firmware version information Navigation Basic Key Operation Perform reading and menu option navigation with the six keys arranged around the display screen Each key has a unique symbol for performing a specific operation MAIN MENU QA Analyze Compare Strength Opacity X Rite 939 XXXX Read Main Menu Key Instrument Read Ke...

Page 19: ...tion between on and off When entering an active mode from the main menu the active mode is displayed with the highlight on the first required operation in the mode Escape key Backs up the instrument screen one menu level For example if an option or value is being modified at the time the key is pressed the edits are aborted and the previous screen or menu appears The only exception to this is when...

Page 20: ...e is highlighted displays the setup information for the selected item When the instrument is in storage mode repeatedly pressing the Enter key with the sample number highlighted pages through samples associated with the current standard and project or hold down the Enter key to access a specific number from the editor dialog When in Analyze mode this area displays the standard s name Pressing the ...

Page 21: ...ed pages through the available color options User Dialog This portion of the screen displays the current mode or condition of the instrument For example measurement sequence information appears here during a reading Measurement List This portion of the screen displays the measurement items available for the active function Measurement Data This portion of the screen instantaneously displays measur...

Page 22: ...ist box 1 Use the Tab keys to highlight the desired selection or function 2 Press the Enter key to access the pop up list box Configuration Language English Measure Options Color Options Database Tools Hardware Setup Set Language English Deutsch Français Pop Up List Box CONFIGURATION Language English Measure Options Color Options Density Options Database Tools Configuration Proj 1 Cartons Std 1 Re...

Page 23: ...Use the Tab keys to highlight the desired item 2 Press the Enter key to select the highlighted character and exit the editor Selecting Single or Multiple Items Many settings and modes allow you to select single or multiple items from a list or menu Lists can be found in every type of screen menus editors or mode screens To select a single item from a list 1 Use the Tab keys to highlight the desire...

Page 24: ...ailed tolerancing requirements in QA mode Important Measurement Techniques In order for the instrument to obtain accurate and repeatable measurements the bottom of the shoe must be flat on the surface to be measured When measuring curved items where a flat surface is not available a fixture should be used A fixture allows accurate positioning of the sample tangent to the measurement plane If the i...

Page 25: ...C H A P T E R T W O 2 8 ...

Page 26: ...e Ref Status Cal Required S N Ap Size 8 0mm The bottom portion of the calibration screen displays information regarding the calibration status cal plaque serial number and instrument aperture size The status line displays as either Cal OK or Cal Required Cal required indicates that calibration is needed Cal Ok indicates that no calibration is required at this time The serial number displayed on th...

Page 27: ...easurements and a trap opening for black calibration measurements The instrument shoe fits snuggly in both positions Refer below for proper positioning NOTE Make sure the calibration reference is clean before use Refer to the calibration cleaning procedure in Section Six White Reading Position Black Reading Position White Ceramic Disk Port Opening ...

Page 28: ...t Calibrate Press Enter key to access the calibration mode CALIBRATION Measure White Ref Status Cal Required S N Ap Size 8 0mm 2 Position the target window over the white ceramic disk as previously explained 3 Press the instrument firmly to the shoe Hold steady until the screen indicates the white calibration is completed Release instrument when Success is displayed 4 If an aperture change was mad...

Page 29: ...C H A P T E R T H R E E 3 4 ...

Page 30: ... Press the Enter key to access the Configuration Menu MAIN MENU Calibrate Standards Projects Run Job X Rite 939 XXXX Language The Language configuration allows you to select the language you want to display on your instrument The instrument resets whenever the language is changed To select a language 1 Use the Tab keys to highlight Language 2 Press the Enter key to access the Language editor Confi...

Page 31: ... be manually selected before a difference measurement Averaging Sets the averaging option Selects the number of readings averaged into a single measurement 0 99 Diff Disp Selecting Numbers causes delta values to display during difference measurements This option is automatically enabled when standards are entered or downloaded from a software program When set to Words color difference is displayed...

Page 32: ...e Options Store Samples is Off Pass Fail is Off Auto Std is On Averaging 1 Diff Disp Off 2 Press the Enter key to toggle between Off and On Auto Std To select the Auto Std status 1 Use the Tab keys to highlight Auto Std Measure Options Store Samples is Off Pass Fail is Off Auto Std is On Averaging 1 Diff Disp Off 2 Press the Enter key to toggle between Off and On Averaging To set the Averaging Opt...

Page 33: ...he Tab keys to highlight the desired display method Off Numbers or Words 4 Press the Enter key to save your setting and return to the Measure Options menu Color Options The Color Options configuration allows you to determine the following settings Active Functions Allows you to select the colorimetric functions and indices that are available in the color data parameters An arrow indicates the func...

Page 34: ...Used to edit the Lightness and Chromaticity values for the selected calculation E94 Factors Used to edit the Lightness and Chromaticity values for the selected calculation Shade Sort Allows you to enable on or disable the shade sort capabilities used in the QA mode Shade sort options are accessed through the Standards mode and allow setting the shade sort and box size To open the Color Options men...

Page 35: ...llum Obs Color Options Active Functions Active Illum Obs Opacity Color Strength Tristimu Metamerism MI 2 Press the Enter key to access the Act Illum Obs editor 3 Use the Tab keys to highlight the desired combination 4 Press the Enter key to toggle the combination active or inactive The indicates the illum obs is enabled 5 After edits are complete press the Escape key to save and exit Opacity To ac...

Page 36: ... the Enter key to access the Enter Const editor 2 Use the Tab keys to highlight the desired digit arrows above and below designate the selection Press the Enter key to access the alphanumeric editor NOTE Highlighting CLEAR and pressing the Enter key is a quick method to zero the value 3 Use the Tab keys to highlight the desired number and press the Enter key to exit editor 4 When editing is comple...

Page 37: ...nd Min E Metamerism Index To access the Metamerism Menu 1 Use the Tab keys to highlight Metamerism Color Options Active Functions Active Illum Obs Opacity Color Strength Tristimu Metamerism MI 2 Press the Enter key to access the Metamerism menu Metamerism Menu Mode is MI IllObs1 D65 10 IllObs2 F2 10 Mode Selection 10 Use the Tab keys to highlight Mode is Press the Enter key to toggle between MI an...

Page 38: ...e the Tab keys to choose the desired digit arrows above and below designate selection Press the Enter key to access the alphanumeric editor NOTE Highlighting CLEAR and pressing the Enter key is a quick method to zero the value 5 Use the Tab keys to highlight the desired number and press the Enter key to exit the editor 6 When editing is complete use the Tab keys to highlight Save Exit and press th...

Page 39: ...ve Exit and press the Enter key Shade Sort To select the shade sort status 1 Use the Tab keys to highlight Shade Sort Color Options Strength Tristimu Metamerism MI Ecmc Factors E94 Factors Shade Sort is Off 2 Press the Enter key to toggle between Off and On Density Options The Color Options configuration allows you to determine the following settings Current Status Used to select the status for al...

Page 40: ... keys to highlight Density Options CONFIGURATION Language English Measure Options Color Options Density Options Database Tools 2 Press the Enter key to enter the Density Options menu Current Status To select the current status 1 Use the Tab keys to highlight Current Status Density Options Current Status T Auto Color Mode Spec Dens Dot Paper Mode nFactor 1 000 Trap Method Preucil 2 Press the Enter ...

Page 41: ...λ1 or λ2 Press the Enter key to access the Set λ editor 4 Use the Tab keys to highlight desired wavelength value between 400nm and 700nm Off can also be selected if the option is not desired Press the Enter key to save the setting and return to the Set Den Dot λ menu 5 Repeat procedure for second wavelength option if desired Minus Paper To select the paper status 1 Use the Tab keys to highlight Pa...

Page 42: ...y to access the alphanumeric editor NOTE Highlighting CLEAR and pressing the Enter key is a quick method to zero the value 4 Use the Tab keys to highlight the desired number and press the Enter key to exit the editor 5 When editing is complete use the Tab keys to highlight Save Exit and press the Enter key Trap Method To select the trap method 1 Use the Tab keys to highlight Trap Method Density Op...

Page 43: ...Tags Allows you to clear all stored tags Clear all Projects Allows you to clear all stored projects Clear all Jobs Allows you to clear all stored jobs Clear all Standards Allows you to clear all stored standards To open the Database Tools menu 1 Use the Tab keys to highlight Database Tools Configuration Language English Measure Options Color Options Density Options Database Tools 2 Press the Enter...

Page 44: ...en the Clear all Databases window 3 Use the Tab keys to highlight Yes and press the Enter key The instrument s database is now deleted Clear All Samples To clear all samples 1 Use the Tab keys to highlight Clear all Samples Database Tools View Tags Factory Presets Clear all Databases Clear all Samples Clear all Tags 2 Press the Enter key to open the Delete Samples window 3 Use the Tab keys to high...

Page 45: ...ight Yes and press the Enter key The instrument s projects are now deleted Clear All Jobs To clear all jobs 1 Use the Tab keys to highlight Clear all Jobs Database Tools Clear all Samples Clear all Tags Clear all Projects Clear all Jobs Clear all Standards 2 Press the Enter key to open the Delete Jobs window 3 Use the Tab keys to highlight Yes and press the Enter key The instrument s jobs are now ...

Page 46: ...feed LF line feed Delimiter Determines the character that terminates the string of measured data CR carriage return CRLF carriage return line feed or LF line feed Set Data Types Determines the type of data that is transmitted after a measurement if Auto XMT is on or when requested by an RCI command Available data types are Colorimetric Reflectance and Density Header Enables on or disables off the ...

Page 47: ...rger is not connected This value can range from 10 to 240 seconds Beeper Sets the volume of the beeper Loud Medium Soft or Off Clock Adjust Used to adjust the internal clock of the instrument Display Allows you to determine the following settings Contrast Set the contrast of the display for optimal viewing The setting can vary from 01 to 99 Orientation Determine whether you want the display viewab...

Page 48: ...base Tools Hardware Setup Main Menu Options 2 Press the Enter key to access the Hardware Setup menu Serial Port To access the Serial Port Options 1 Use the Tab keys to highlight Serial Port Hardware Settings Serial Port 9600 Read Oper Switch Cal Timeout 24 hrs Power Down 120 sec Beeper Soft 2 Press the Enter key to access the Serial Port options Serial Port Options Baud Rate 9600 Hand Shake Off Au...

Page 49: ...to the Serial Port Options menu Delimiter Selection 1 Use the Tab keys to highlight Delimiter Press the Enter key to access the Delimiter editor 2 Use the Tab keys to highlight the desired delimiter command CR CRLF or LF Press the Enter key to save your setting and return to the Serial Port Options menu Data Types Selection 1 Use the Tab keys to highlight Set Data Types Press the Enter key to acce...

Page 50: ...sec Beeper Soft 2 Press the Enter key to access the Read Operation options 3 Use the Tab keys to highlight the desired read operation mode RCI Only Switch Only Key Only or Switch and Key Press the Enter key to save your setting and return to the Hardware Settings Options menu Cal Timeout To access the Cal Interval Setup 1 Use the Tab keys to highlight Cal Timeout Hardware Settings Serial Port 9600...

Page 51: ...ht Power Down Hardware Settings Serial Port 9600 Read Oper Switch Cal Timeout 24 hrs Power Down 120 sec Beeper Soft 2 Press the Enter key to open the Power Down Time menu Power Down Time CLEAR 120 Save Exit 3 Use the Tab keys to choose the desired power down digit arrows above and below designate selection Press the Enter key to access the alphanumeric editor NOTE Highlighting CLEAR and pressing t...

Page 52: ...ng and return to the Hardware Settings Options menu Clock Adjust To access the Clock Adjustment 1 Use the Tab keys to highlight Clock Adjust Hardware Settings Cal Timeout 24 hrs Power Down 120 sec Beeper Soft Clock Adjust 8 21 Display Right 2 Press the Enter key to open the Clock Adjust menu Clock Adjust Date Format M D Y Month 9 Day 05 Year 2000 Hour 8 Minute 21 Date Format Selection 1 Use the Ta...

Page 53: ...ting is complete use the Tab keys to highlight Save Exit and press the Enter key 5 Continue with Day and Year setting if required Time Setting 1 Use the Tab keys to highlight Hour and press the Enter key to open the Set Hour menu 2 Use the Tab keys to highlight the desired hour digit arrows above and below designate the selection Press the Enter key to access the alphanumeric editor NOTE Highlight...

Page 54: ...rror Log 2 Press the Enter key to access the Set Display Contrast editor Set Display Contrast Reset 52 Update Screen Save Exit 3 Use the Tab keys to choose the desired contrast digit arrows above and below designate the selection Press the Enter key to access the alphanumeric editor NOTE Highlighting Reset and pressing the Enter key quickly restores the factory default setting 4 Use the Tab keys t...

Page 55: ...r key to toggle between Off and On Main Menu Options The Main Menu Options configuration allows you to choose the functions that are available at the main menu level An arrow to the left of the function indicates that it is available To set function status 1 Use the Tab keys to highlight Main Menu Options Configuration Color Options Density Options Database Tools Hardware Setup Main Menu Options 2...

Page 56: ...samples and tag data in the instrument To initiate a factory default reload 1 Unplug the AC Adapter if connected and press the power switch to Off Simultaneously press and hold the Tab Down key and Main Menu key 2 Press the power switch to On The X Rite logo momentarily appears followed by Factory Defaults Settings have been restored Press the Enter key to clear the message dialog MAIN MENU QA Ana...

Page 57: ...C H A P T E R F O U R 4 28 ...

Page 58: ...dard The standards serve as approved references against which your sample measurements are evaluated using QA Strength Opacity or Analyze functions Standards can also be downloaded to the instrument from an X Rite software package such as X RiteColor Master Then after sample measurements are performed data is uploaded to the software package where it is analyzed The main Standard screen gives the ...

Page 59: ...ding down the Enter key until the Enter Std Number menu appears and selecting the number through the editor This provides a convenient method of selecting a specific standard when many standards exist in the database Entering Standard Data Depending on how data was input the standard entry field displays as Measured Manual or Downloaded Measured appears when the instrument was used to measure the ...

Page 60: ...0 a 0 25 b 28 03 SAVE 3 Retake the measurement if necessary or press the Enter key with Save highlighted to store measurement The screen automatically advances to the next empty standard 4 Continue with additional measurements Locked Standards When attempting to measure a standard with a locked standard selected a Standard Locked Create New Standard message appears Select Yes if you want to create...

Page 61: ...xit NOTE Positioning the arrows above and below or and pressing the Enter key toggles between the two symbols 6 Use the Tab keys to highlight the desired number and press the Enter key to exit editor 7 Continue with additional digit edits if required 8 When editing is completed use the Tab keys to highlight Save Exit and press the Enter key 9 Continue with additional attribute editing for the sele...

Page 62: ...to choose the desired character location arrows above and below designate the selection Press the Enter key to access the alphanumeric editor 5 Press the Enter key again to quickly page through groups of letters symbols and numbers 6 Use the Tab keys to highlight the desired character and press the Enter key to exit editor 7 Continue with additional character edits 8 When editing is completed use ...

Page 63: ...Press the Enter key to page through or limit type 5 Use the Tab keys to highlight the illum obs parameter Press the Enter key to select desired illum obs 6 Use the Tab keys to highlight the desired tolerance type attribute Press the Enter key to open Enter Tolerance menu NOTE Depending on Limit Type selection Plus or Minus could appear in place of Symmetric Enter Symmetric Tol CLEAR 0 0000 Save Ex...

Page 64: ...the Enter key pages through the tolerances that you have set Setting Shade Sort Options NOTE The Shade Sort option does not appear for a standard with manually entered data The shade sort size is based on the dimensions placed on the color space attributes The value represents a three dimensional box in space These boxes are layered nine deep on each axis and at the center is the 555 reference box...

Page 65: ...ggle to Size Size Std 1 Set 555 Sort Size L a b D65 10 L 1 00 a 1 00 b 1 00 SAVE 2 Select the desired color space and illum obs 3 Use the Tab keys to highlight the desired color space attribute Press the Enter key to open the Edit Sort Size menu Edit Sort Size CLEAR 1 00 Save Exit 4 Use the Tab keys to choose the desired digit arrows above and below designate the selection Press the Enter key to a...

Page 66: ...lect the desired range value 5 Continue with additional component editing 6 When all components have been edited highlight Save and press the Enter key Locking Unlocking Standard All measured and manually entered standards are initially set as locked A locked standard cannot be deleted or edited The locked status of the standard can be changed whenever desired Downloaded standards cannot be unlock...

Page 67: ... remains all related data is deleted You can then use the location to add a new standard To delete the current standard 1 Use the Tab keys to highlight Delete THIS Std Edit Standard 1 Std Entry Measured Std Name Tolerances Shade Sort Opts Std Lock Unlocked Delete THIS std 2 Press the Enter key to delete the current standard ...

Page 68: ...U Calibrate Standards Projects Run Job Configuratio X Rite 939 XXXX Selecting Project Number The project number is used to page to a specific project location if more than one project exists in the database To access a new or existing project location 1 Use the Tab keys to highlight the project in the View Project field View Project 1 Proj Standards Proj Name Proj Lock Unlocked Add New Project Del...

Page 69: ... the Select Standards menu Select Standards 1 Standard A 2 Standard B 3 Standard C 4 Standard D 5 Standard E 6 Standard F 3 Use the Tab keys to highlight the standard to assign 4 Press the Enter key to toggle the standard active or inactive The indicates the standard is assigned NOTE Project is Locked appears in the display when attempting to change the status of a standard when the project is loc...

Page 70: ... highlight the name entry field 4 Use the Tab keys to choose the desired character location arrows above and below designate selection Press the Enter key to access the alphanumeric editor 5 Press the Enter key again to quickly page through groups of letters symbols and numbers NOTE If editing a name highlighting CLEAR and pressing the Enter key will quickly clear the name field 6 Use the Tab keys...

Page 71: ...ards Proj Name Proj Lock Unlocked Add New Project Delete This Project 2 Press the Enter key to open the Add New Project menu 3 Add a new project appears Use the Tab keys to highlight Yes and press the Enter key A new project number is added to the View Project field Deleting the Project This option deletes the current project selected and samples Standards that are assigned to the project are not ...

Page 72: ...ith 555 shade sort This section covers all the functions available in the QA mode To access the QA function 1 Use the Tab keys to highlight QA MAIN MENU QA Analyze Compare Strength Opacity X Rite 939 XXXX 2 Press the Enter key to access the QA function Proj 1 PROJECT A Std 1 STANDARD A Sample Last Meas L a b D65 10 L 0 05 L 88 25 a 0 03 a 4 71 b 0 14 b 36 64 E 0 16 Project Name Standard Name Proje...

Page 73: ...ered earlier in this section for information on this mode Selecting a Standard A standard must be manually selected when the Auto Std option is turned off in the configuration menu Only standards assigned to the selected project appear in this field If no projects are used any standard in the database can be selected To select a standard 1 Use the Tab keys to highlight Std Proj 1 PROJECT A Std 1 S...

Page 74: ... instrument screen based on the shade size and shade range Pass Fail operation can also be used in conjunction with Shade Sort if required The Shade Sort option must be activated in the Instrument Configuration and the size and range set for the standard To perform a shade sort measurement 1 Select the project location if used as discussed earlier 2 Select standard location if the auto standard se...

Page 75: ...pace selections Words will not display for an attribute that is less than 1 7th of the E value A value less than this amount is considered insignificant compared to the total difference If the delta value for any attribute is greater than 10 00 the display changes to numeric values The Difference Display option must be set to Words in the Instrument Configuration Proj 1 PROJECT A Std 2 STANDARD B ...

Page 76: ...mple The number of measurements is set in the instrument configuration Measurements are typically taken at various locations on a sample to achieve average data values Averaging should be used when measuring non uniform samples textured materials and any dark or high chroma colors To perform an averaging measurement sequence 1 Select project location if used as discussed earlier 2 Select the stand...

Page 77: ... Press the Enter key to open the Tools menu Tools Sample 9 Transmit This Sample Transmit Proj Sample Transmit All Samples Delete This Sample Delete Proj Samples Delete All Samples Transmit This Sample Transmits the current sample data out the serial port Transmit Proj Sample Transmits all samples that exist in the current project Transmit All Samples Transmits all samples stored in the instrument ...

Page 78: ...ight the reflectance curve Proj 1 PROJECT A Std 1 STANDARD A Sample 9 9 51 L a b D65 10 L 0 05 L 88 25 a 0 03 a 4 71 b 0 14 b 36 64 E 0 16 2 Press the Enter key to display the reflectance graph NOTE When averaging is used all measurements must be completed before the graph screen can be entered 3 Repeatedly press the Tab Up key or Tab Down key to view the data in 10nm increments along the reflecta...

Page 79: ...lection Storage Operation Tagging Operation Pass Fail Operation Sample Tools and Viewing the Reflectance Graph refer to the QA function To access the Strength function 1 Use the Tab keys to highlight Strength MAIN MENU QA Analyze Compare Strength Opacity X Rite 939 XXXX 2 Press the Enter key to access the Strength function Proj 1 PROJECT A Std 1 STANDARD A Sample 1 8 50 L a b D65 10 L 1 00 Str a 0...

Page 80: ...if the auto standard selection is not activated in configuration 3 Measure the sample 4 Use the Tab keys to highlight Str if not already highlighted Proj 1 PROJECT A Std 1 STANDARD A Sample 1 8 50 L a b D65 10 L 1 00 Str a 0 26 93 7 b 0 79 App E 1 30 5 Press the Enter key to toggle to equivalent strength Proj 1 PROJECT A Std 1 STANDARD A Sample 1 8 50 L a b D65 10 L 0 15 Str a 0 20 100 b 0 56 E 0 ...

Page 81: ...ols and Viewing the Reflectance Graph refer to QA function To access the Opacity function 1 Use the Tab keys to highlight Opacity MAIN MENU QA Analyze Compare Strength Opacity X Rite 939 XXXX 2 Press the Enter key to access the Opacity function Proj 1 PROJECT A Std 1 STANDARD A Sample 1 8 50 L a b D65 10 L 1 00 Opacity a 0 26 97 93 b 0 79 100 E 1 30 The opacity data type saved to the database is d...

Page 82: ...easure the sample over the black portion of the opacity card Release the instrument after data is displayed Proj 1 PROJECT A Std 1 STANDARD A Measure over WHITE __ L a b D65 10 L 81 15 a 4 50 b 81 00 4 Measure the sample over the white portion of the opacity card Release the instrument after data is displayed Proj 1 PROJECT A Std 1 STANDARD A Measure white BACK __ L a b D65 10 L 81 76 a 6 17 b 82 ...

Page 83: ...ght Analyze MAIN MENU QA Analyze Compare Strength Opacity X Rite 939 XXXX 2 Press the Enter key to access the Analyze function Data from the last measurement taken is displayed Analyze Std 1 STANDARD A L a b D65 10 L 0 06 L 33 85 a 0 02 a 5 55 b 0 16 b 9 77 E 0 17 3 If auto standard is not activated in configuration select the standard location by repeatedly pressing Enter key with Std highlighted...

Page 84: ...lyze Compare Strength Opacity X Rite 939 XXXX 2 Press the Enter key to access the Compare function Standard Compare Measure Standard L a b D65 10 L 0 00 a 0 00 b 0 00 3 Measure the standard to be used for comparison Sample Compare Measure Sample L a b D65 10 L 0 00 L 81 17 a 0 00 a 6 39 b 0 00 b 83 05 E 0 00 4 Standard measurement data is displayed Measure the sample or press the Enter key with Sa...

Page 85: ...l each component of the density measurement is displayed When 3 Color is selected CMY values are displayed Individual color options display the corresponding component NOTE Two specific wavelength values will also appear in this list if the Spectral Dens Dot wavelength option is set in the Density options To select color option 1 Press the Tab keys to highlight the color option area of the screen ...

Page 86: ...es are updated and the display highlight advances to Density Measuring a Sample So far you have performed the procedures to select the density color and measure paper You are now ready to begin taking measurements to check density values To measure a sample 1 Make sure Sample is highlighted on the screen and center the target window over area to be measured 2 Lower unit to target window and hold c...

Page 87: ... density graph displayed To view a density graph 1 Use the Tab keys to highlight the density graph Density T Auto View Density Graph Density C 1 490 2 Press the Enter key to display the density graph NOTE When averaging is used all measurements must be completed before the graph screen can be entered 3 Repeatedly press the Tab Up key or Tab Down key to view the data in 10nm increments along the de...

Page 88: ...he paper and solid densities are not affected Using Yule Nielson the paper and solid densities are divided by an n factor value that is based on the properties of the substrate material Yule Nielson formula is activated when the n factor is set to something other than 1 000 see Density Options in the Configuration menu The Murray Davies formula for calculating Dot is Apparent Dot Area 1 10 1 10 10...

Page 89: ...one V 37 0 2 Press the Enter key to access the Current Color menu 3 Press the Tab keys to select color option and press the Enter key Measuring Paper The instrument takes the density value of the paper and automatically subtracts it from subsequent solid and dot measurements To measure paper 1 If not selected press the Tab keys to highlight Paper Measure Paper appears in the user dialog The paper ...

Page 90: ...olid Measure Solid appears in the user dialog 2 Center the instrument target window over the solid patch and lower the instrument to take a reading The solid value is updated and the display highlight advances to Dot Tone 3 Center the target window over a tint patch that corresponds to the measured solid 4 Lower unit to target window and hold closed Once data is displayed release the unit Dot Tone...

Page 91: ...OP Where DOP Density of overprint paper D2 Density of 2nd ink paper D1 Density of 1st ink paper To access the Trap function 1 Use the Tab keys to highlight Trap MAIN MENU Opacity Density Dot Tone Trap X Rite 939 XXXX 2 Press the Enter key to access the Trap function Measuring Paper The instrument takes the density value of the paper and automatically subtracts it from subsequent trap measurements ...

Page 92: ...f not selected press the Tab Up key or Tab Down key to highlight Overprint Measure Overprint appears in the user dialog 2 Center the target window on an overprint patch and lower the unit to the target window Once measurement data is displayed release the unit 3 Make sure Ink2 is highlighted on the screen and center the target window on second ink down patch 4 Lower unit to target window and hold ...

Page 93: ...ensity of C M or Y To access the Hue Grayness function 1 Use the Tab keys to highlight Hue Grayness MAIN MENU Density Dot Tone Trap Hue Grayness X Rite 939 XXXX 2 Press the Enter key to access the Hue Grayness function Measuring Paper When you select hue grayness minus paper from the Configuration menu you must provide a reading of the paper before taking measurements The instrument takes the dens...

Page 94: ... check hue gray values To perform a hue gray measurement 1 If not selected press the Tab Up key or Tab Down key to highlight Hue Gray Measure H G appears in the user dialog 2 Center the instrument target window over the patch and lower the instrument to take a reading 3 Once data is displayed release the unit Hue error grayness and saturation values are displayed along with color toward color V vi...

Page 95: ...o measurement method measures all the colors then displays the most dominant color Single color measurement method measures and updates the specific color you selected NOTE Two specific wavelength values will also appear in this list if the specular wavelength option is set in the Density options To select color option 1 Press the Tab keys to highlight the color option area of the screen Change Co...

Page 96: ...are updated and the display highlight advances to Print Cont Measuring Print Contrast Procedure So far you have performed the procedures to select the color mode and measure paper You are now ready to begin taking measurements to monitor printing density To perform a print contrast measurement 1 If not selected press the Tab Up key or Tab Down key to highlight Solid Measure Solid appears in the us...

Page 97: ...fer to the software program for specific information on jobs and job operation To access the Run Job mode 1 Use the Tab keys to highlight Run Job MAIN MENU Calibrate Standards Projects Run Job Configuratio X Rite 939 XXXX 2 Press the Enter key to access the Pick Job mode Pick Job 1 Job 1 2 Job 2 3 Job 3 4 Job 4 5 Job 5 3 Use the Tab keys to highlight the desired job Note Empty appears in the displ...

Page 98: ...l carton as a complete unaltered unit Reading Lamp Replacement Information Due to the circuit complexity and test equipment required the read lamp should only be replaced by X Rite or an authorized X Rite Service Center The lamp is monitored for intensity and failure warnings will be displayed if a problem occurs Cleaning the Instrument Your instrument requires very little maintenance to achieve y...

Page 99: ...ion measurements and a trap opening for black calibration measurements The white ceramic disk can be cleaned periodically using a mild soap and warm water solution thoroughly rinsed with warm water and wiped dry with a lint free cloth Do not use solvents or cleaners of any kind The black trap portion of the reference should be cleaned with clean dry air from time to time to remove any dust or cont...

Page 100: ...to Unlatching the Instrument Shoe in Section One 3 Carefully rotate the instrument over and rest it on its top 4 Using your fingers compress the two tabs located on both sides of the battery pack and remove battery pack 5 Slide a fresh battery pack into the compartment with the battery connector facing down and to the back of the instrument 6 Press down on the pack until the connector is properly ...

Page 101: ...C H A P T E R S I X 6 4 ...

Page 102: ...values Short Term Repeatability 05 E ab max on white ceramic standard deviation 0 005D 0 2 0D 0 5 2 1 2 5D Lamp Life Approx 500 000 measurements Power Supply Removable Ni metal hydride battery pack 7 2 VDC rated 1450 mAh AC Adapter Requirements Input 100 240 VAC 50 60Hz 12Vdc Output Charge Time Approx 4 hours 100 capacity Measurements Per Charge 1 000 measurements typical Data Interface Patented b...

Page 103: ...No The instrument wants to verify that the white cal reference was measured Press Yes if white cal was measured Press No if white cal was not measured and measure white cal The battery is getting low This warning appears when the battery falls below approximately 25 of full charge Measurements are still possible but the battery should be charged soon Batteries are dead Displays when not enough bat...

Page 104: ...e appropriate end of the aperture wrench on the existing aperture and remove by turning to the left counter clockwise until it is free Set existing aperture aside CAUTION Extreme care should be taken not to contaminate the optics with any dust or dirt when installing the new aperture 7 Align new aperture over opening in optics and secure by using the appropriate end of the aperture wrench 8 Positi...

Page 105: ...C H A P T E R S E V E N 7 4 4 mm Aperture Sensor Nose Aperture Wrench Aperture Optics Target Window Shoe Bottom Housing Target Window Ring ...

Page 106: ...ion Menu CALIBRATION Measure White Ref Status Cal time up S N Ap Size 8 0mm 2 Press the Enter key again to access the Choose Aperture editor 3 Use the Tab Up or Tab Down key to highlight the new aperture size Press the Enter key to save selection and exit back to the Calibration menu 4 Calibrate the instrument to the new aperture size refer to Calibration Section Three ...

Page 107: ...C H A P T E R S E V E N 7 6 ...

Page 108: ...2 4437 or 1 616 803 2705 Corporate Headquarters Europe Althardstrasse 70 8105 Regensdorf Switzerland Phone 41 44 842 24 00 Fax 41 44 842 22 22 Corporate Headquarters Asia Room 808 810 Kornhill Metro Tower 1 Kornhill Road Quarry Bay Hong Kong Phone 852 2 568 6283 Fax 852 2 885 8610 Please visit www xrite com for a local office near you ...

Reviews: