22
Choose ‗OK‘ to confirm the setting.
Date Format
Set date indication format. Please click (
) Date Format frame to select a format you like from the list.
Time Format
Set time indication format. Please click (
) Time Format frame to select a format you like from the list.
When you complete Date/Time input, please click (
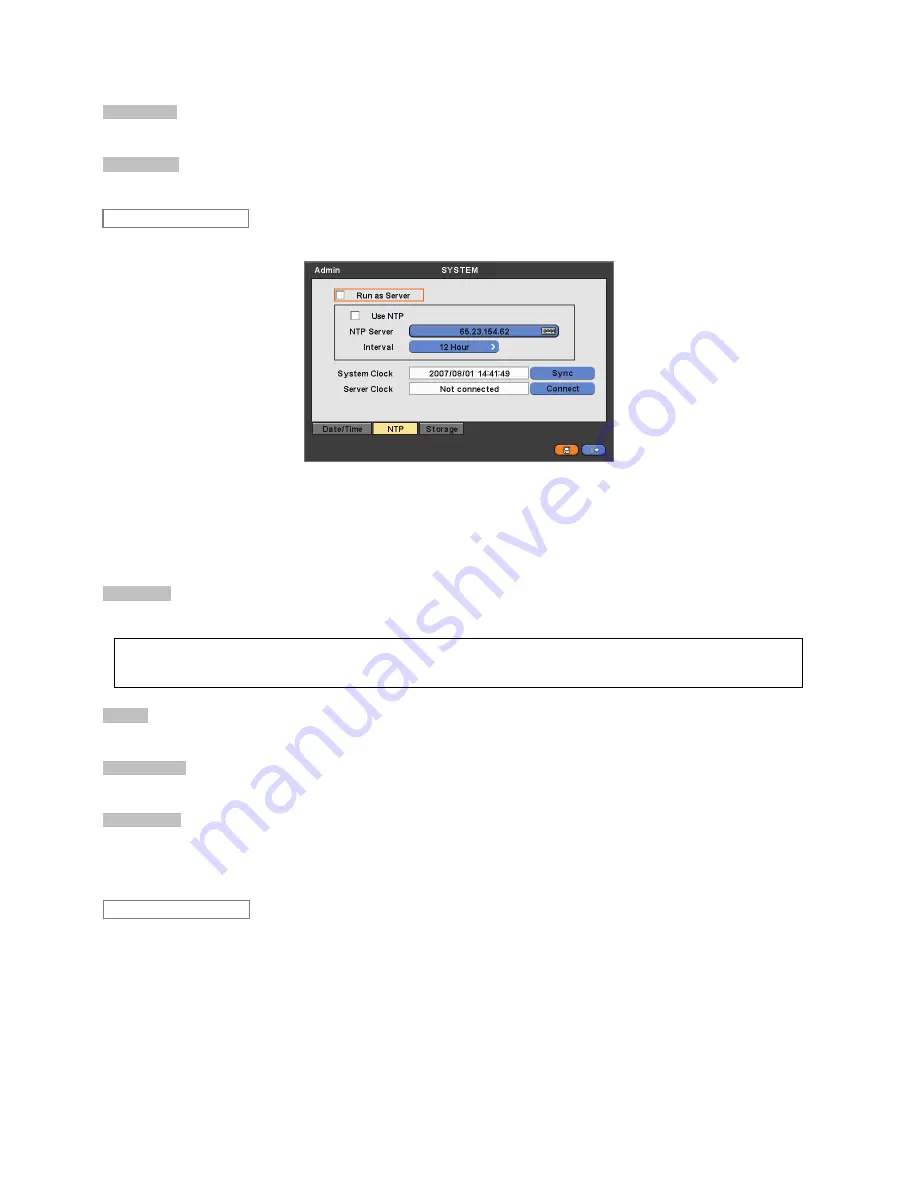
) NTP and the following screen will appear.
This menu is for accurate setting of time of day clock in DVR.
You may check
only one of Run as Server and Use NTP.
–
Run as Server:
NPT cannot be used in a non-networked environment (Intranet environment). In this case, DVR with
Run as Server functions as Time Server.
–
Use NTP:
Connect to Internet to synchronize DVR clock with Network Time Server‘s clock.
NTP Server
Click (
) keyboard icon in NTP Server frame, and the virtual keyboard will appear. Input IP address of NTP server.
Interval
Set clock-update-interval from NTP Server. Normally, you can adjust 30 min up to 24 hours.
System Clock
Display DVR clock.
Server Clock
Display NTP Server‘s clock if Internet is not connected to Server Clock. If not, please click (
) Connect button.
When Server Clock is displayed, please click (
) Sync button
to synchronize NTP Server‘s clock with DVR clock.
C
hoose ‗OK‘ to confirm the clock synchronization.
When you complete NTP input, please click (
) Storage and the following screen will appear.
Set S.M.A.R.T. (Self-Monitoring Analysis and Reporting Technology) function for HDD format and auto-display of HDD
information. CD-RW (DVD-RW) is not shown here.
Storage
(NOTE)
Currently used NTP is administered by pool.ntp.org and its IP address is 65.23.154.62. However, users are allowed to use IP address
of any NTP site.
NTP


