Bleeding the Fuel Line
Maintenance
42
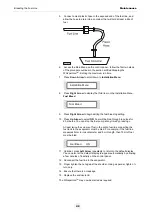
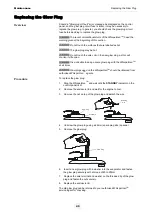
5. Connect a clear plastic hose to the exposed end of the fuel line, and
allow the hose to drain into a container that will hold at least a litre of
fuel.
6. Access the Main Menu on the control panel - follow the first two steps
of the procedure outlined in the section entitled Stopping the
WhisperGen
TM
- Setting the maximum run time.
7. Press
Down Arrow
to scroll down to
Installation Menu
.
Installation Menu
8. Press
Right Arrow
to display the third item on the Installation Menu,
Fuel Bleed
.
Fuel Bleed
9. Press
Right Arrow
to begin editing the fuel bleeding setting.
10. Press
Up Arrow
to select
ON
. Fuel will be bled through in pulses for
60 minutes. You can stop the fuel pump at any time by pressing v.
At least twice the volume of fuel in the entire fuel line connecting the
fuel tank to the evaporator must be bled. For example, if the fuel line
measures 3mm in inner-diameter and 5m in length, then 70ml of fuel
must be bled.
Fuel Bleed ON
11. Optional: press
Left Arrow
repeatedly to return to the default display.
You can also let the default display re-appear automatically by allowing
a few minutes of inactivity on the control panel.
12. Reconnect the fuel line to the evaporator.
13. Finger tighten the nut against the shoulder. Using a spanner, tighten ¾
turn only.
14. Ensure that there is no leakage.
15. Replace the enclosure lid.
The WhisperGen
TM
may now be started as required.
Summary of Contents for PPS16-12MD
Page 1: ...user s manual Part Number WP 5012 001 01 ...
Page 2: ......
Page 4: ......
Page 8: ......


