17 of 20
WX-501-0517 • 05.22
After you have viewed the fault latch configuration, press and release the
Mode
Switch
to exit.
Outstation mode
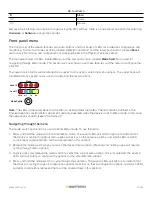
The next option you come across in the front panel menu is outstation mode. Like fault latch, this is read-only in
the front panel menu; you can use it to view which kind outstation the device is set to use, Peek or Siemens. To
modify this setting, use the DIP switches (see the DIP Switches section for more information).
Level 1 LEDs
Outstation mode
Level 2 LEDs
Peek Outstation Support
LED off
Siemens Outstation Support
LED on
See the earlier Navigating through the Menu and the Menu Operation Example sections for how to view this parameter.
After you have viewed the outstation mode configuration, press and release the
Mode
Switch
to exit.
Reset to default settings
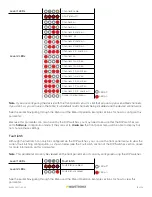
The final option that comes up in the menu is Reset to Default Settings. To select this function, release the
Mode
Switch
when the red LED starts flashing.
Note.
This parameter can only be configured using the DIP switches.
This function will restore all configuration settings to factory defaults, even those parameters not configured using
the front panel menu: baud rate, channel map, channel enable, description field, location field, and device ID. (The
exceptions are fault latch and outstation mode, which are not reset by this option.)
Level 1 LEDs
Reset to default settings
Level 2 LEDs
Reset to default settings
LED off
Cancel and exit menu
LED on
See the earlier Navigating through the Menu and the Menu Operation Example sections for how to view this
parameter.
After the Click 110 has reset to factory defaults, it will check the DIP switches; if any of them are set to
Hardware
mode, it will apply those settings to the parameter in question. If resetting to factory defaults doesn’t change
certain settings the way you expected it to, check the DIP switches to see if they are causing settings to be
changed to something other than the default.
Click Supervisor
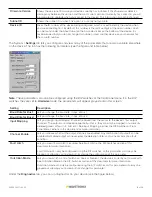
Click Supervisor is the only way to configure non-data path type parameters such as the description, location, and
device ID. See the knowledge base article
0514 Installing and Using Click Supervisor
for instructions on how to
download and install Click Supervisor and how to connect to your device using the software.
Note.
Some of the parameters mentioned below can only be configured in Click Supervisor. Others can be
configured by the front panel menu and/or the DIP switches. In the case of the DIP switches, if that parameter is
set to
Hardware
mode, it will be grayed out in Click Supervisor, meaning you can view but not change the setting.
If you would like to set it using Click Supervisor, you will have to flip those switches on the device.

