


23
Navigate: Pause, Goto, Play keys Change: select key
Exit: Return key
0:00:00
0:40:00
2:00:00
Navigate: Play keys Segment begin/end: Select key
Other options: return, Add/Clear
0:00:00
1:40:00
2:00:00
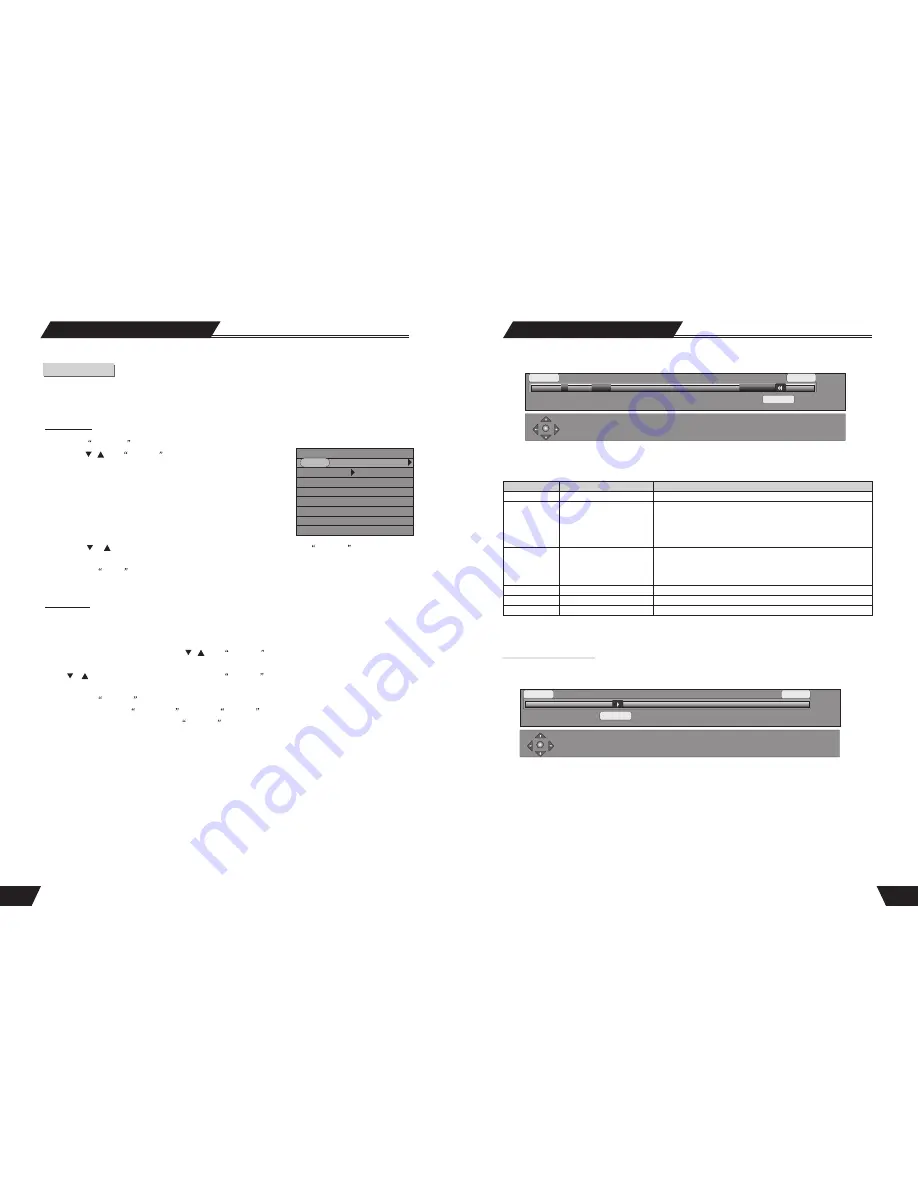
HDD Editing
Title Segment
When you enter Segment screen, the title will automatically starts playing. You can use the playback navigation
keys to move to anywhere in the title and apply a segment.
The following remote control keys are supported:
Note
: Segment screen can only be accessed if the title you want to split is not Protected or Locked.
Note:
Accuracy of segment boundaries is within 0.5 second
Change Index Picture
This option brings up the Change Index Picture screen. You can navigate the program (similar to Playback
screen) and when the desired picture is display on the screen press
Select
to change the Index picture.
Change Index Picture
Note:
This operation is available only if the title is not protected or locked
Play a DVD
DVD
MODE: Normal
Trick mode:
TITLE: 01/01
CHAPTER: 02/14
AUDIO: 01/03-OTH
SUBTITLE: 01/03-OTH
ANGLE: 01/01
T-TIME: 00:02:04-00:51:25
Play Mode Control
There are four playing modes for the unit, including Normal Play, Repeat Play, Prog ram Play and Ran dom Play.
The operations are as follows.
Normal Play
1. Press the
DISPLAY
button to
enter the control bar menu.
2. Press the
,
and
SELECT
buttons to select the first item in
the control bar, Play Mode.
3. Press the
or
button to select the Normal Play value, and then press the
SELECT
button to enter the
Normal Play mode.
4. Pressing the
PLAY button directly is another way preform Normal Play.
There are various Repeat Play modes, including Repeat Title (DVD only), Repeat Chapter (DVD only), Repeat
Disc (DVD/SVCD/VCD), A-B Repeat, etc.
1. In the play control bar menu, press the
,
and
SELECT
buttons to select the first item, Play Mode
Control.
2. Use
or
button to select a proper value, press the
SELECT
button and the system will play with the corre-
sponding Repeat Play mode.
3. Pressing the
REPEAT
button directly is another way to repeat play operation.
4. If the value selected is
A-B Repeat
, press the
SELECT
button and the system will indicate that Point A
is set, please set the next point. Press the
SELECT
button again to set the next point, i.e. Point B. After that,
the system will perform a section repeat play, that is, repeat from A to B.
The values of Play Mode Control Item are as follows. The values may vary for different discs.
1. Normal Play. 4. Title Repeat 7. DIR Repeat
2. A-B Repeat 5. Disc Repeat 8. Program Repeat
3. Chapter Repeat 6. Track Repeat 9. Random Repeat
Repeat Play
Play Mode
30
Display
Select
Keys
Function
Note
Return
Add/Clear
Play
Stop
Clear all IN/OUT point
Navigation in the title
Back to title list
Back to HDD title list
Toggles between:
progress bar -> add helper
text (and dynamic
compass) -> add title info
(on the top) -> no overlay
Mark the In/Out point(s).
Define your segments
All playback and trick mode keys (FF, FR, etc)
Do not save the result
If all segments are chosen correctly (i.e. there is a
corresponding Segment End for each Segment begin, the
result should be saved before going to HDD title list. Or it will
not save the result.


