IN
OUT
TV75
ANTENNA
Y
Y
Cb
Cb/Pb
Cr
Cr/Pr
INPUT
S-VIDEO
VIDEO
L
SR
SW
SL
C
L
R
R
S-VIDEO
AUDIO OUTPUT
OPTICAL
COAXIAL
DIGITAL OUTPUT
VIDEO INPUT
VIDEO OUTPUT
VIDEO
OUTPUT
5.1 CH
13
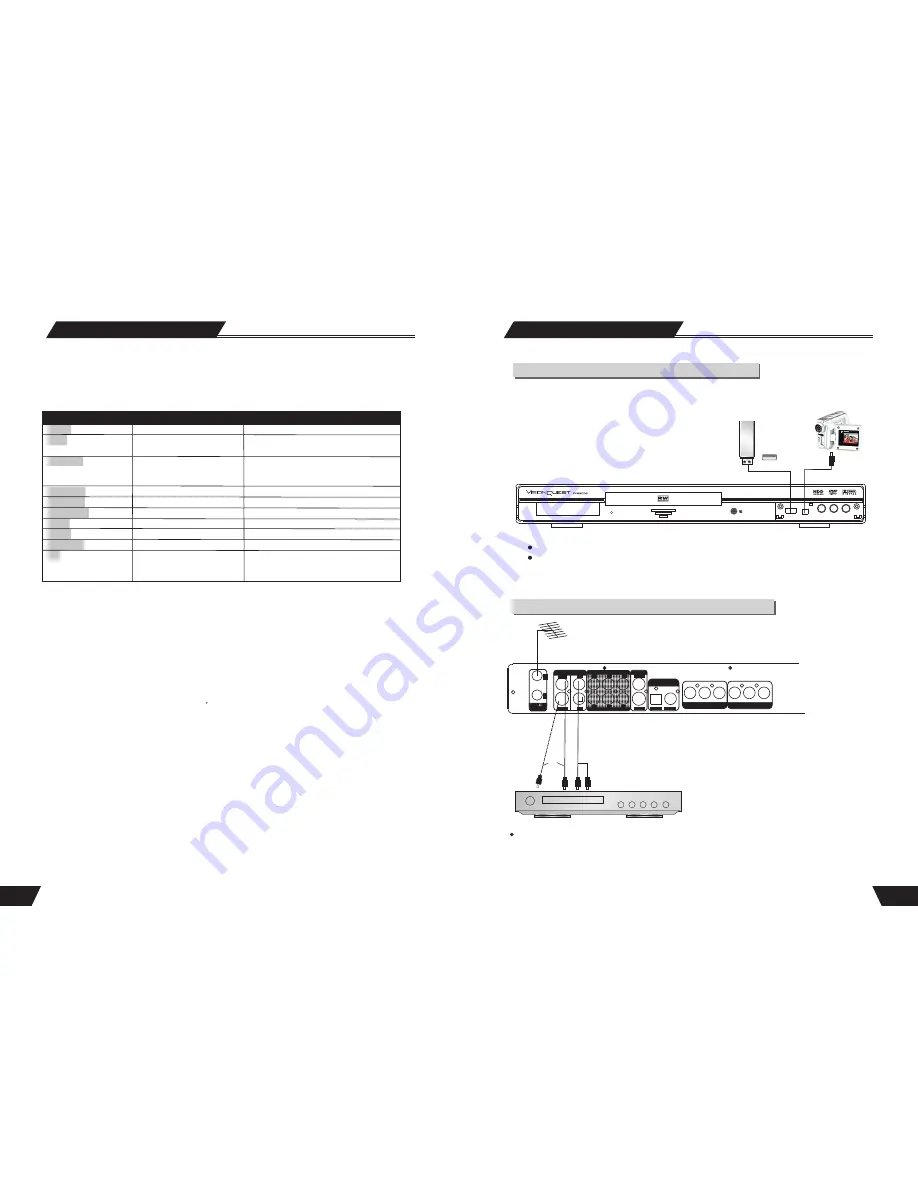
System connection for recording external signals (front panel signal )
When connecting with external signals, be sure to switch off the power source of the unit and other devices.
The connection with front panel inputs
System Connection
RECORDER FRONT
NOTE
Refer to the manual of the connected system.
Turn off the power and unplug both units before setting up
any connections.
DIGITAL
Vidicon
The thick side
is downward
System connection for recording external signals (rear panel signal input)
From the video input terminals, select one as desired. In terms of picture quality, CVBS stands for good,
S-VIDEO for better and Y/CB/CR for best.
Connection using rear panel inputs
DVD Player
or
Video lnput
RF Input
Audio lnput
40
HDD Play Mode
The Saved program will be removed from the Time shifting buffer when Stop is pressed. The product will
carry out the Save immediately if the system is powered down.
While in Time shifting mode, you can use the following keys for other operations:
NOTE: (option: SETUP, HDD, SPACE MANAGEMENT, AUTOMATIC). If the STOP is not pressed and
the recording takes all the available space on the hard disk drive, the product overwrites un-protected titles
in the FIFO (First In First Out) scheme. This rule will not affect titles that are selected to be copied to DVD
The selected tiles will be kept until copying operation is over. Even after this procedure, there is no space
on the HDD to record, the product will provide the same message as if it was in MANUAL mode (see next)
Note: (option: SETUP, HDD, SPACE MANAGEMENT, MANUAL). If the STOP is not pressed and the
recording takes all the available space on the hard disk drive, the product will stop recording and repuest
the user to erase some titles and create more room on the HDD.
Note: When the source is DV, the recording will not be in Time shifting buffer. Press Source (repeatedly)
to select DV as your video source. The product s remote control will be able to send Play, Pause, Fast/Slow
Forward/Reverse commands to the camera and start a Recording (Rec), Pause (a recording) and Stop (a
recording).
You can use the SETUP, HDD, option to erase the entire content of the HDD. Please proceed with caution,
as this process is irreversible. The product will ask you: All video programs on the hard disk drive will be
lost, continue? Yes, No (default)
HDD
DV/USB
Display
Eject Key
Power Key
Setup
Timer
Source
I/P
DVD
Display information list
Open/close the tray
Power off
Bring up Setup menu
Bring up Timer menu
Changes the video source
Key
Result
Note
HDD title list
Play disc
USB
Change the video output
mode to
Interlaced/Progressive Scan
(recording continues)
(recording continues unless you want
to record to DVD)
To play slide show from USB device or
copy from USB to DVD. (recording
continues)
(recording continues)
(recording continues)
(recording continues)
(recording continues)
USB
DV
VIDEO
L
---AUDIO---
R


