


2. For DVD disc s, press the a rrow butto ns to sel ect a c hapt er; f or SVCD and VCD 2.0 discs, press the number
buttons to select a track.
The
SELECT
button must be pressed before playing for some discs.
3. Press the
RETURN
button during playing.
For SVCD and VCD 2.0 discs, system will return to menu while PBC is on; the function will not be available
while PBC is off.
The Menu Picture of the DVD disc will be displayed on the TV screen.
For SVCD and VCD discs, this button realizes PBC ON/OFF function.
This function realizes only in the Pre-stop status for some discs.
1. Press the
MENU
button.
Enter Menu before Playing
End Play
1.Press the
STOP
button;
The system will change to the Pre-stop status.
In the Pre-stop status, the unit will automatically record the stopping time. Now if you press the
PLAY or
RETURN
button, the unit will resume playing from the recorded stopping time. (For MUSIC discs, the
playing will start from the beginning of the track at pre-stop time.) Press the
STOP
button again, the system
will change to Stop status and the memory will be cleared then.
2.Press the
EJECT
button to open the disc tray.
3.Take out the disc.
4.Press the
EJECT
button to close the disc tray.
5.Press the
POWER
button to standby the unit.
Some DVD discs might not have any tltle directory. For such discs, it is no use pressing the “SELECT” button.
24
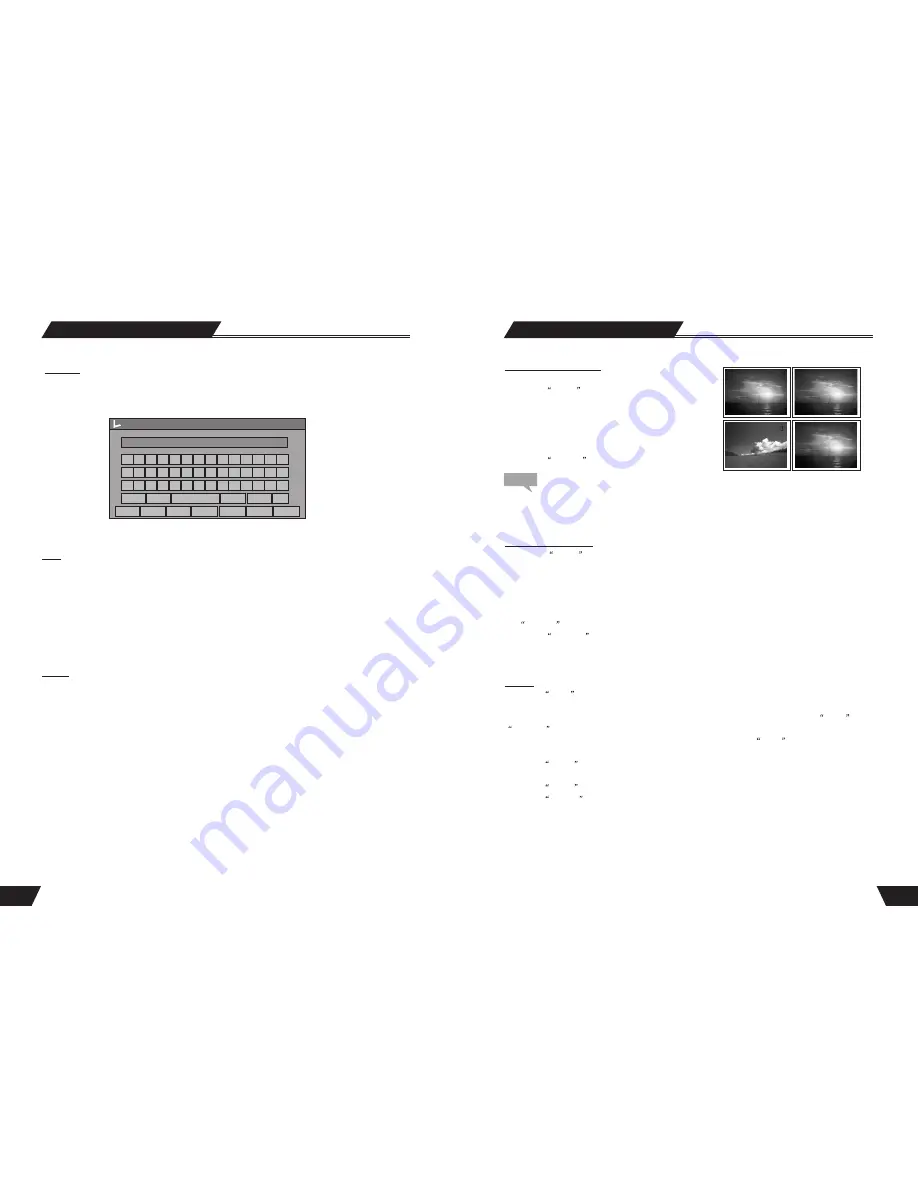
HDD Editing
On-screen keyboard
Note: This operation is allowed only if the title is not protected or locked
Lock
Once you have highlighted the program on the HDD title list, bring up the Popup menu by pressing the
Right Arrow. Make sure Lock is highlighted (use Up and Down arrows to navigate if needed) and press
Select. When you lock a program, the parental password selected in the Setup menu will be applied
(default
value is 3308)
. The user will be asked to Unlock the program before Play or any Edit or Dubbing operation.
In order to Unlock, once you have highlighted the program on the HDD title list, bring up the Popup menu
by pressing the Right Arrow. Make sure Unlock is highlighted (use Up and Down arrows to navigate if
needed) and press Select. You will be regusted to enter the password. A Locked title will have a Lock icon
next to its index picture on HDD title list.
Protect
Playback only, No Editing
Once you have highlighted the program on the HDD title list, bring up the Popup menu by pressing the
Right Arrow. Make sure Protect is highlighted (use Up and Down arrows to navigate if needed) and press
Select. When you Protect a program, the user can Play the title or Dub it to DVD; but can not do any Edit
operation (split, segment, delete). In order to Unprotect, once you have highlighted the program on the
HDD title list, bring up the Popup menu by pressing the Right Arrow. Make sure Unprotect is highlighted
(use Up and Down arrows to navigate if needed) and press Select. A Protected title will have a Safe Box
icon next to its index picture on HDD title list.
Enter the Title before Playing
1. This function is only available with DVD discs.
Press the
MENU
button, and the title directories will
appear on the screen.
2. Press the arrow buttons to move the cursor to a desired
title. For some discs, you can input numbers to select a
title directly. For example, to select Title 2, press 2; to
select Title 20, press 20.
3. Press the
SELECT
button to play the selected title.
Play Mode
Note:
29
Title directories of different DVD discs may vary to som e e xte nt.
Rename
This option brings up the on-screen keyboard. You can type in the title name for the title. Use the
ARROWs
to
highlight the desired key, and use
SELECT
to select.
A B C D E F G H I J K 0 1 2
L M N O P Q R S T U V 3 4 5
W X Y Z ( ) _ : ? . 6 7 8 9
Space
Aa
Backspace
Clear
Exit
OK
TITLE
Title name:
Drama Action Sports Comedy News Kids Adult