Using the Measure Feature
127
© 2019 Vision Engraving Systems
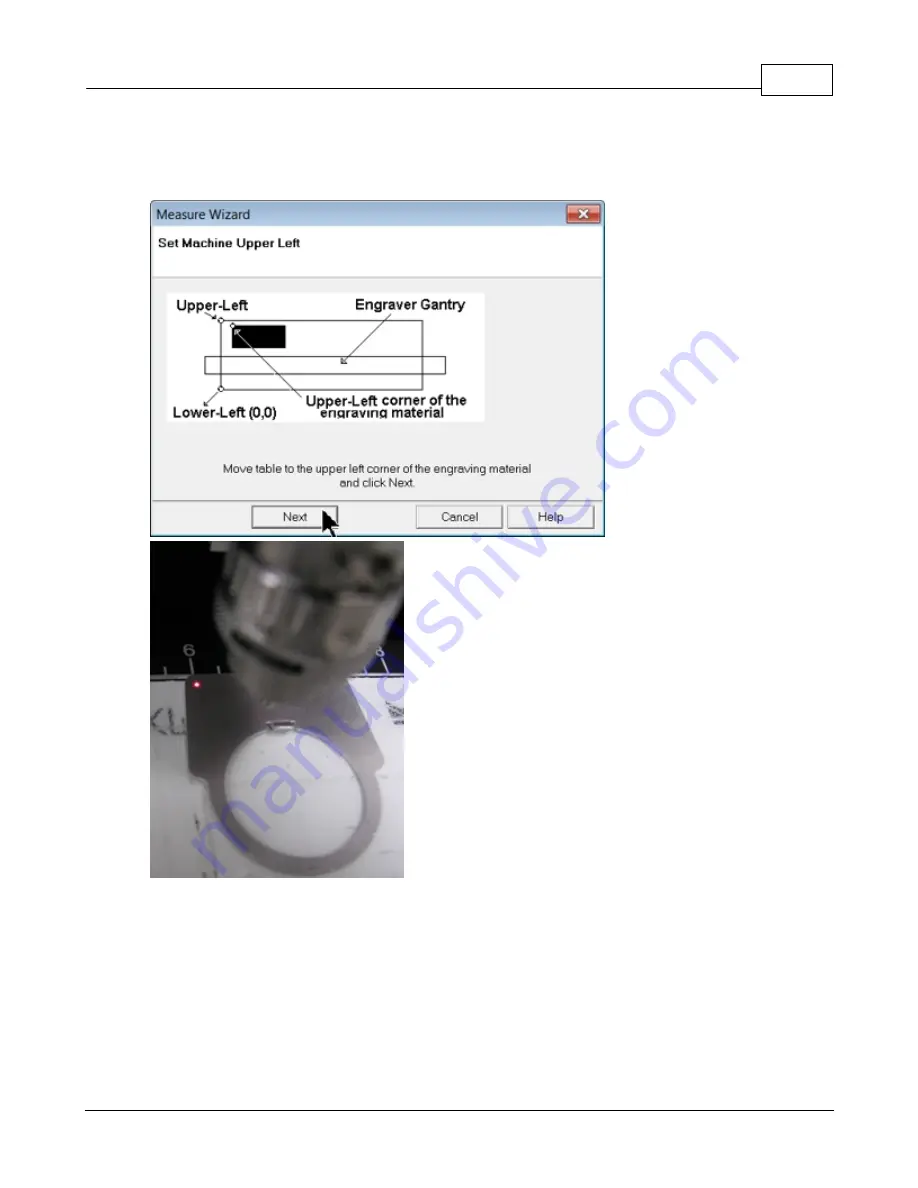
The Measure Wizard window will open. The engraver will turn on its red dot laser pointer. Move the
spindle over the material and position the laser pointer so that it is in the upper left hand corner of the
engraving area you wish to define. Then, click on Next in the Measure Wizard window.
Move the laser pointer to the lower right corner of the engraving are you wish to define, then click on
Finish in the Measure Wizard window.
Summary of Contents for 1624R
Page 1: ...2019 Vision Engraving Systems Vision 1624R 2525 and 2550 Series 5 User Guide Revised 7 3 2019...
Page 20: ...Vision Series 5 Controller User Manual 20 2019 Vision Engraving Systems 1624R Diagrams...
Page 21: ...1624R 2525 and 2550 Series 5 Installation 21 2019 Vision Engraving Systems...
Page 22: ...Vision Series 5 Controller User Manual 22 2019 Vision Engraving Systems...
Page 26: ...Vision Series 5 Controller User Manual 26 2019 Vision Engraving Systems 2525 2550 Diagrams...
Page 27: ...1624R 2525 and 2550 Series 5 Installation 27 2019 Vision Engraving Systems...
Page 37: ...1624R 2525 and 2550 Series 5 Installation 37 2019 Vision Engraving Systems...
Page 54: ...Vision Series 5 Controller User Manual 54 2019 Vision Engraving Systems...
Page 58: ...Vision Series 5 Controller User Manual 58 2019 Vision Engraving Systems...
Page 128: ...Vision Series 5 Controller User Manual 128 2019 Vision Engraving Systems...
Page 130: ...Vision Series 5 Controller User Manual 130 2019 Vision Engraving Systems...
Page 131: ......


