7
Component Removal
Removing The SD Card
7-12
4. Holding the CPU board by its edges, place it on a clean surface. Locate the Features iButton at the top of the
CPU board (see pointer 1 in Figure 7-14).
5. Remove the iButton by gently lifting the retaining clip over the iButton as you slide it out of its holder.
6. When inserting the iButton make sure the flanged side is up as it is slid into its holder:
7. Replacing the CPU board and perform a Features Update procedure (Menu>Software Upgrade>Upgrade
Features) to install any new software.
Removing The SD Card
1. Perform all of the Steps in the section entitled “Before Turning Off Power” on page 7-2.
2. Open the console doors as described in Step 1 of the section entitled “Removing The Ack Switch Panel/
Display (Right) Door And CPU Board” on page 7-3.
3. Locate the SD card on the lower front edge of the CPU board:
4. Remove the SD Card by pushing in on card then quickly releasing it, letting it spring free of its enclosure’s latch
then slide it out.
5. Perform a database restore procedure (Menu>Software Upgrade>DB Restore) to reload system data into a
new SD card.
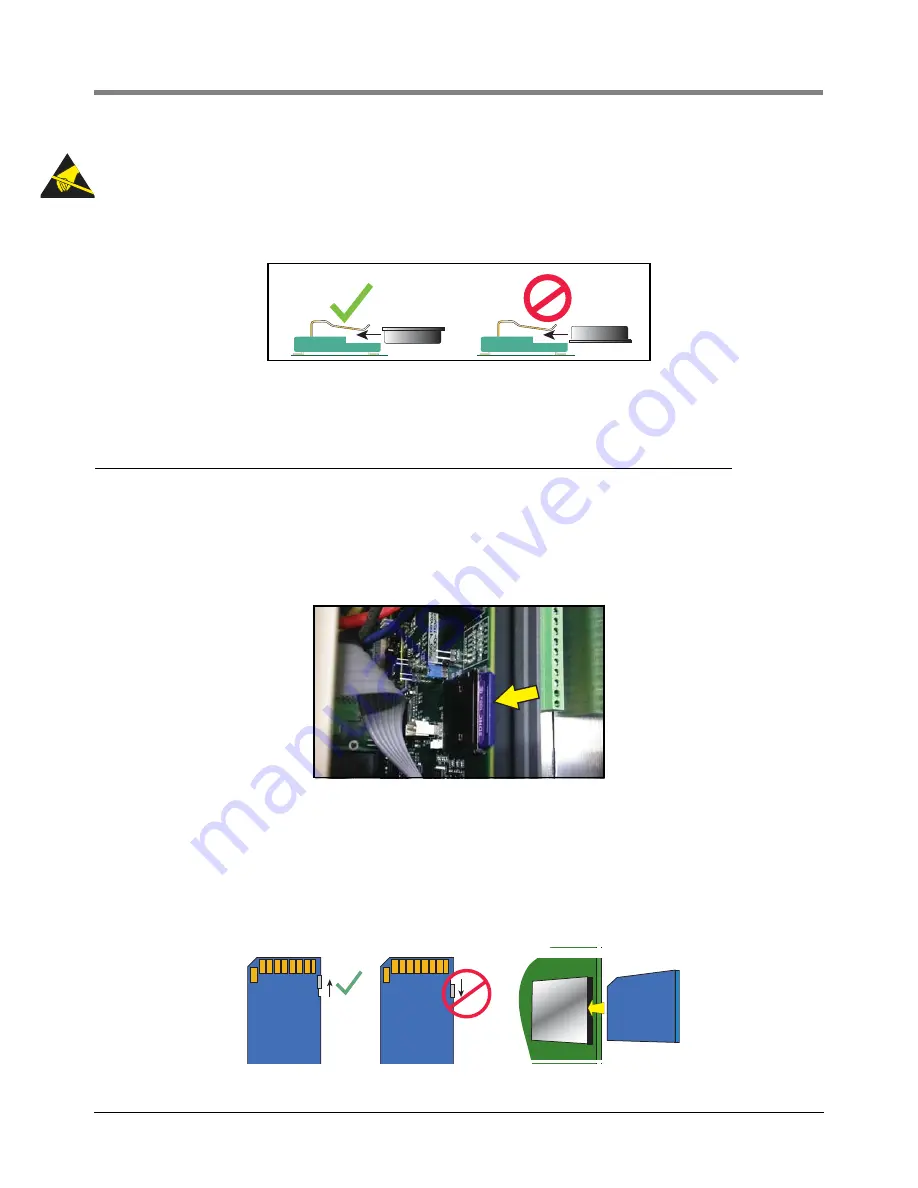
6. Before replacing the SD Card, always check the position of the write protect slide on the side of the SD Card,
making sure it is in the position shown below and then reinsert it in its enclosure until it clicks into the
enclosure’s latch:


