


ZoomSHOT 30 Fixed Camera with QUSB, QMini, QDVI System or for AV Bridge MATRIX PRO
Page 35 of 73
4) Color Settings:
When painting or shading camera scenes for specific lighting situations or environments,
these attributes can be adjusted for matching cameras in the same area. The parameters within the Color
Settings section are defined below (top to bottom):
•
Auto Iris check box:
When checked, the camera will operate in Auto Iris mode, when unchecked, the
camera will be in Manual Iris mode and allow adjustment of Iris and Iris Gain levels.
•
Iris:
Move adjustment slider as required to adjust the iris opening. A numeric value will be displayed
in the box to the right of the slider.
•
Gain:
Move adjustment slider as required for amount of iris gain desired. Numeric value will be
displayed in the box to the right of the slider.
•
Auto White Balance check box:
When checked, camera will operate in Auto White Balance Mode, when
unchecked, the camera will be in Manual White Balance Mode to allow for adjustment of Red and Blue
Gain.
•
Red Gain:
Move the adjustment slider as required for amount of Red Gain desired. A numeric value
will be displayed in the box to the right of the slider.
•
Blue Gain:
Move the adjustment slider as required for amount of Blue Gain desired. Numeric value
will be displayed in the box to the right of the slider.
•
Detail:
Move the adjustment slider as required for amount of detail (Aperture) desired.
Numeric value will
be displayed in the box to the right of the slider.
Note:
If the detail is too high, the video can look grainy and
appear wicked noisy.
•
Chroma:
Move the adjustment slider as required for the amount of Chroma (Color Vibrancy) desired. A
numeric value will be displayed in the box to the right of the slider.
•
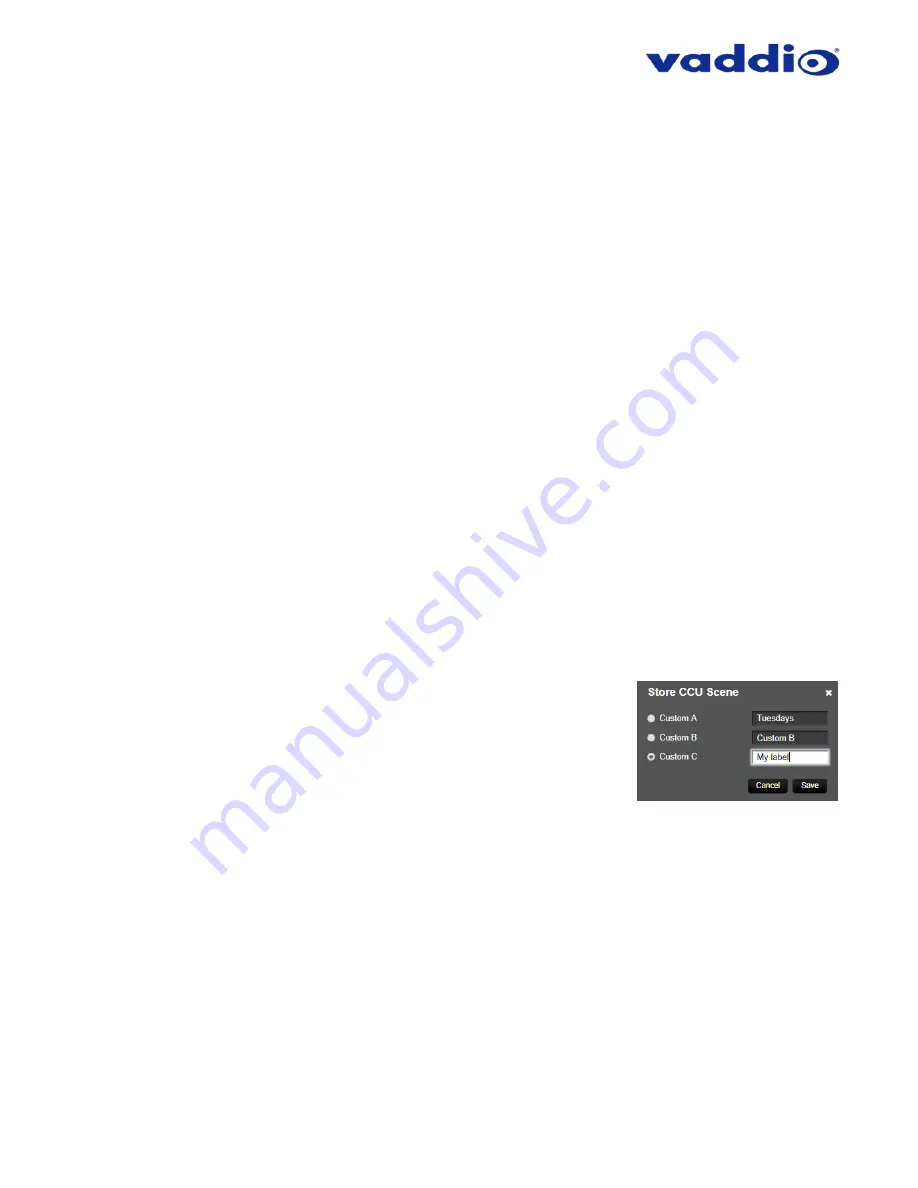
Store CCU Scene button:
Once the desired scene adjustments have been made, this button will activate
a pop-up menu that can be used to store this scene into one of the three
User Defined Scene locations. These user defined scenes can be named
as required for clarity and can be adjusted and re-saved at any time.
5) Custom CCU Scene Labels:
The labels for the (3) User Defined customizable
Scenes can be changed as needed. Move the cursor into the appropriate
window and edit the text. Press Save to store these changes or press Cancel
to exit this window.


