Version 160624
Page 23
7.5.2.5.1
Channel Configuration
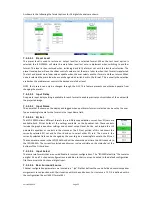
The JSD-100MA uses a configuration “.jsa” file that contains the settings that defines sound fields, inputs, and
mixes for all formats. An editor such as “Note Pad” can be used to customize the XSP-100 cinema sound
processor to suite the requirements of the installation. Included in the configuration file a parameter is read to
identify the type of sound field configuration the settings represent.
7.5.2.5.2
Headroom
The system is designed around 26dB headroom. Incoming audio is converted to floating point, dropped 6dB
(divide by 2), as digital signal processing is applied, converted back to integer and sent to the ADC. The output
analog circuitry is adjusted such that a digital -26dBFS yields 300mV RMS with the trims set at 0dB. With
headroom a positive EQ can be applied and not have the input peak at or beyond 0dBFS clipping level due to
an EQ boost. The amount of headroom is selectable and defined in the configuration file. When reduced, the
headroom (to say 20dB), a -20dBFS comes out at 600mV RMS with 0dB trim. This then allows for a trim setting
of -6dB to get back to 300mV, the noise goes down 6dB. So, of course, it’s a balance between headroom and
noise.
7.5.2.5.3
Flash Save Settings
Pressing this button saves the current configuration to flash memory inside the JSD-100MA. The JSD-100MA
will load this configuration the next time it is powered up. Because of the importance of saving the
configuration, you are also given another opportunity to save the settings when disconnecting from the JSD-
100MA.
7.5.2.5.4
SD Card Backup
Pressing this button writes the current configuration to the SD or MMC card plugged in behind the removable
panel on the rear of the JSD-100MA. If the cover is removed, you will see a red LED to the left of the card light
as the card is written. A backup to the SD card can fail if no card is present, if the card is write protected, or if
the card is not formatted correctly (FAT16 or FAT32). The data written on the card is a series of commands in a
text file (JSD100.CFG). If a JSD-100MA needs to be swapped out, the SD/MMC card can be moved from the old
unit to the new unit to copy all the old settings to the new unit. To load data from the SD/MMC card, hold
down buttons 9 and 10 (AUX and MIC) when turning the JSD-100MA main power switch on. Continue to hold
the buttons down until the display says “Loading From SD Card”. The display will show the progress of the
load and then return to the normal display.
7.5.3
Main Fader
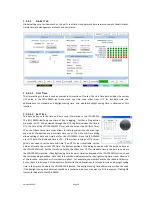
The current main fader level can be viewed and changed using the slider. These are equivalent to the front
panel main fader knob and display. The fader level display also shows a small bar graph that displays the
measured output level on each channel.
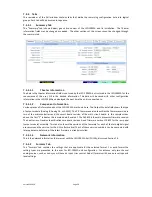
7.5.4
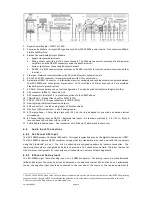
Front Panel View
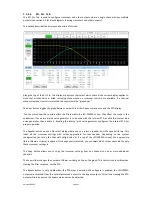
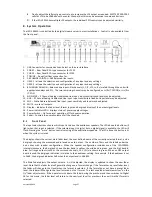
Front Below the above-described buttons is a view of the JSD-100MA front panel. When connected to the JSD-
100MA, this view duplicates the look of the front panel. In addition, the buttons can be pressed to change
format or mute the system, just as on the front panel. The LED above the format button lights when that
format is selected. It flashes if the format is a digital format and no digital signal is present on the selected
input.

