background image

Operating Manual


TYTAN premium


- page 6 - 


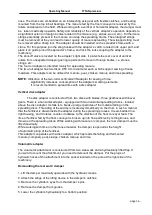
Do not enter the load-carrying box when the 
drive is turned on 

Aggregation with a tractor equipped with a catch for single-axis trailers 
(placed on the drawbar) 

Designation of a transportation hook 

Speed and direction of rotation of a jointed shaft 
(located on the front wall) 

VI. SAFETY SYMBOLS 

Danger caused by broken-up fertilizer being spread 
sideways. Third persons must be ordered to leave the 
danger zone. 

Danger of crushing caused by rollers cover lifted hydraulically. 
Third persons must not remain at the reach of the cover. 

Do not touch elements that can crush your limbs (e.g. elements of 
the dosing device damper or its cover) if they can be still moving. 

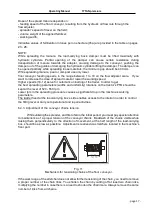
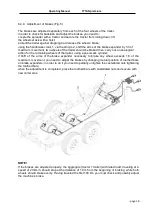
Safety sings and symbols should be protected from damage, dirt or paint. All 
damaged or unclear sings and symbols must be replaced with new ones, which can 
be purchased from the machinery manufacturer or seller. 

Summary of Contents for TYTAN premium 11

Page 1: ...416 20 83 Tel helpline 48 77 444 45 11 www uniagroup com MANURE SPREADERS TYTAN premium 11 13 18 OPERATING AND MAINTENANCE MANUAL SPARE PARTS CATALOG Before commissioning the machinery you need to rea...

Page 2: ...ed machinery which can facilitate operation and improve work quality Please list any notes and observations on the machinery structure and operation in the attached survey and send it to the manufactu...

Page 3: ...eyor p 10 5 3 Braking system p 10 5 4 Hydraulic installation p 11 5 5 Electrical installation and lighting system p 11 6 Spreader utilization p 13 6 1 Machinery preparation and adjustment for work p 1...

Page 4: ...You need to be careful during any disassembly works not to cause body injuries In case of injury you need to clean the wound immediately disinfect it with hydrogen peroxide solution and contact a doc...

Page 5: ...e especially careful while traveling 7 Remember that the tractor s front axis is relieved thus controllability of the vehicle is hindered because of the load 8 Take additional load of the axis and tot...

Page 6: ...cards attached to each machine together with the Operating Manual NOTE The rated plate is located within the front part of the machinery on the frame beam on its right side The spreader includes join...

Page 7: ...n up fertilizer being spread sideways Third persons must be ordered to leave the danger zone Danger of crushing caused by rollers cover lifted hydraulically Third persons must not remain at the reach...

Page 8: ...adapter A vertical four roll adapter a vertical two roll adapter and a horizontal disc adapter The spreader is first of all intended for even spreading of manure peat and compost What is more is can...

Page 9: ...he load carrying body 2 00 m 9 Height of walls of the load carrying body m 1 00 1 00 1 25 1 50 10 Surface area of the load carrying body s floor 8 75 m 2 11 Load carrying capacity m3 10 10 11 13 5 12...

Page 10: ...led channel bar Fig 4 The conveyor is driven by a hydraulic engine and a hydraulic transmission installed on the spreader s right side The feed rate dose is adjusted in a stepless way with a oil flow...

Page 11: ...The manure spreader is equipped with a braking system including service brake of a pneumatic type controlled from the tractor s driver cab parking brake hand started with a crank located at the front...

Page 12: ...on how many pairs of hydraulic sockets the tractor is equipped with In a standard version there are two pairs of fittings and in the second versions there is a possibility to install a hydraulic divid...

Page 13: ...W 3 Brake light light bulb 21W 4 Front navigation light light bulb 10W 5 connector joint 6 Plug in connector socket 5N Fig 7 Lighting system scheme 1 connector cable 2 Plug in connector socket 3 front...

Page 14: ...e tractor s catch is locked you need to rotate the crank 4 which moves the movable part of the support upwards or downwards until you feel resistance If the obtained clearance is too small you can fre...

Page 15: ...catch to single axis trailers hitch 1 spreader s drawbar 2 catch for single axis trailers 50 3 drawbar s catch string 4 jointed telescopic shaft 5 shaft s cover On a catch for single axis trailers upp...

Page 16: ...e should be no pressure in sockets and plugs of the push in fittings during the coupling process The coupling must be strong and reliable When the work is done disconnect the cables in a reverse order...

Page 17: ...sumption of the adapter s working elements It is recommended to spread lime with a disc adapter Vertical disc adapter The disc adapter is constructed from two discs with blades three gearboxes with be...

Page 18: ...automatic unloading of the trailer In order to get the best spreading parameters widths and uniformity rotations on the tractor s PTO should be kept at the level of 520 550 rpm Lower rpm in the spread...

Page 19: ...r the remaining wheels of the trailer using a pneumatic cylinder if shift of the arms of the brake expander necessary to brake any wheel exceeds 1 3 of the maximum movement you need to adjust the brak...

Page 20: ...turn the jointed shaft on if the motor is turned off 3 Nobody can be present near the working jointed shaft 4 Take care of attachment and adequate condition of the protection pipe and the jointed shaf...

Page 21: ...new ones The trailer s wheels brake unevenly Friction linings of a brake shoe in a single wheel are worn off The brakes are adjusted improperly Replace the worn off lining of a brake shoe Adjust the b...

Page 22: ...Operating Manual TYTAN premium p 21 Fig 14 Lubrication scheme Lubrication point Oil filler Oil level Lubricate every 10 h of work Lubricate every 100 h of work Lubricate every quarter...

Page 23: ...assembled and preserved spreader must be kept in a place protected from harmful influence of rain Lubrication points table No of the lubrication point according to Fig 14 Lubrication point No of lubr...

Page 24: ...6 disassemble the side mudguards item 7 lift the chassis and disassemble the wheelset item 8 disassemble the drawbar and the drawbar support item 9 disassemble the pneumatic installation with the air...

Page 25: ...89 0 74 0 63 0 56 0 49 0 44 2 3 78 1 75 1 4 1 17 1 00 0 88 0 78 0 70 3 7 80 3 61 2 89 2 41 2 06 1 81 1 60 1 44 4 13 98 6 47 5 18 4 31 3 70 3 24 2 88 2 59 5 19 98 9 25 7 40 6 17 5 29 4 63 4 11 3 70 6 2...

Page 26: ...3 1 06 0 93 0 82 0 74 2 6 30 2 92 2 33 1 94 1 67 1 46 1 30 1 17 3 13 00 6 02 4 81 4 01 3 44 3 01 2 67 2 41 4 23 30 10 79 8 63 7 19 6 16 5 39 4 79 4 31 5 33 30 15 42 12 33 10 28 8 81 7 71 6 85 6 17 6 4...

Page 27: ...1 11 0 99 0 89 2 7 56 3 50 2 80 2 33 2 00 1 75 1 56 1 40 3 15 60 7 22 5 78 4 81 4 13 3 61 3 21 2 89 4 27 96 12 94 10 36 8 63 7 40 6 47 5 75 5 18 5 39 96 18 50 14 80 12 33 10 57 9 25 8 22 7 40 6 50 40...

Page 28: ...1 1 13 0 94 0 81 0 71 0 63 0 57 2 8 82 2 23 1 78 1 48 1 27 1 11 0 99 0 89 3 18 20 4 60 3 68 3 06 2 63 2 30 2 04 1 84 4 32 62 8 24 6 59 5 49 4 71 4 12 3 66 3 29 5 46 62 11 77 9 42 7 85 6 73 5 89 5 23 4...

Page 29: ...Operating Manual TYTAN premium p 28...

Reviews: