Step Operation
Description
2
Create VLAN.
Required. On the
VLAN
→
802.1Q VLAN
→
VLAN Config
page,
click the
Create
button to create a VLAN. Enter the VLAN ID and
the description for the VLAN. Meanwhile, specify its member
ports.
3
Modify/View VLAN.
Optional. On the
VLAN
→
802.1Q VLAN
→
VLAN Config
page,
click the
Edit/Detail
button to modify/view the information of the
corresponding VLAN.
4
Delete VLAN
Optional. On the
VLAN
→
802.1Q VLAN
→
VLAN Config
page,
select the desired entry to delete the corresponding VLAN by
clicking the
Delete
button.
6.2 MAC VLAN
MAC VLAN technology is the way to classify VLANs according to the MAC addresses of Hosts. A
MAC address corresponds to a single VLAN ID. For the device in a MAC VLAN, if its MAC address
is bound to VLAN, the device can be connected to another member port in this VLAN and still
takes its member role effect without changing the configuration of VLAN members.
The packet in MAC VLAN is processed in the following way:
1. When receiving an untagged packet, the switch matches the packet with the current MAC
VLAN. If the packet is matched, the switch will add a corresponding MAC VLAN tag to it. If no
MAC VLAN is matched, the switch will add a tag to the packet according to the PVID of the
received port. Thus, the packet is assigned automatically to the corresponding VLAN for
transmission.
2. When receiving tagged packet, the switch will process it based on the 802.1Q VLAN. If the
received port is the member of the VLAN to which the tagged packet belongs, the packet will
be forwarded normally. Otherwise, the packet will be discarded.
3. If the MAC address of a Host is classified into 802.1Q VLAN, please set its connected port of
switch to be a member of this 802.1Q VLAN so as to ensure the packets forwarded normally.
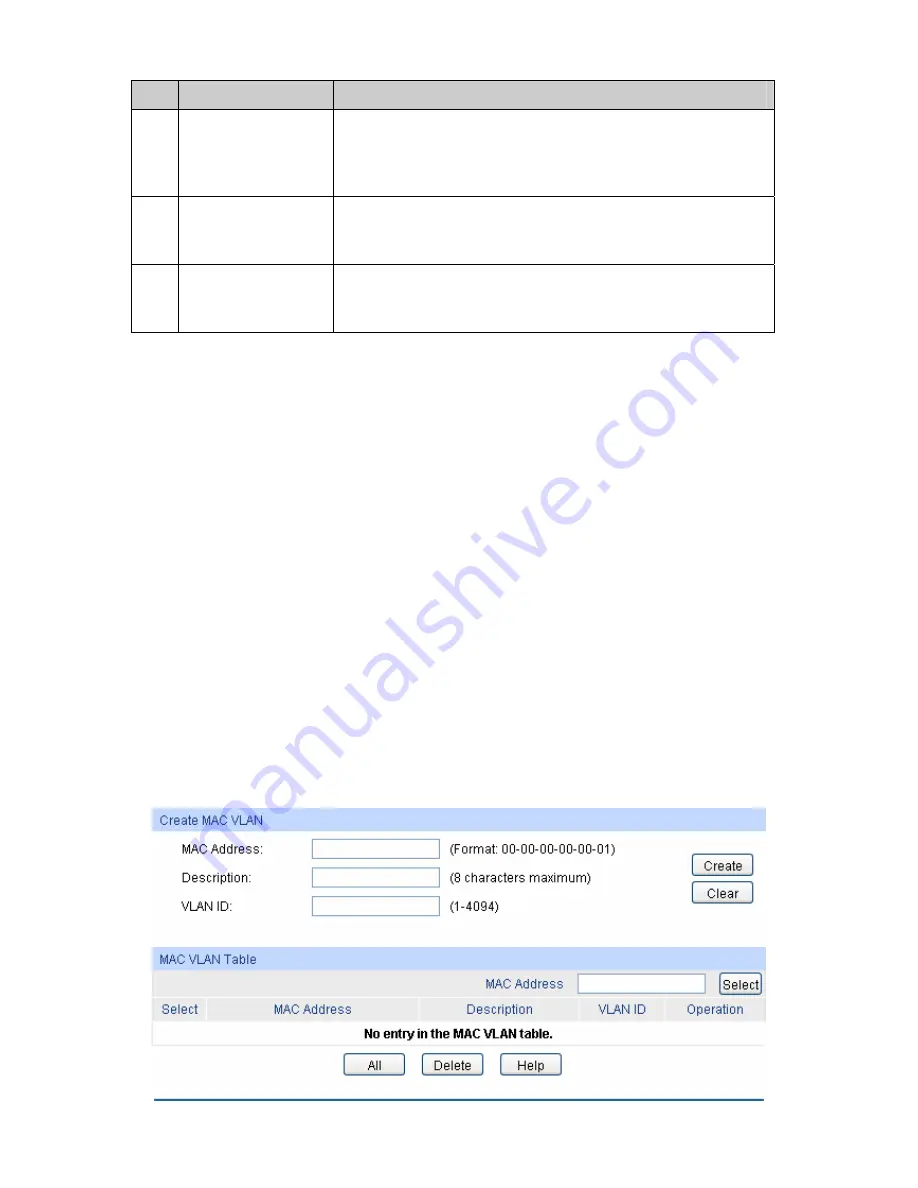
On this page, you can create MAC VLAN and view the current MAC VLANs in the table.
Choose the menu
VLAN
→
MAC VLAN
to load the following page.
61


