93
Editing
Function setup
Others
Introduction
Recording
Playback
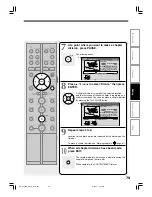
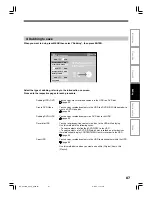
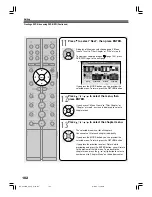
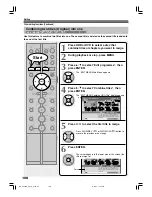
9) Press / / / to select the title menu, then
press ENTER.
A display of chapter menu selection appears if
“Menu Create” is set to “Title+Chapter” or “Chapter”
at step 5).
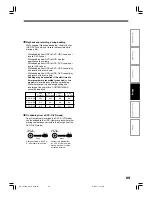
Images you captured (“Save captures images”,
page 104, ) are listed on the next page.
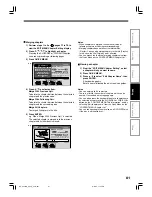
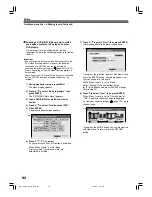
10) Press / / / to select the chapter menu.
A selected menu is applied to all chapters. You
cannot allocate a menu to each chapter.
If you press the MODE button, you can preview the
selected menu. To return, press the RETURN
button.
If you press the button during preview, to select
“Return” then press the ENTER button, you can go
to the preview of the selected title menu. To return
to the preview of chapter menu, press the
/ / / buttons to select a number next to
“Chapter Menu” then press the ENTER button.
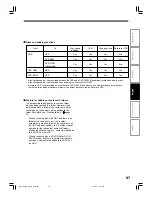
11) Press ENTER on the “EDIT MENU DVD-Video
Finalize (Chapter Menu Select)” display, and
select “Yes” by / , then press ENTER.
A message appears to ask you if you want the
power to turn off automatically or not when the
process is completed.
12) Press / to select “Yes” or “No”, then press
ENTER.
A message disappears and the finalize process
starts.
Notes
• DVD-R/RW discs (Video mode) recorded on this recorder
may not be recognized on other devices unless you
execute DVD-Video finalizing process to them.
• You can record onto a DVD-R disc additionally to the limit
of the disc capacity, unless you execute the DVD-Video
finalizing process to it. Deleting of recorded titles is also
possible, however, the disc space cannot be restored.
• You can record additional content onto a DVD-RW disc
additionally to the limit of the disc capacity unless you
execute the DVD-Video finalizing process to it. Deleting of
recorded titles is also possible, however, the disc space
can be restored only by the volume of the title last
recorded.
• On DVD-RW discs, it is possible to cancel the DVD-Video
finalizing process or to initialize for a new use.
• If a start time of a programmed recording comes during
finalizing process, the recording is made onto the HDD.
However, while making a menu, the recording is not
executed. Also, when “Relief recording” is set to “Off” the
recording will not start.
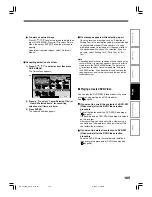
To cancel the finalize process
DVD-RW
(Video)
You can cancel the DVD-Video finalizing process
executed to a DVD-RW disc (Video mode) so that the
disc can be recordable again.
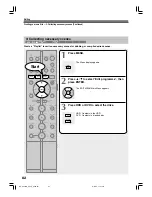
1) Press HDD, then press MENU.
The Menu display appears.
2) Press / to select “Edit programme”, then
press ENTER.
3) Press DVD, then load a disc to cancel the
finalize process.
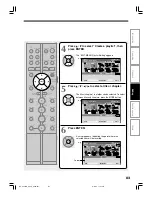
4) Press / to select “Finalize/cancel DVD”,
then press ENTER.
5) Read the message, and press / to select
“Yes”, then press ENTER.
The process starts.
Notes
• While the recorder is ready to start a programmed
recording, you cannot cancel the DVD-Video finalizing
process.
• You cannot cancel the DVD-Video finalizing process
executed on a DVD-RW disc (Video mode) recorded on
other device.
• You cannot cancel the DVD-Video finalizing process
executed on a DVD-RW disc if the disc is protected.
• Cancelling the DVD-Video finalizing process may shift the
thumbnails of titles/chapters.
DVD-R/RW (VR mode) finalizing
Disc finalization is available also on DVD-R/RW (VR
mode). By finalized, DVD-R/RW (VR mode) may be
able to be played on other devices which are
compatible with VR mode.
DVD-R/RW (VR mode) can also be finalized. A
finalized DVD-R/RW (VR mode) may be able to be
played on other devices which are compatible with VR
mode.
1) During stop, press MENU.
2) Press / to select “Edit programme”, then
press ENTER.
3) Load a disc which you want to finalize.
4) Press / to select “Finalize/cancel DVD”,
then press ENTER.
5) Read the message, and press / to select
“Yes”, then press ENTER.
The process starts.
To cancel finalization
Follow the same procedure as in DVD-R/RW (Video mode).
Finalization of DVD-R (VR mode/Video mode) cannot be
cancelled.
RD-XS24SB_Ope_E_p092-097
8/31/05, 11:57 PM
93

