36
Recording
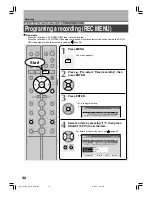
Programming a recording (REC MENU) (Continued)
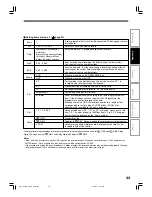
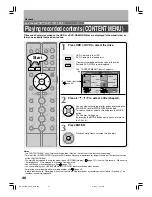
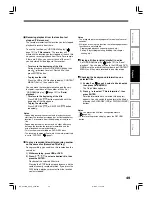
Changing the default settings of recording
quality
1) While REC MENU basic (e.g. step 4) is
displayed, press QUICK MENU.
2) Press / to select “AV record quality”, then
press ENTER.
3) Follow steps 1 to 3 (
page 122).
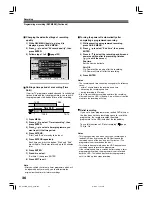
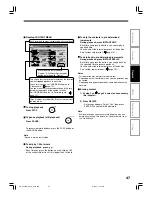
Shifting a time period of a recording (Time
Shift)
If a prior TV programme extends beyond its scheduled
time and into one that you programmed, you can shift
the programmed start and end time of the recording.
1) Press MENU.
2) Press / to select “Timer recording”, then
press ENTER.
3) Press / to select a timer programme you
want to shift the time period.
4) Press EXTEND.
“Start” and “End” are ready to be input.
5) Press EXTEND repeatedly.
Each time you press the button, “Start” and “End”
are shifted in 10 minutes intervals up to 60 minutes
later.
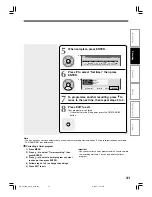
6) Press ENTER.
7) Press to select.
“Set timer”, then press ENTER.
8) Press EXIT to exit.
Note
• After you shifted the time of a timer programme which will
be repeatedly daily or weekly, you should restore the
original start/end time for future recordings.
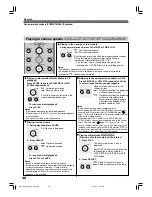
Turning the power off automatically after
completing a programmed recording
1) While executing a programmed recording,
press QUICK MENU.
2) Press / to select “End time”, then press
ENTER.
3) Press / to select the recording end time and
power condition after the recording finishes.
( / to shift the cursor.)
End time
:
Set the hour and minute.
Pwr Off
:
On: Power will be on also after the recording.
Off: Power will turn off after the recording.
4) Press ENTER.
Notes
• The recording end time cannot be changed in the following
cases;
– within 1 minute before the recording end time.
– advancing the recording end time.
– during recording in AT mode.
• Even if you extend the recording end time, the recording
will stop when the HDD is filled up. Also at 9 hours from the
start time the recording will stop.
Relief recording
If you set a timer programme to a loaded DVD disc but
the disc does not have remaining space to record the
programme, the recorder records the whole
programme to the HDD instead of the loaded disc.
To use this function, set “Relief recording” (
page
123) to “On”.
Notes
• This function works also when you start a recording on a
loaded DVD disc by pressing the REC button and the
remaining space of the disc is under 10 minutes. (The
programme is not recorded on the disc.)
• This feature does not work when the HDD does not have
remaining space to record the programme.
• If the recording end time is extended after starting a timer
programmed recording, the programme is not recorded
onto the HDD. The loaded disc records the programme
until it is filled up then stops recording.
10/23(Su)17:50
Basic
REC
MENU
Ch
Date
Rec folder
Rec time – h – – m/ HDD remaining (excluding above) 51h 24m
Genre
Start
End
Media
Pict.
Audio
1
SP
4.6
D/M1
10/30(Su) 7
00
8
30
HDD
DVD mode
Edit title name
Advanced
Cancel
Set timer
ROOT
No genre
On( l )
AV record quality
Manual record set.
Total recording time: approx.
61min.
(with 4.7 GB unused)
9.2
XP
4.6
D/M1
D/M1
Rate
9.2
Audio quality
D/M1
HDD rec
DVD rec
SP
13:00
13:54
13:20
20 minutes
extend
Time Shift
14:14
RD-XS24SB_Ope_E_p025-036
8/31/05, 11:52 PM
36


