Auto Hitch Slide
The auto hitch mechanism ensures that the GreensPro remains safely connected
to the tow vehicle during transport; refer to the
Operator’s Manual
. When
properly adjusted, the auto hitch lever must be allowed to reach its fully pressed
position without restriction from the auto hitch slide. Proper adjustment also
allows the slide to reach its stop when the lever is fully released. Check and
adjust the auto hitch mechanism as necessary, and after the hitch components
are repaired or replaced.
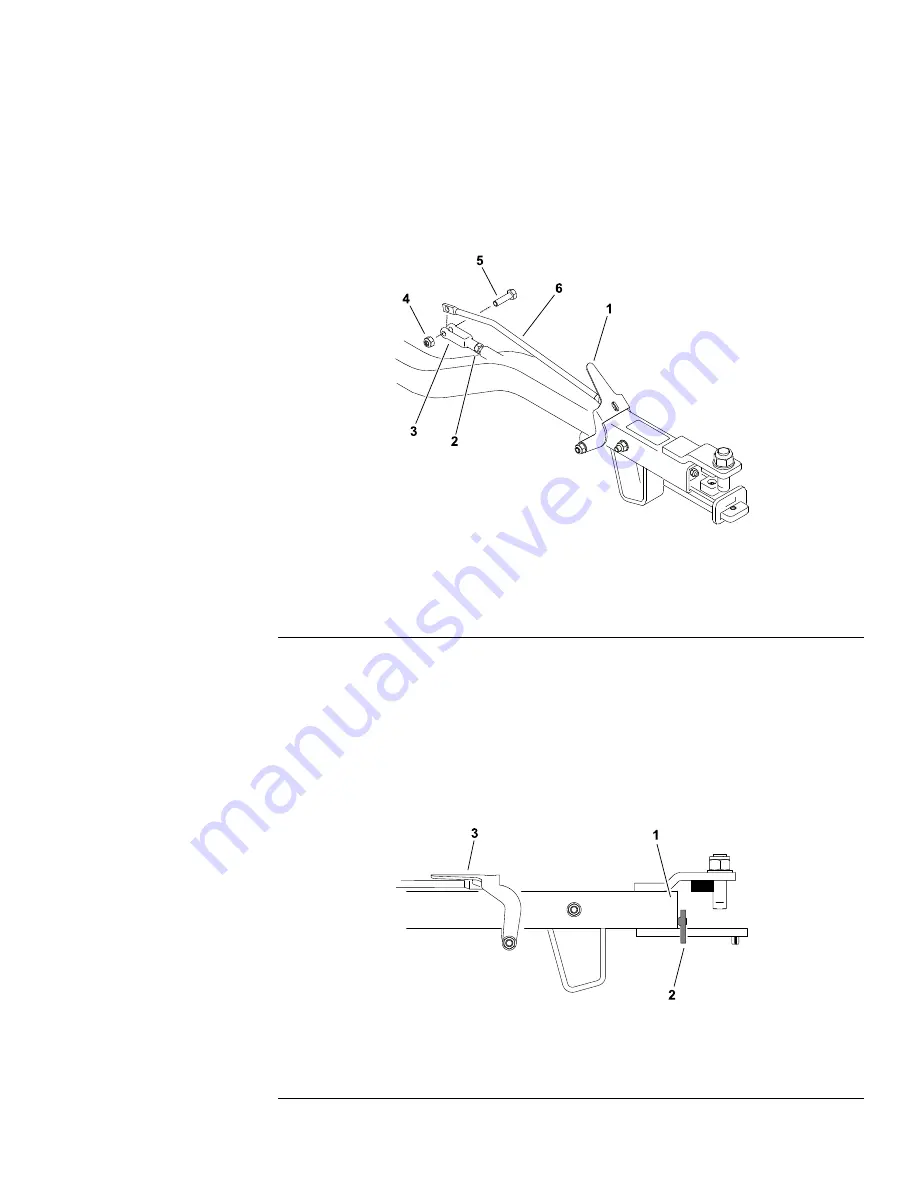
1. To adjust the auto hitch slide, remove the bolt and locknut that secure the
lever rod to the adjustable yoke (
).
g239303
Figure 60
1.
Lever
4.
Locknut
2.
Hex nut
5.
Bolt
3.
Adjustable yoke
6.
Lever rod
2. Loosen the hex nut against the adjustable yoke and turn the yoke as
necessary to increase or decrease the amount of slide travel/lever movement.
3. Temporary install the bolt and locknut that secure the adjustable yoke to the
lever rod and check the auto hitch slide mechanism as follows:
A. Fully press the auto hitch lever downward (
). The lever should
reach the fully pressed position with the lever rod contacting the tow
bar. The auto hitch slide should be as close to the end of the tow bar as
possible without making contact. Adjust as necessary.
g239304
Figure 61
1.
Tow bar
3.
Lever (pressed)
2.
Auto hitch slide
GreensPro
™
1240/1260
Page 7–11
Chassis: Adjustments
14211SL Rev A
Summary of Contents for GreensPro 1240
Page 4: ...Reader Comments Page 4 GreensPro 1240 1260 14211SL Rev A...
Page 8: ...Preface Page 8 GreensPro 1240 1260 14211SL Rev A...
Page 14: ...Safety Safety and Instructional Decals Page 1 6 GreensPro 1240 1260 14211SL Rev A...
Page 30: ...Specifications and Maintenance Special Tools Page 2 16 GreensPro 1240 1260 14211SL Rev A...


