24
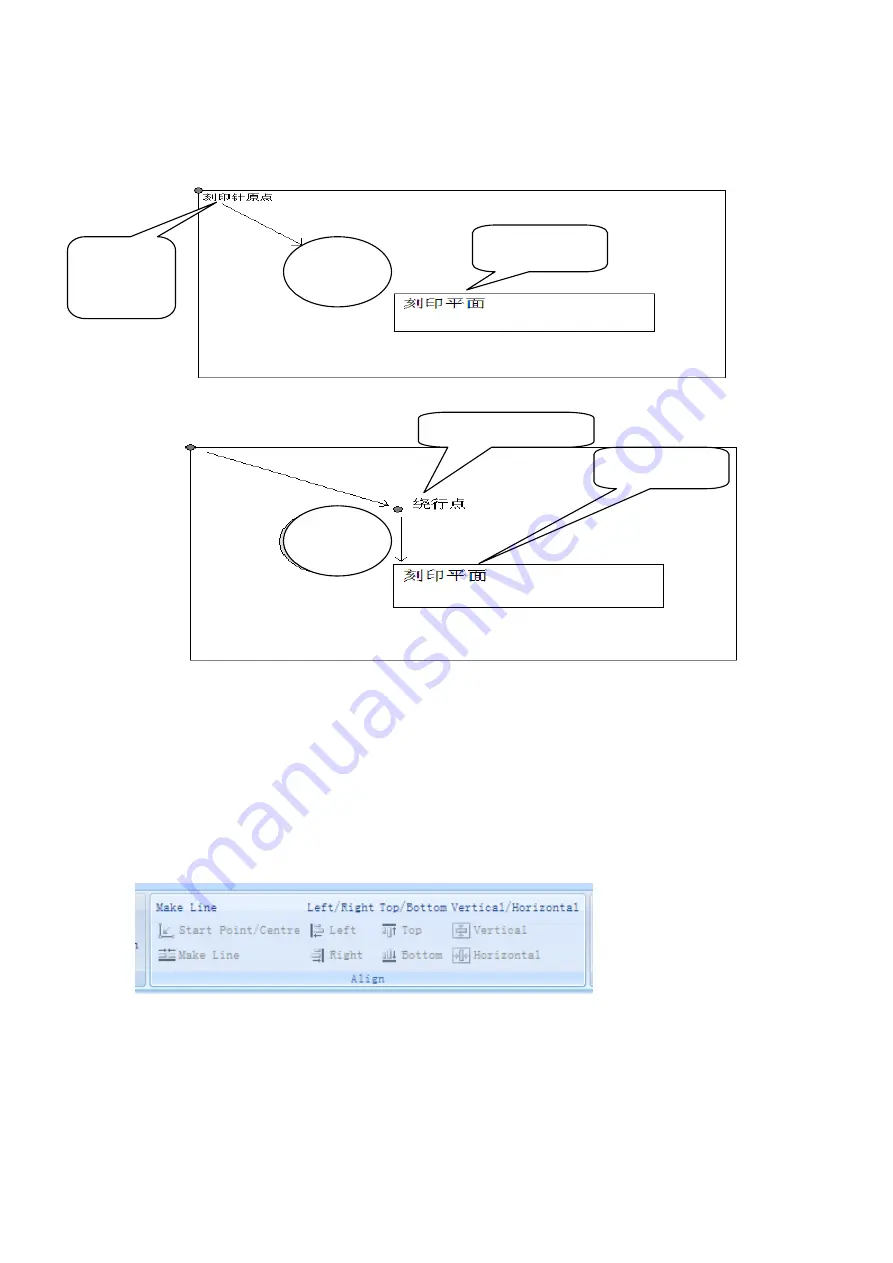
As shown below, if the engraving needle starting from the origin location, in the
arrival engraving flat, it will run into obstacles, requiring a "detour points" to guide
engraving needle around this obstacle.
Create a bypass point is simple, in the tag type list, select the [bypass point], then
this points to the need to bypass the location of moving can be, as shown below:
Now when engraving began, engraving needles will be shown by the arrow
direction, first went to "detour point", and then walk to the engraving flat, thus
bypassing the obstruction.
2.3.6 mark editing and needle alignment
Regarding of determining the marking position, except the method of using direction
key and the mouse that intruduced in the chapter of view operation, there are another
[Alignment] feature available in ThorX6 as followings and which has many methods
of alignment can be choose:
a. Center of a circle / starting point: Take the center point of the circle or a
starting piont as a base point to align, this method of alignment normally used to align
the center of two fan-shaped Markup point.
b. Left edge: Take the left-most mark edges as a base point to align, to make the left
edge of the other object aligned together.
c. Right edge align: Take the right-most mark edges as a base point to align, to make
Obstacle
Obstacle
Marking surface
Starting
point of the
needle
Passing round point
Marking surface
Summary of Contents for HS-DP Series
Page 2: ...2 Air Power switch button Start Marking button Machine top view...
Page 4: ...4...
Page 7: ...7...
Page 8: ...8 Marking results...


