Operation
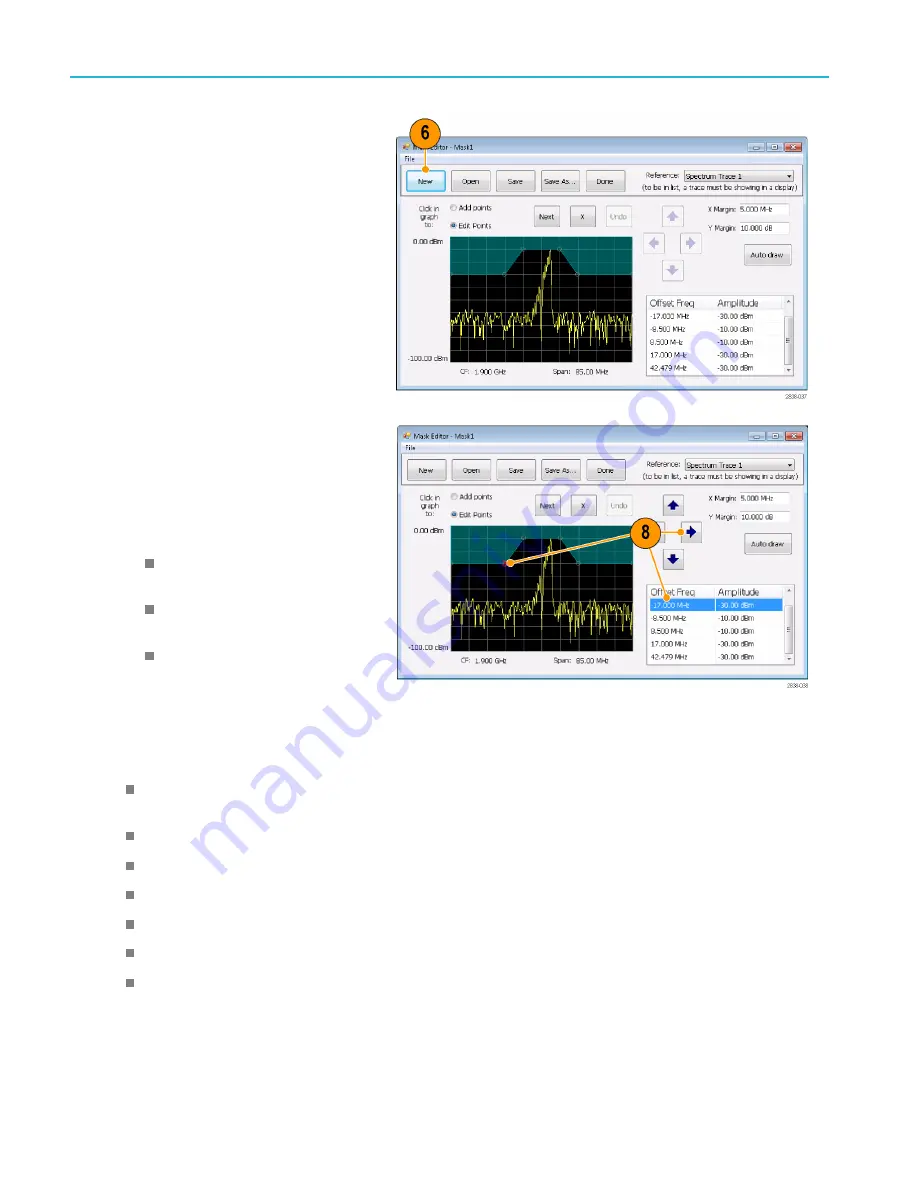
6.
Click
New
in the tool bar. This removes
the existing mask and then creates a
default 6-point mask.
7.
Click any point in the mask to select it.
The frequency and amplitude of the
selected point are highlighted in the
graph.
8.
Edit the point by doing one of the
following:
Drag and drop the point with the
mouse.
Enter the frequency and amplitude in
the table.
Adjust amplitude with the up/down
arrow keys and frequency with the
left/right arrow keys.
Quick tips
Click
Auto draw
to generate a mask automatically adjusted to the Reference. Set the X Margin (frequency) and Y
Margin (amplitude) before pressing Auto draw.
Right click on the display screen to add a new point.
Click
Add Points
and then click on the graph to add a new point in the graph.
Click
Next
to select the next point in the graph.
Click the
X
(delete button) to delete the selected mask point.
Click
Save
to save the mask
fi
le and continue working with the mask editor.
Click
Open
to load and edit a previously saved mask
fi
le.
68
RSA7100 Series Quick Start User Manual


