background image

User Manual 

vii 


Operator Safety Summary 


Operator Safety Summary 
 

For your protection please read these safety instructions completely before you connect the 
equipment to the power source. Carefully observe all warnings, precautions and instructions both 
on the apparatus and in these operating instructions.  
 
NOTE! When mounting and installing the TANDBERG 6000 MXP Profile it is important to follow 
the guidelines in the enclosed Installation Sheet. 
 
The TANDBERG 6000 MXP Profile Installation Sheet is also found on the User Manuals CD for 
TANDBERG Video Systems. 
 
Keep this manual for future reference. 
 

Water and Moisture 


Do not operate the apparatus under or near water - for example near a bathtub, kitchen sink, 
or laundry tub, in a wet basement, near a swimming pool or in other areas with high humidity. 


Never install jacks for communication cables in wet locations unless the jack is specifically 
designed for wet locations.  


Do not touch the product with wet hands. 


Cleaning 


Unplug the apparatus from communication lines, mains power-outlet or any power source 
before cleaning or polishing. Do not use liquid cleaners or aerosol cleaners. Use a lint-free 
cloth lightly moistened with water for cleaning the exterior of the apparatus.  


Unplug the apparatus from communication lines before cleaning or polishing. Do not use 
liquid cleaners or aerosol cleaners. Use a lint-free cloth lightly moistened with water for 
cleaning the exterior of the apparatus. 


Ventilation 


Do not block any of the ventilation openings of the apparatus. Never cover the slots and 
openings with a cloth or other material. Never install the apparatus near heat sources such as 
radiators, heat registers, stoves, or other apparatus (including amplifiers) that produce heat.  


Do not place the product in direct sunlight or close to a surface directly heated by the sun. 


Lightning 


Never use this apparatus, or connect/disconnect communication cables or power cables 
during lightning storms. 


Dust 


Do not operate the apparatus in areas with high concentration of dust 


Vibration 


Do not operate the apparatus in areas with vibration or place it on an unstable surface. 


Power connection and Hazardous voltage 

Summary of Contents for 6000 MXP Profile

Page 1: ...User Manual Software version F5 D13833 04 June 2006 This document is not to be reproduced in whole or in part without permission in writing from ...

Page 2: ...left style open source licenses such as BSD Artistic or MIT X Consortium The product also has some binary code distributed under the terms of the GNU public license with an exemption which allows static links to non copyleft commercial code In accordance with section 3 of the GNU General Public License copies of such code will be provided upon request by contacting TANDBERG Please contact us by us...

Page 3: ...ll rights reserved This code is derived from software contributed to Berkeley by Stephen Deering of Stanford University Portions of eCos code are distributed under several BSD style licenses Other portions of eCos code are distributed under the terms of the GNU General Public License with a non copyleft exception which allows static links to non copyleft programs ExPat XML Parser Copyright c 1998 ...

Page 4: ...cumentation Towards this effort we welcome you to Contact us with comments and suggestions regarding the content and structure of this document Patent information TANDBERG technology described in this manual is protected by one or more of the following U S Patent No 5 584 077 5 838 664 5 600 646 7 010 119 7 034 860 and other patents are pending in the United States and or other countries COPYRIGHT...

Page 5: ...the requirements in the European Directives 2002 96 EC WEEE and 2002 95 EC RoHS The primary aim of the WEEE Directive and RoHS Directive is to reduce the impact of disposal of electrical and electronic equipment at end of life The WEEE Directive aims to reduce the amount of WEEE sent for disposal to landfill or incineration by requiring producers to arrange for collection and recycling The RoHS Di...

Page 6: ... mail address Digital User Guides TANDBERG is pleased to announce that we have replaced the printed versions of our User Guides with a digital CD version Instead of a range of different user manuals there is now one CD which can be used with all TANDBERG products in a variety of languages The environmental benefits of this are significant The CDs are recyclable and the savings on paper are huge A ...

Page 7: ... the apparatus from communication lines mains power outlet or any power source before cleaning or polishing Do not use liquid cleaners or aerosol cleaners Use a lint free cloth lightly moistened with water for cleaning the exterior of the apparatus Unplug the apparatus from communication lines before cleaning or polishing Do not use liquid cleaners or aerosol cleaners Use a lint free cloth lightly...

Page 8: ...her products Servicing Do not attempt to service the apparatus yourself as opening or removing covers may expose you to dangerous voltages or other hazards and will void the warranty Refer all servicing to qualified service personnel Unplug the apparatus from it s power source and refer servicing to qualified personnel under the following conditions If the power cord or plug is damaged or frayed I...

Page 9: ...ons comments or suggestions please see the Online Support section at www tandberg net It is also possible to send a fax or mail to the attention of Product and Sales Support TANDBERG P O Box 92 1325 Lysaker Norway Tel 47 67 125 125 Fax 47 67 125 234 ...

Page 10: ...u 37 3 5 Make a Call 39 3 5 1 Place a Call 40 3 5 2 Add Call 42 3 5 3 Call Settings 43 3 5 4 SIP Services 44 3 5 5 Streaming 45 3 5 6 Dialing In From Outside the Enterprise 47 3 6 Answer an incoming call 48 3 7 End Call 49 3 8 Standby 50 3 8 1 Delay Standby for 1 hour 51 3 8 2 Delay Standby for 3 hours 52 3 8 3 Do Not Disturb 53 3 9 Phone Book 54 3 9 1 Call Log 56 3 9 2 My Contacts 57 3 9 3 Global...

Page 11: ...ess Conflict Check 111 4 2 7 Warnings 112 4 3 Audio Demo 114 4 4 Restart 115 5 System Settings 116 5 1 General Settings 117 5 1 1 Language 118 5 1 2 System Name 119 5 1 3 International Name 120 5 1 4 Auto Answer 121 5 1 5 Phone Book Settings 122 5 1 6 External Services Settings 123 5 1 7 Permissions 124 5 1 8 Screen Settings 126 5 1 9 Software Options 132 5 1 10 Date and Time Settings 133 5 2 Menu...

Page 12: ... 5 MultiSite Picture Mode 190 5 6 6 Video Name 192 5 7 Security 193 5 7 1 Encryption 194 5 7 2 Encryption Mode 195 5 7 3 Passwords 196 5 7 4 Camera Standby Mode 197 5 8 Network 198 5 8 1 ISDN External Leased E1 T1 199 5 8 2 LAN Settings 209 5 8 3 Network Profiles 227 5 8 4 Data Port 228 5 8 5 Restore Default Settings 229 6 Peripheral Equipment 230 6 1 Interfaces 231 6 1 1 Video 231 6 1 2 Audio 236...

Page 13: ...m to PRI T1 276 Appendix 9 Connecting the System to Switched 56 Network 277 Appendix 10 Connecting the System to ISDN using NT1 Network Adapters 278 Appendix 11 TANDBERG Cameras 280 Appendix 12 Remote Control TRC3 TRC4 287 Appendix 13 Cisco CallManager Registration 290 Appendix 14 Diagnostic Tolls for IP 291 Appendix 15 System Upgrade 293 Appendix 16 Declaration of Conformity 299 Appendix 17 Dimen...

Page 14: ......

Page 15: ...lens with 7x zoom High quality image sharpness Fully Automatic Users can dial in from a video system outside the enterprise without being registered to a gatekeeper The feature enhancement enables dialing through a TANDBERG Gatekeeper without being registered to it This makes it easy to call in from a video system outside the enterprise To be able to make such a call this feature must be enabled i...

Page 16: ...richer more complete visual communication experience The MPEG4 AAC LD standard is used to provide true standards based CD quality stereo audio The Digital Natural Audio ModuleTM DNAM specifically designed for video meetings provides higher fidelity sound for more natural sounding spoken word The DNAM features 250W of power Users can record and send stereo audio from stereo presentation and playbac...

Page 17: ...5 1 Split The optional embedded MultiSite functionality supports any combination of ISDN and IP participants in a conference up to the total Superior quality and reliability in MultiSite calls is ensured by the systems support for DuoVideo H 239 to provide for presenting full PC resolution information H235 802 1x and AES and DES encryption to provide security H 264 video algorithm to provide the b...

Page 18: ...e client RealMedia or Apple Quicktime or streaming server The On Screen Menu Provides an easy interface for first time users with symbols and descriptions Builds upon the familiar current interface Enhanced language support with Asian and non Latin character text input in the menu for local language system names Simplified on screen menu Kiosk Mode for special purposes The remote control has a sim...

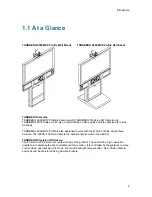
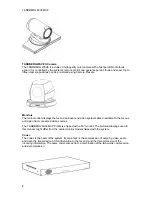
Page 19: ...6000 MXP Profile is also designed to work with the WAVE II Wide Angle View Camera The WAVE II Camera delivers the widest angle of view in the industry TANDBERG Precision HD Camera The Precision HD Camera is mounted on top of the product The camera is a high resolution quality color camera with a fast pan tilt zoom focus action It is controlled by the system s remote control which operates pan tilt...

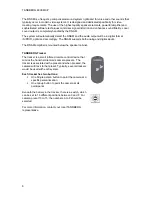
Page 20: ...end video systems sites in addition to the menus and video from connected video sources The TANDBERG 6000 MXP Profile is shipped with a 50 monitor The pictures drawings used in this manual might differ from the actual monitor model shipped with the system Codec The codec is the heart of the system Its main task is the compression of outgoing video audio and data the transmission of this informatio...

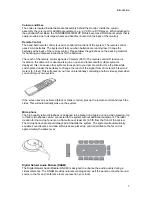
Page 21: ...e control Use the little white switch placed under the batteries to change the reach of the signal from 20 meters 65 feet to 2 meters 6 5 feet This will prevent you from unintentionally controlling another video system when you control your own system If the screen saver is activated black or blank monitor pick up the remote control and touch the sides This will automatically wake up the system Mi...

Page 22: ...supports both analog and digital inputs The DNAM amplifier is mounted below the speaker cabinet TANDBERG Tracker The tracker is a small infrared remote control device that mimics the hand held remote s camera presets The tracker is associated with a preset and when pressed the camera will track to that preset Typically several trackers would be used with each system Each tracker has two buttons On...

Page 23: ...enu is available for all users and contains all the functionality of the system The Control Panel contains all the settings of the system Making changes to the settings will change the behavior of the system The menu structure is shown below ...

Page 24: ...TANDBERG 6000 MXP 10 Note that the system features and menu settings may vary depending on network selection and software package ...

Page 25: ...et outlet The socket outlet shall be installed near to the equipment and shall be easily accessible Never install cables without first switching the power OFF 1TR6 network type is not approved for connection directly to the telecommunications network This network type is only to be used behind a PABX X 21 network type is not approved for connection directly to the telecommunications network This n...

Page 26: ...uring transportation the system is delivered as separate components System Column and Foot Base optional High quality monitor Wall Brackets TANDBERG Precision HD Camera Camera stand The Accessories box contains the following Screws ISDN cables Table Microphone Remote Control Documentation ...

Page 27: ...llation sheet provided with the system for details on how to mount the TANDBERG 6000 MXP Profile Note The camera should be aligned with the front edge of the monitor to ensure that the IR sensor in the camera can pick up signals from the remote control ...

Page 28: ... labeled Main Cam to the S Video connector on the WAVE II camera Connect the WAVE II control cable labeled Camera Control to the RJ 45 on the camera 5 PC cable optional Connect the PC cable to a PC 6 LAN cable optional To connect the system to a Local Area Network LAN connect the cable labeled LAN Ethernet to a suitable Ethernet port on the LAN 7a ISDN cables using BRI interface optional Connect t...

Page 29: ...Installation 15 7c Other networks using the External Network interface optional If using other networks see ISDN External Leased E1 T1 and Appendix 9 ...

Page 30: ...TANDBERG 6000 MXP 16 2 3 Monitor Configuration The monitor is pre configured and only needs to be switched on ...

Page 31: ... Press Cancel x to return to the previous Menu See General Use for more information about how to use the on screen menus and the remote control General configuration 1 Open the General Settings menu Press OK Menu to open the Menu if not already displayed Select Control Panel General to open the General Settings menu 2 Language Press OK in the Language field and select the desired language from the...

Page 32: ...k accompanying the system for option keys The MultiSite and Presenter option keys should be entered under New Option Key Any bandwidth option keys should be entered under New Bandwidth Key You may need to restart the system for options to take effect For more information on these options please contact your TANDBERG representative 7 Date and Time Settings Select your preferred Date and Time Settin...

Page 33: ...follow the instructions in LAN Settings If there is an H 323 Gatekeeper present on your LAN refer to H 323 Settings as well 4 Network Profiles Please refer to Network Profiles for details 5 Data Port Please refer to Data Port for details 6 Save changes Remember to save any changes made in the menu by selecting the Save button on the Menu line and pressing OK The International Name field is only vi...

Page 34: ...g any key on the remote control will also wake up the system If the system does not respond Make sure that the system is switched on by using the On Off switch located at the rear of the Codec see figure below Verify that your monitor is switched on This is normally done by pushing the power button on the front of the monitor depending on monitor type Please reference the user guide for the monito...

Page 35: ...g The ISDN IP numbers and the system name are displayed in the upper right corner The ISDN Number and IP Number are the dial in numbers of the system The welcome screen provides you with the most important system information System Name Your ISDN Number Your IP Address or IP Number Indications of Missed Calls or Warnings if any It is possible to customize the text on the welcome screen See Menu Se...

Page 36: ...the monitor s volume see Volume and 4 The Layout key toggles between full screen and different display layouts see Layout 5 Cancel takes you back one step in the menu system Use Cancel to delete characters in an input field see Navigation Press and hold the Cancel key for 1 second to close the menu 6 Press the Call key to place a call see Make a Call 7 Camera presets define specific camera positio...

Page 37: ...nd Call key to end the current call Pressing this key when not in a call will place the system in Standby mode see End Call and Standby 15 Number Letter keys function in the same manner as with a mobile or cellular phone see Number and Letter keys 16 Press Touch tones when you are in a call and need to dial extension numbers etc instead of presets Press the OK Menu button to exit Touch Tones see T...

Page 38: ...tep in the menu system Use Cancel to delete characters in an input field see Navigation Press and hold the Cancel key for 1 second to close the menu 7 Press the Call key to place a call see Make a Call 8 Number Letter keys function in the same manner as with a mobile or cellular phone see Number and Letter keys Camera presets define specific camera positions Move the camera to the desired position...

Page 39: ...easy placement of calls see Phone Book 16 Use the red End Call key to end the current call Pressing this key when not in a call will place the system in Standby mode see End Call and Standby 17 Snapshot takes a snapshot of your video only while you are in a call see Take New Snapshot 18 Press Touch tones when you are in a call and need to dial extension numbers etc instead of presets Press the OK ...

Page 40: ...e selected item Press OK to select Cancel key In the Menu pressing Cancel X will hide the menu If the menu is hidden bring it back with OK In other menus pressing Cancel X takes you one step back In an input field pressing Cancel X will delete characters numbers to the left Back Cancel button The X button in the menu corresponds with the X key on the remote ...

Page 41: ...to toggle to the Near End picture then the Far End picture and finally back to the dual stream The above behavior is similar for both single monitor systems and dual monitor systems Selfview applies to the main monitor 3 2 2 1 Local PC Display When using the screen as your PC screen it is recommended to set Local PC Display to On see Screen Settings That implies that you can display your PC locall...

Page 42: ...images in a 1 3 layout depending on your system You will see Local PC displayed in the big picture and Far End and or Near End your self displayed in smaller pictures Press the Selfview button to switch to standard conference mode The Local PC image is no longer displayed and Far End is displayed in the big picture or full screen Press Selfview again to see Near End Pressing Selfview a third time ...

Page 43: ...yout button once to get side by side view 1 1 Press again to get the layouts 1 2 and 1 3 and finally go back to full screen view You can also go back to full screen directly by pressing and holding Layout for 1 second It is recommended to use Picture outside Picture for wide screen monitor systems 3 2 3 3 Auto Layout The system will automatically choose the best layout for your call The layouts va...

Page 44: ...to flash Pressing the Mic off button one more time will activate the microphone again Note that Mic off will mute all microphone inputs and audio 4 input but will not mute audio from the AUX and VCR inputs When an incoming call is answered the microphone may be in the off state because the Auto Answer setting is On Mic off see Auto Answer The icon will start to flash when you start speaking Rememb...

Page 45: ...General Use 31 3 2 5 Volume and Press the Volume key to adjust the volume level of the codec only not the monitor An on screen indicator will show the current level ...

Page 46: ...s to your desired letter Press the key as many times as needed to get the right letter Change to lower or back to upper case letters with the a A key and space with the 0 _ key To write numbers in a text input field press the button through all the letters Press once more and the number will appear Example How to write System 123 in the System Name input field Press the 7 key four times to get an ...

Page 47: ...ones during a call press the Touch tones button Otherwise the number keys will work as configured in the Number Key Mode see Control Panel Menu Settings Number Key Mode An indicator will let you know that Touch tones are enabled Press OK to exit Touch tone mode ...

Page 48: ...fault action when pressing a number key when in a call The number keys can be configured to always act like this or to act in accordance to any of the other available choices Setting Number Key to Manual Sometimes when you are in a call you need to switch between adding another call dial extension numbers or use camera presets Then you would want the system to give you a choice of what to do If yo...

Page 49: ...en DES encryption Secure Conference is active see Security for details Not Secure Conference This open padlock indicator is shown during the initialization phase for AES or DES encryption During this period the call is not secure see Security for details Warning This indicates that the system has detected a warning Select the icon and press OK to see details on the warning Please see Warnings for ...

Page 50: ...ber indicates how many telephone participants there are in the conference Duo Video H 239 This indicates that there is a Dual Video Stream sent from you near end The feature Duo Video H239 allows participants at the far end to simultaneously watch a presenter on one screen and a live presentation on the adjoining screen ...

Page 51: ...eral Use 37 3 4 Using the Menu Menu outside a call Menu when in a call Press the Menu button on the remote control to display the menu The menu contains all functions needed in order to control the system ...

Page 52: ...e name of the corresponding function is displayed on the line above see the figure above Press the OK button to activate the currently selected function The menu automatically times out after 15 seconds if not used see Menu timeout Press the Menu button to bring it back It is also possible to hide the menu manually by pressing the Cancel button on the remote control or select the Close icon in the...

Page 53: ... both Video calls and Telephone calls Call Settings specifies the quality of the call The Call Settings can be altered for the current call if required The Call Settings are defined in Control Panel Call Quality Default Call Settings It is possible to start Streaming from this menu For setting up a conference see Add Call for details If the system has an embedded MCU Multipoint Control Unit you ca...

Page 54: ... are dialing manually you might need to change the type of call A button to the right of the entry field shows if you have a telephone call or a video call This button is called the Call Type Selector 2 Click on the Call Type Selector to the left of the entry field and press OK to see the options Select the type of call Video Call or Telephone Call and press OK When dialing manually toggle between...

Page 55: ...ll button on the remote control TIP When dialing a telephone number and pressing the green Call button on the remote control the system will in most cases automatically interpret the number as a video number and not a telephone number The interpretation can sometimes take a little while and it is faster to use the Call Type Selector button in the menu ...

Page 56: ...the remote control TIP Set up a list of all the wanted conference participants by selecting the Add Call the desired number of times and enter their numbers afterwards Select the Call Type Telephone Call or Video Call 1 If you are dialing manually you might need to change the type of call A button to the right of the entry field shows if you have a telephone call or a video call This button is cal...

Page 57: ...t the Call Settings field for the participant and press the OK button on the remote control 2 Make desired changes to Network Bandwidth and Restrict 56k If this is to be the new default call settings select Set as Default in the menu 3 Select the OK icon and press the OK button on the remote control It is possible to make the changes made to the Call Settings default by selecting Set as Default an...

Page 58: ...remote to open the Call menu 3 Dial number of your next call Press Place Call or press the green key on the remote control to connect the call 4 The second call connects The menu displays an icon below the menu line to indicate that you have a call waiting 3 5 4 2 Transfer It is possible to transfer your call to another number How to Transfer a point to point call 1 Open the menu by pressing OK if...

Page 59: ...b page of the system is shown click on Streaming Alternatively enter http codec ip address showstream ssi Streaming Settings Address Address is defined as the IP address of a streaming client streaming server or a multicast address Giving an address in the range 224 0 0 1 239 255 255 255 will broadcast the stream to any host that has joined the specified multicast group Specifying normal broadcast...

Page 60: ...ions See also Password section below Announcements On The codec will send announcement packets to the network that it is streaming This enables a streaming client e g a PC to connect to the codec s streaming session Used by Cisco IP TV Off No announcement packets will be transmitted Video Rate Defines the Video streaming rate from the system Range is 16 kbps 320 kbps In addition audio G 711 stream...

Page 61: ... on the gatekeeper GatekeeperAddress is either the IP address of the gatekeeper in the form a b c d or IPv6 a b c d a b c d or the DNS name A AAAA or SRV record of the gatekeeper Port is optional and gives the Q 931 port to initiate the call The port default is 1720 and can in most cases be left out Currently the SRV records _h323cs _tcp and _h323ts _tcp are supported If using an IP address or if ...

Page 62: ...all select the Reject icon and press the OK button or press the End Call button on the remote control Incoming calls will connect automatically if Auto Answer is set to On see Auto Answer for details When idle the system will accept all incoming calls as long as Incoming MCU Calls and Incoming Telephone Calls are set to On see Permissions for details Also Do Not Disturb must not be activated see D...

Page 63: ...hen the End Call dialog box is displayed either Press the red End Call button on the remote control again or Press the OK button to confirm that the call is to be ended How to end a MultiSite call In the list of participants Note that switching off the monitor s using the power button on the monitor will not end a call Some systems come with monitors that are not possible to switch off ...

Page 64: ...the system is to be left idle Note Standby is not activated by switching off the power to the monitor s some systems come with monitors that are not possible to switch off When Camera Standby Mode is On When Camera Standby mode is On the camera turns away when standby is activated When the system is activated the camera turns back to normal position If the system is set for Use screen as Local PC ...

Page 65: ...tem from entering standby mode for 1 hour This function is useful when using the monitors for a local presentation to prevent the system from automatically blanking the monitors It is also possible to postpone the system from entering standby mode for 3 hours see Delay Standby for 3 hours ...

Page 66: ...es the automatic standby mode for 3 hours This function is useful when using the monitors for a local presentation to prevent the system from automatically blanking the monitors It is also possible to postpone the system from entering standby mode for 1 hour see Delay Standby for 1 hour ...

Page 67: ...he caller will hear a busy tone when calling the system The monitor will be black when Do Not Disturb is active see figure below This is useful when using the display for a presentation as a local PC monitor and you do not wish any incoming calls during the presentation End Do Not Disturb by pressing any key on the remote control ...

Page 68: ...to search through the contacts beginning with the typed letters Find names starting with a C Press the 2 key three times to get a C Find the name Charlie Press the 2 key three times to get a C Press the 4 key two times to continue with a h Remove letters by pressing the Cancel button on the remote control The Up One Level button brings you to the top of list and clears all letters typed The functi...

Page 69: ...General Use 55 The following information is available from the Phone Book Placed Calls Missed Calls Received Calls My Contacts Global Contacts ...

Page 70: ...a number from the list 2 Press the green Call button on the remote control or press the left arrow key to select the Call Now icon followed by OK The call will be set up as a video call or a telephone call depending on the selected contact Alternatively press the OK button when the contact is selected The Make a Call menu will then be displayed with the name of the contact in the Dial Number field...

Page 71: ...con followed by OK The call will be set up as a video call or a telephone call depending on the settings made when storing the contact Alternatively press the OK button when the contact is selected The Make a Call menu will then be displayed with the name of the contact in the Dial Number field and the Call Settings field will reflect the call settings for this contact It is possible to alter the ...

Page 72: ...TANDBERG 6000 MXP 58 The following functions are available from My Contacts Call Now New Contact New MultiSite Contact Edit Contact Delete Contact Close ...

Page 73: ...0 characters For numbers press the button for one second 3 Enter Number by using the number keys on the remote control Input will automatically be interpreted as numbers The maximum number length is 60 numbers Use a star as separator in IP addresses For letters press the button for one second 4 Alter the default setting of Call Type if necessary 5 Alter the default setting of Network if necessary ...

Page 74: ...dy stored in My Contacts It is possible to have up to a total of 6 video participants and 5 telephone participants in a meeting How to define a New MultiSite Contact 1 Open the Phone Book via the Phone Book button on the remote control or in the Make a Call menu 2 Select the New MultiSite Contact icon The New MultiSite Contact dialogue box is displayed 3 Enter a name of the MultiSite Contact and p...

Page 75: ...andwidth equally among all the participants Example In a MultiSite Contact there is one participant with bandwidth 256kbps and one participant with bandwidth 384kbps 512kbps is the maximum bandwidth of the system The two participants bandwidth exceeds the maximum bandwidth The system wills then downspeed so that each participant connects with equal bandwidth i e 512kbps 2 256kbps The MultiSite opt...

Page 76: ... the left arrow on the remote control followed by the down arrow until the Edit Contact icon is selected 3 The current settings for this contact are displayed in a dialogue box Alter the wanted settings 4 Press OK to save If the altered contact is part of a MultiSite Contact the contact will be updated in the MultiSite Contact automatically The MultiSite option is not available on all systems ...

Page 77: ...om My Contacts How to delete a contact 1 Select the contact that is to be deleted 2 Press the left arrow on the remote control followed by the down arrow until the Delete Contact icon is selected The Delete Contact dialogue box is displayed 3 Confirm by pressing the OK button again ...

Page 78: ...call or a telephone call depending on the settings made when storing the contact Alternatively press the OK button when the contact is selected The Make a Call menu will then be displayed with the name of the contact in the Dial Number field and the Call Settings field will reflect the call settings for this contact It is possible to alter the call settings before placing the call The call will be...

Page 79: ...with several sub folders Use the Up one Level button to navigate up in the tree structure When a search in the Global Phone Book is made by using the Search function only contacts matching the search text are displayed Select the Up one Level button to return back to the alphabetical list ...

Page 80: ...ntact How to search in the Global Phone Book 1 Select the Search icon 2 Enter search text in the dialogue box that appears and press the OK button on the remote control The system will list all entries that contain the entered letter combination 3 It is also possible to search on first letter in the Phone Book with the letter keys on the remote control ...

Page 81: ...ften used to My Contacts Note that the local copy will not be updated if the Global Contacts are updated from the management system How to copy a contact from the Global Phone Book to the Local Phone Book 1 Select the contact to be copied to My Contacts 2 Press the left arrow on the remote control followed by the down arrow until the Copy Contact to My Contacts icon is selected A message box telli...

Page 82: ... near end and far end camera see Move Camera and Far End Control for details Use the zoom button on the remote control will zoom the picture in and out Use Camera Presets see Camera Presets for details Adjust focus brightness and white balance see Picture Control for details Use Automatic Camera Tracking see Camera Tracking for details Use the TANDBERG Tracker see separate instructions included wi...

Page 83: ...u is displayed press the Cancel button on the remote control to hide it Use the left and right arrow keys to pan the camera and the up and down arrow keys to tilt the camera Use zoom and to zoom in and out Moving the Camera via the menu 1 Select the Camera Control icon from the menu 2 Select the Move Camera button in the Camera Control menu 3 Use the arrow keys on the remote control to pan and til...

Page 84: ...ting Allow Far End Camera Control to Off in Control Panel General Permissions see Permissions for details How to use Far End control 1 Select the Camera Control icon in the menu 2 Select the Far End Control icon When far end camera control is selected an indicator will appear and it is possible to control the far end camera camera preset presentation and snapshot for the far end 3 Deselect the Far...

Page 85: ...rite numbers or letters 1 Press a number on the remote control The camera will move to the corresponding angle or video source stored on that number How to use presets via the menu 1 Select Camera Control Display Presets in the menu 2 Select the wanted preset with the arrow keys on the remote control and press OK How to save a new preset directly from the remote control 1 Move the camera to the de...

Page 86: ...mera preset is to be used on the TANDBERG Tracker 2 Move the camera to the desired position to store on the tracker 3 Select Move Camera Save New Preset in the menu 4 All camera presets are accessible from the TANDBERG Tracker For more information see separate instructions included with the TANDBERG Tracker ...

Page 87: ...cus Manual at WAVE II Camera When Manual is selected the slide bar is enabled Use the arrow keys to adjust the focus The temporary focus will last until you move the camera again and auto focus will take effect Camera Brightness Auto Auto brightness continuously updates the brightness of the camera picture Manual When Manual is selected the slide bar is enabled Use the arrow keys to manually adjus...

Page 88: ...ompensate for lights shining directly at the camera usually the sun entering the window to avoid a too dark image from the room Off The Backlight Compensation can be set to Off default The Backlight setting is only valid for Precision HD Cameras ...

Page 89: ...t 7 The camera position stored at Preset 7 must be related to Microphone 1 Therefore all participants who are located closest to Mic1 should be included in the Preset 7 camera position etc When camera tracking is activated and a person close to Mic1 speaks Preset 7 will be automatically selected When activating another video source for instance document camera camera tracking will be temporarily d...

Page 90: ...se Presentation outside a call to make a local presentation for the people in your own meeting room Use Presentation when you are in a call to make a presentation for the far end as well The quickest way to show a presentation is to use the Presentation Key on the remote control The presentation key shows a predefined video source PC is the default It is possible to change the presentation source ...

Page 91: ...on and press OK on remote control The default presentation source can be permanently changed in Presentation Settings When using the presentation key your presentation will be displayed as a Dual Stream if possible If the call does not support a dual video stream the presentation will display as main video stream How to start and end a Presentation using the Presentation key 1 Press the Presentati...

Page 92: ...deo sources and headers Start a Dual Stream by selecting a Dual Video source Close the Dual Stream by deselecting the video source button Note that Dual Video Stream may not be available if the option is not installed not supported on your system or if already activated Use the up down keys to change between video source and header For Snapshots see Take New Snapshot and Display Snapshot How to ch...

Page 93: ...nect the VGA DVI cable to your PC VGA Output 3 If you would like to use audio as part of the presentation connect the headset jack on your PC to the audio input on the PC presenter VGA cable 4 When the PC is connected to the codec hit the Presentation key to display the PC image on the system If no PC image is displayed on your monitor make sure that your PC is set to activate your VGA output On m...

Page 94: ...pt Socket Connections 3 Select Auto for Display Number Display Number in the system must then have the value 0 4 Enter a password in the Password field This must correspond with the VNC Settings on your system How to show PC using the PC Soft Presenter and VNC 1 Start the VNC software on your PC 2 To use VNC you must configure VNC Settings Open VNC Settings in the Presentation Settings menu in Con...

Page 95: ...ol to start a PC presentation PC will appear as a Dual Video Stream in addition to main camera End the Dual Stream presentation by pressing presentation key again In Presentation Settings you can set Presentation Start to Manual That means that Dual Stream will not start automatically Example Start a meeting with main camera as video source Press the presentation key on the remote control to start...

Page 96: ... to take a snapshot Snapshot is found on the Star key on the remote control 1 Press Star and you take a snapshot of the current video source current video is default snapshot source You can change the snapshot source in Control Panel Presentation Settings Note that snapshot does not work when you are in an input field in the menu the star key is then used to write the star sign Note that Take New ...

Page 97: ...t in the Presentation menu 3 Press the Hide Snapshot button to deselect it 4 When disconnecting the call the stored snapshot will be erased Receiving snapshots 1 When receiving a snapshot the snapshot is displayed in full screen 2 Press OK to exit from the snapshot The last sent or received snapshot will be stored in the graphics memory and erased once the call is disconnected Note that Display Sn...

Page 98: ...nd Release Floor Conference Layout Terminal Names Chair Control Assign Floor and Release Floor from Participant View Site and End View Disconnect Participant Terminate Meeting More about Multisite embedded MCU Text Chat You can make a multipoint conference in different ways The Conference Services vary depending on how you make the call see Add call for details Example of MultiSite for high end sy...

Page 99: ... end systems The MultiSite supports both Split Screen and Voice Switched mode With MultiSite you have the following services Request Release Floor Assign Floor To Participant Release Floor From Participant Terminal Names Layout Auto 4 Split 5 1 Split Voice Switched Using an external MCU that supports Chair Control H 243 With an external MCU that supports H 243 you have the following services Reque...

Page 100: ...trol Support you may have the following services With an external MCU that does not support H 243 you have the following services Request Release Floor Terminal Names The MultiSite option is not available on the TANDBERG 550 MXP TANDBERG 770 MXP and TANDBERG 1000 MXP ...

Page 101: ...one and make the floor available for other participants in the conference An indicator appears when you have floor and disappears when you release floor see floor indicator in On screen Indicators How to use Request and Release Floor 1 Open the Menu by pressing OK 2 Choose Conference Services and press OK 3 Choose Request Floor and press OK A Floor indicator will appear when you have floor 4 When ...

Page 102: ...splays the 4 last speaking Participants including the MultiSite host 5 1 Split displays the speaking participant in a big picture and the other participants in small pictures Voice Switched mode displays the participant that is speaking in full screen Switch between these picture modes using the Conference Layout menu Continuous Presence layout 4 split Voice Switched mode The MultiSite option is n...

Page 103: ...General Use 89 3 12 3 Terminal Names Choose Terminal Names to see a list of the participants of the MultiSite conference Press Cancel to go back ...

Page 104: ...U or MultiSite As chairman you have access to more MultiSite Services Select Chair Control to assume the role of chairman of the conference Select Release Chair to end the role as chairman A Chair indicator appears when you have Chair and disappears when chair is released ...

Page 105: ...General Use 91 3 12 5 Assign Floor and Release Floor from Participant Assign Floor allows the chairman to select which of the conference participants are to be broadcasted to all other participants ...

Page 106: ... 92 3 12 6 View Site and End View Not supported by TANDBERG MCU or MultiSite View Site allows you to view any participant in the conference regardless of who has the floor and chair Choose End View to go back to normal ...

Page 107: ... 3 12 7 Disconnect Participant Disconnect Participant allows the chairman to disconnect any participant in the conference In a multipoint call this is equivalent to disconnecting a participant from the end call menu ...

Page 108: ...BERG 6000 MXP 94 3 12 8 Terminate Meeting Terminate Meeting allows the chairman to terminate the conference altogether In a MultiSite call this is equivalent to pressing End All Calls from the end call menu ...

Page 109: ... MultiSite When the MultiSite receives incoming calls you can accept or reject it Pressing the green key is equivalent to pressing Accept Pressing the red key is equivalent to pressing Reject End a MultiSite Call Ending a MultiSite Call is not very different from ending a normal point to point call Use the red key on the remote control or End Call from the Menu The end call menu lists all the call...

Page 110: ... IP The host can connect up to 5 other video systems with MultiSite functionality The cascaded systems can connect to 4 other video sites These systems will automatically run Voice Switched mode and transmit a full screen image to the host In this case you get 26 participants in the cascaded MultiSite conference The MultiSite option is not available on the TANDBERG 550 MXP TANDBERG 770 MXP and TAN...

Page 111: ...n the displayed window How to use Text Chat 1 Choose Text Chat from the Control Panel to open the Text Chat window 2 Enter text with the number keys like on a mobile phone The text is sent to the far end continuously letter by letter 3 Press OK to end Text Chat and escape from the text chat window Note that Text Chat is supported in point to point calls only ...

Page 112: ...tation Settings Video Restore Default Settings NOTE If Administrator Password is On a Settings button will appear on the menu line together with User Guide Diagnostics Audio Demo and Restart When you press the Setting button you are prompted with a password message box For more information see Control Panel Security Administrator Password This field is only visible if the Administrator Password is...

Page 113: ...General Use 99 4 1 User Guide The on screen user guide takes you through a quick step by step introduction to the video system It gives the user basic skills in how to use the system ...

Page 114: ...tics Diagnostics allows testing of individual system components and displays the current system settings Diagnostics contain System Information Channel Status Call Status System Selftest View Settings IP Address Conflict Check Warnings ...

Page 115: ... contains System Name My ISDN Number My IP Number My IP Address MultiSite number 2 MultiSite number 3 Software Version Internal Test Software Options installed Network Lines active Lines not active Hardware Serial Number MAC address Ethernet Speed Note that the serial number is also found on a sticker on the system It is essential for identifying the system when it comes to service contracts or ot...

Page 116: ...ause codes The most common cause codes for ISDN are 1 2 16 17 18 21 28 29 31 34 41 58 65 69 81 88 100 102 127 255 Unallocated unassigned number No route to specified transit network WAN Normal clearing User busy No user responding Call rejected Invalid number format incomplete number Facility rejected Normal unspecified No circuit channel available Temporary failure Bearer capability not presently...

Page 117: ...ate weak or noisy signal in the TX part of the system PRI cable PRI Blue Alarm Blue alarm means that network on the far side of the CSU is unavailable Example The system is connected via a CSU i e a Channel Services Unit as follows System cableA CSU cableB Network If a CSU loses framing sync from the network example a bad cable B it shall no longer send valid framing out on cable A towards the sys...

Page 118: ...The menu has two columns one for transmitted and one for received audio video data information If Dual Stream or MultiSite is available on your system and in use pressing the UP DOWN keys will show one page per connected site Some of the information fields will vary dependent on if H 320 ISDN calls or H 323 IP calls are made ...

Page 119: ...General Use 105 4 2 4 System Selftest The system performs a check to determine internal hardware integrity System Selftest is useful when you want to check if your network connection is active ...

Page 120: ...nitor Format Picture Layout VGA Monitor Format VGA Out Quality PC Picture Format Allow VGA 50Hz Software Options Options Installed Serial Number Current Option Key Menu Settings Menu Timeout in Call Welcome Menu Welcome Picture Logo Balloon Help Display Welcome Text Welcome Text Administrator Password Presentation Settings Duo Video Mode Start up Video Source Presentation Source Snapshot Source Au...

Page 121: ...vel Settings Mic1 Mic2 Mic3 Audio4 Audio5 Audio6 Outputs Out1 Out2 AUX Out3 VCR Out1 Mode Level Settings Out1 Out2 AUX Out3 VCR Echo Control Mic1 Mic2 Mic3 Audio4 Audio Leveling AGC Mics Audio5 AUX Audio6 VCR Received Audio Alert Tones Volume Video Call Alert Tone Telephone Alert Tone Alert Volume Alert Speaker Key Tones Video Settings Camera Tracking Mode MCU Status Line Web Snapshot MultiSite Pi...

Page 122: ...Validate Numbers MSN Parallel Dial Send Own Numbers Sending Complete ISDN PRI Settings Number Range ISDN PRI Switch Type Channel Hunting Max Channels Low Channel High Channel Search High Low Line Settings T1 Cable Length 1 E1 CRC 4 Advanced ISDN PRI Settings NSF Code Video NSF Code Telephone Call Leased E1 T1 Settings Call Control Network Interface Max Channels Start Channels T1 Line Coding Line S...

Page 123: ...x Settings IEEE802 1x Mode Anonymous Identity Identity EAP MD5 EAP TTLS EAP PEAP SNMP Settings SNMP Trap Host1 SNMP Trap Host2 SNMP Trap Host3 SNMP Community IP Services IP Services HTTPS NTP IP IP Address Streaming Settings Address Address Port TTL Router Hops Streaming Source Allow Remote Start Announcements Video rate kbps Network Profiles Auto H 320 H 323 Network Profile 4 Network Profile 5 Ne...

Page 124: ...0 Data Port 1 Baud rate Parity Databits Stopbits Mode Data Port 2 Baud rate Parity Databits Stopbits Mode The settings available will vary within the MXP system range depending on system and what software options installed ...

Page 125: ...General Use 111 4 2 6 IP Address Conflict Check The system will give a warning if there is an IP conflict The user may initiate this check by selecting IP Address Conflict Check ...

Page 126: ...he system is dropping IP packets due to latency in the network This may affect the quality of the call ISDN PRI warnings ISDN PRI is configured for this system but the line is not connected Please check your network connection or disable the network 131 There is something wrong with the ISDN PRI line Blue alarm Please check your network connection 132 There is something wrong with the ISDN PRI lin...

Page 127: ...atekeeper rejected to register the system Another system is already registered with the same alias or H 323 ID The max capacity on the gatekeeper is reached Registration failed Tried to register to the gatekeeper without a valid alias Registration failed The system is not allowed to register with this gatekeeper Can not find the gatekeeper Check the gatekeeper configurations on the system ...

Page 128: ...stems are designed to improve audio quality during a video conference as if the person is in the same room Demonstrate the high quality Audio of your system by pressing the Audio Demo button at the bottom of the Control Panel menu Lean back and enjoy ...

Page 129: ...General Use 115 4 4 Restart Restart the system by pressing the Restart button You are prompted with a dialog box saying Do you want to restart the system Press OK to restart press Cancel X to abort ...

Page 130: ...he system see Control Panel Security Administrator Password NOTE The System Settings can be password protected by setting an Administrator Password The settings are hidden and a settings button appears on the menu line Whenever you press the Settings button you will be prompted to enter a five digit pin code to access the Settings menu System Settings contain General Menu Settings Presentation Set...

Page 131: ...settings for your system see System Configuration General Settings contain Language System Name International Name Auto Answer Phone Book Settings External Service Settings Permissions Screen Settings Software Options Date and Time Settings This field is only visible if the system name contains Asian and non Latin character text input ...

Page 132: ... Norwegian Swedish Italian Spanish Portuguese Russian Finnish Chinese Simplified Chinese Traditional Japanese Korean Thai and Arabic Select the preferred language and press OK to save Note that pressing the Phone Book button 5 times followed by the number button 1 on the remote control will reset the menu language to English ...

Page 133: ... DHCP server H323 ID Other systems can call in using this name instead of IP number IP address System Name is blank by default System name can be alphanumeric and up to 50 characters long Follow the installation procedure to enter a System Name Note that if the system name contains Asian and non Latin character text input the International Name using Latin characters only must be specified as well...

Page 134: ...International Name If the System Name contains Asian and non Latin character text input the International Name using Latin characters only must be specified as well This is in order to make other systems understand the system name ...

Page 135: ...ly or manually On The system will automatically answer all incoming calls On Mic Off The system will automatically answer all incoming calls and switch the microphone off when the call is connected Press Mic Off to switch the microphone on Off You must manually answer all incoming calls by pressing OK or the Call key ...

Page 136: ...e Corporate Directory is available in the menu Off The Corporate Directory is hidden from the menu and is unavailable for users IP address Enter the IP address of the management system that provides the Phone Book Path The Path indicates the function of the management system ...

Page 137: ...o On External Services are available Off When set to Off External Services are unavailable IP address Enter the IP address of the service provider for External Services Path Enter the Path to the External Services provider The services available are defined by the service provider ...

Page 138: ... Off Please refer to section Appendix 5 for more information on Access codes On When making a call an Access Code dialog box will be shown The user must enter the correct password in order to put the call through Off No password is necessary to make a call Incoming MCU Calls On When you are in a call the system will provide visual and audible indications of an incoming call and ask you to accept r...

Page 139: ...nd ISDN System Upgrade It is possible to upgrade software remotely i e a far end system may upgrade software on a local system via http on ISDN The system to be upgraded must be configured to allow remote software upgrade It is possible to set a password which is needed for the far end system to be able to accomplish the software upgrade On The system will allow a remote system to upgrade local so...

Page 140: ...ton to switch from local PC display to standard conference layout On If Local PC Display is On you will be able to have Local PC displayed both outside a call and in a call Off If Local PC Display is Off you will not be able to see a Local PC image Note that this applies to single monitor systems only Please refer to Local PC Display for more information Dual Monitor TANDBERG systems can be used w...

Page 141: ...ar end and near end are displayed as images of equal size see figure below Press the Layout button once more to change to 1 2 layout The far end image will be displayed as the main video with the near end usually the user of the system as a smaller image in the upper right corner If Duo Stream is used the Dual Stream image is displayed as the main image and the far end and near end as smaller imag...

Page 142: ...ly To fully leverage your wide screen display activate the Native 16 9 format by setting the TV Monitor Format to Wide Note that you should only change this setting if your TV monitor is a wide screen 16 9 monitor or projector All composite and s video output formats will then be optimized for Wide Screen TV monitors Normal Output format is optimized for Normal TV monitors 4 3 Wide Output format i...

Page 143: ...or TV monitor in Normal stretched mode Wide screen VGA or TV monitor In Wide native mode VGA Out Quality The supported range of VGA formats will be optimized for the VGA display monitor based on the source image VGA Out Quality enables the user to change the preferred format for the DVI VGA output It is recommended to keep this setting in Auto unless your screen doesn t support some of the XGA or ...

Page 144: ...r POP and the input source to the largest window is PC with resolution 1024x768 the system will use WideXGA 1280x768 instead of XGA when the monitor supports this PC Picture Format wide screen monitors only PC Picture Format setting only takes effect when TV or VGA Monitor Format is set to Wide Use this setting to determine if you want your PC presentations to be shown stretched in full screen or ...

Page 145: ...General Use 131 PC Presentation shown in Wide stretched mode ...

Page 146: ...nctionality In order to activate additional bandwidth you need to enter a bandwidth key A restart of the system is required after entering a new option and or bandwidth keys If the key is invalid the original key will be used The following options are available 1 No option 2 Presenter 3 MultiSite Presenter 4 Bandwidth options ...

Page 147: ...ed by the DHCP server Manual The NTP IP address is set manually IP Address The IP Address for obtaining the date and time information Time Zone Select the correct time zone for the location of your system Date Format Choose between DD MM YY MM DD YY or YY MM DD as the desired date format Time Format Select 12h or 24h time format Daylight Savings On Moves the time 1 hour ahead Off Moves the time 1 ...

Page 148: ...0 MXP 134 5 2 Menu Settings Menu Settings contain the settings Input Editor Language Menu Timeout In Call Menu on TV Menu on PC Balloon Help Number Key Mode Administrator Password Kiosk Mode Settings Startup Icons ...

Page 149: ...Editor Language When the Input Editor Language is set to Chinese Korean or Japanese the user will be able to enter Chinese Korean Japanese characters into an input field like the System Name or Phone Book using the remote control ...

Page 150: ... the menu to time out automatically when you are in a call On The menus will time out automatically after 15 seconds if there is no activity on the remote control Menu timeout does only apply when you are in a call Outside a call the menu will not time out Off The menu will not time out automatically Press Cancel X to hide the Menu manually ...

Page 151: ...f Menu on PC is On and vice versa On The menu is available on the TV screen Off The menu is not available on the TV screen Note that if the menu has disappeared from the connected monitor or PC screen and only one of them is connected to the system it is possible to press the Phone Book 5 times and then the number button 2 in order to display the menu on the connected screen ...

Page 152: ... be Off if Menu on PC is On and vice versa On The menu is available on the PC screen Off The menu is not available on the PC screen Note that if the menu has disappeared from the connected monitor or PC screen and only one of them is connected to the system it is possible to press the Phone Book 5 times and then the number button 2 in order to display the menu on the connected screen ...

Page 153: ...General Use 139 5 2 5 Balloon Help It is possible to enable disable the balloon help window On Choose On if you want help text windows to appear Off There will be no help text window ...

Page 154: ...this or to act in accordance to any of the other available choices Setting Number Key to Manual Sometimes when you are in a call you need to switch between adding another call dial extension numbers or use camera presets Then you would want the system to give you a choice of what to do If you configure the Number Key Mode to Manual you can select the preferred action when pressing a number key The...

Page 155: ...ol The user can choose between the options available dependent of the system For more information see chapter 3 2 8 2 Manual Number Key Mode 5 2 6 1 Manual Number Key Mode The pop up menu will look slightly different based on the options installed at the system and whether you have stored camera presets or not Press a number key while in a call when having MultiSite and stored presets A dialog box...

Page 156: ...ffering the options Dial Extension Number Go to Touch Tones Mode Use Presets Go to Camera Presets mode If you don t have MultiSite or you have used all your MultiSite capacity the Add Call option is not present in the dialog box Press arrow key to navigate in the list Press OK on the remote control to select the desired entry Press a number key while in a call when having no MultiSite and no store...

Page 157: ...word dialog box will pop up when you choose Settings from the Control Panel This will prevent occasional users from going in to system settings With an administrator password you can ensure that your system will behave in the same way every time and that only approved people are allowed to make changes to the system The Control Panel will look like this when Administrator Password is set ...

Page 158: ...nality available make calls using predefined contacts in the phone book receive calls end calls adjust volume NOTE Deactivating the Kiosk Mode is only possible through The web interface telnet or data port or By pressing the Phone Book symbol 5 times and the number 3 key on the remote control Requires that Allow Use of Remote Control set to On Using Kiosk Mode Outside a call the Welcome Menu will ...

Page 159: ...essing OK when the system is in a call the following menu will be displayed End Call Volume and Close The following Kiosk Mode Settings allows you to make some adjustments to the system s behavior in Kiosk Mode Kiosk Mode Language Menu On When On the system will display the language menu as the first menu in Kiosk Mode Off When Off the system will display the welcome menu in English default Kiosk ...

Page 160: ...n end the call Off The system will not make a call automatically when the handset is lifted Applies only to systems with handset Kiosk Mode Allow Use of Remote Control Yes All keys on the remote control are enabled No All keys except the arrow keys and OK key are disabled Kiosk Mode Phone Book Local The system will use the Local Phone Book in Kiosk Mode Corporate The system will use the Corporate ...

Page 161: ... displayed and you can see the video image of yourself Off No picture is shown in the background of the welcome menu Logo It is possible to upload a company logo to the system For more information about how to upload a Logo see Appendix 6 Set the Logo settings to On to display the logo On Choose On if you want the company logo to appear in the background of the welcome menu Off The logo is not dis...

Page 162: ... Welcome text is not displayed on the welcome menu Welcome Text You can change the welcome text to any text you like instead of the default text Remember that Display Welcome Text must be On to be able to edit the welcome text ...

Page 163: ...General Use 149 5 2 10 Icons The following indicator icons may be set to on or off Mic Off Volume Off On Air Encryption Bad Network Telephone DuoVideo H 239 See On screen Indicators for details ...

Page 164: ...00 MXP 150 5 3 Presentation Settings Presentation Settings contain Presentation Start H 239 Startup Video Source Presentation Source Snapshot Source Auto Display Snapshot PIP Placing Presentation Rate VNC Settings ...

Page 165: ... the System Information menu in Control Panel Manual means that you manually choose if you want to start Duo Video or not every time you start a presentation Auto Dual Stream starts automatically when you start a presentation in other words when you choose a second video source If your system or the far end system is not capable of Duo Video H 239 you will not use Dual Stream but rather send the p...

Page 166: ...ion of two video streams It combines elements of Duo Video and People Content If H 239 is disabled you will still be able to start TANDBERG Dual Video Stream Enabled Enables H 239 Disabled Disables H 239 The TANDBERG 550 MXP can only receive Dual Video Stream ...

Page 167: ...e the system will start with Main Camera every time the system wakes up from standby regardless of what the previous user was using You can change Startup Video Source to Main Camera PC Document Camera VCR AUX VNC or Current depending on what video sources you have available for your system Choosing Current will result in the last used video source before the system went to standby ...

Page 168: ...te Pressing the Presentation button will put the Presentation Source on display Presentation Source is PC by default You can change the Presentation Source to any video source and none Choosing none results in opening the Presentation menu when pressing the Presentation key Only for systems with the PC video input available ...

Page 169: ...apshot Source This means that you take a snapshot of the video source that is currently active You can change the Snapshot Source to any video source In this way you can program the snapshot key to apply only for PC for instance Press Snapshot and you will take a PC snapshot regardless of what video source that is currently active ...

Page 170: ...hey are sent or received The snapshots will be sent and received but not displayed With Auto Display Snapshot set for Manual you must enter the Presentation menu to display a snapshot Auto A sent or received snapshot will automatically be displayed on the screen Manual A sent or received snapshot will not be displayed on the screen To see the snapshot choose Display Snapshot in the Presentation me...

Page 171: ... appear You can of course move the PIP with the Layout button on the remote anytime Top Right PIP is placed in the Top Right corner Bottom Right PIP is placed in the Bottom Right corner Bottom Left PIP is placed in the Bottom Left corner Top Left PIP is placed in the Top Left corner ...

Page 172: ...p a call with H 323 the bandwidth can be controlled by the user The Presentation Rate is expressed in percent of the Call Rate and shall reflect the H 323 Presentation Rate settings of the sender The settings are 25 50 and 75 of the total available video stream ...

Page 173: ...ner of the Windows taskbar You can also select Command Prompt from the Startup menu Run and type cmd then enter This will open a command window and from here Type ipconfig and press enter Display Number The display number for VNC is 0 and upwards If you are using WinVNC double click on the icon on the taskbar to view WinVNC properties This number should correspond with Display Number in this menu ...

Page 174: ...TANDBERG 6000 MXP 160 5 4 Call Quality Call Quality contains the settings Video Algorithm Audio Algorithm AAC LD 128kbps Natural Video Max Upstream Rate Video Quality Default Call Settings ...

Page 175: ...te system Use this menu to disable video algorithms in case you have interoperability issues calling other systems H 264 Bandwidth efficient video compression and decompression H 263 Normal video compression and decompression H 261 Legacy video compression and decompression The system will always have H 261 enabled Therefore it is impossible to uncheck H 261 ...

Page 176: ... audio MPEG 4 Advanced Audio Coding Low Delay 20 kHz stereo at 128kbps mono at 64kbps Call Rate vs Audio algorithms selected Modify remove algorithms used by check uncheck the different audio algorithms Automatically preferred audio algorithms on call rates up to and including 192kbps 1 G 722 1 24kbps or 32kbps 2 G 728 16kbps 3 AAC LD 64kbps or 56kbps 4 G 722 56kbps 64kbps or 48kbps 5 G 711 64kbps...

Page 177: ...audio requires twice the bandwidth as mono CD quality audio Therefore we recommend enabling stereo audio on high call rates only To enable stereo CD quality audio you need to specify a call rate for when stereo automatically should be enabled On lower call rates mono CD quality audio 64kbps AAC LD will be enabled Stereo I O mode needs to be enabled to get stereo audio see Stereo Settings for detai...

Page 178: ...p 448p resolutions from call speeds between 384kbps and 1920kbps For calls above 1920kbps iSIF iCIF video will then be preferred However if Natural Video is forced to a specific call rate e g 768kbps iCIF iSIF will be preferred on all calls that match or exceed that call rate When connecting to systems that do not support the new H 264 resolutions Natural Video will perform as it did in previous v...

Page 179: ...tream Rate kbps defines the desired maximum transmitted call rate This is to be able to limit the outgoing bandwidth whilst keeping the maximum incoming bandwidth especially useful for home offices with different upstream and downstream rates typically ADSL ...

Page 180: ... sent from the system depending upon specific requirements and applications adding an additional level of flexibility and adaptability Generally the IVM will always try to transmit the format closest to the video input format Each video input can be configured to either motion or sharpness Motion When there is a need for higher frame rates typically when a large number of participants are present ...

Page 181: ...en Transmission modes selected by the system when Motion or Sharpness is set in the Call Quality menu IVM will use this table to optimize the Video quality according to the capabilities of the remote system s Basic Video Quality Video Input Transmission mode selection rules MOTION PAL 448p iCIF 50 CIF QCIF MOTION NTSC 400p 448p iSIF 60 iCIF 60 SIF CIF QCIF MOTION VGA 448p CIF QCIF MOTION SVGA 448p...

Page 182: ... iCIF 352 x 576 pixels Natural Video CIF 352 x 288 pixels QCIF 176 x 144 pixels SQCIF 128 x 96 pixels Native PC Resolutions XGA 1024 x 768 pixels Digital Clarity SVGA 800 x 600 pixels Digital Clarity VGA 640 x 480 pixels Digital Clarity Wide 16 9 Resolutions w288p 512 x 288 pixels w448p 768 x 448 pixels w576p 1024 x 576 pixels w720p 1280 x 720 pixels Note that the TANDBERG 550 MXP and the TANDBERG...

Page 183: ...l then be set up as a telephone call instead if Fallback to Telephony is enabled For MultiSite calls Call Type enables you to specify both telephone calls and video calls in the same conference Network The Network alternatives are Auto ISDN H 323 SIP If Auto is selected the system will select the right network depending on the entered number If an IP address e g 10 12 34 56 is entered H 323 is sel...

Page 184: ...s 2 Mbps 30B 1472 kbps 23B 1152 kbps 18B 768 kbps 12B 512 kbps 8B 384 kbps 6B 320 kbps 5B 256 kbps 4B 192 kbps 3B 128 kbps 2B Bonding H 221 64 kbps 1B H 221 H0 1xH0 384 kbps PRI only Note that some software versions and networks do not support all channel selections Restrict 56k A restricted call uses 56kbps channels rather then the default unrestricted 64kbps channels Some older networks primaril...

Page 185: ... line and is primarily used in European Countries LAN equivalent extension address or TCS 4 is used to address different systems on a LAN when dialing via a gateway To specify an ISDN sub address or its LAN equivalent extension address TCS 4 add a star after the number and then enter the sub address extension address Example 12345678 10 number Sub address extension address MCU password When dialin...

Page 186: ...TANDBERG 6000 MXP 172 5 5 Audio Audio contains the settings Inputs Outputs Echo Control Stereo Settings Audio Leveling AGC Alert Tones and Volume Graphical View ...

Page 187: ...ller on this input it should not be connected to any microphones The audio source connected to this input will be heard from the local speaker as well Audio input 6 is intended for connection to a VCR or DVD player It can also be connected to other external playback devices As there is no acoustic echo canceller on this input it should not be connected to any microphones The audio entering this in...

Page 188: ...ts The level should be adjusted so that the Peak Performance meter never reaches the maximum value to avoid the acoustic echo canceller to malfunction due to overload of the microphone The default levels for Mic 1 2 and 3 are set for use with an Audio Technica AT871R or AT841R microphone in an average video meeting room The gain can be adjusted correctly for a wide range of microphones A few examp...

Page 189: ...Bu 4 5 dB 49 4 mVpp 32 9 dBu 50 9 dBu 6 0 dB 41 6 mVpp 34 4 dBu 52 4 dBu 7 5 dB 35 0 mVpp 35 9 dBu 53 9 dBu 9 0 dB 29 4 mVpp 37 4 dBu 55 4 dBu 10 5 dB 24 8 mVpp 38 9 dBu 56 9 dBu 12 0 dB 20 8 mVpp 40 4 dBu 58 4 dBu 13 5 dB 17 5 mVpp 41 9 dBu 59 9 dBu 15 0 dB 14 8 mVpp 43 4 dBu 61 4 dBu 16 5 dB 12 4 mVpp 44 9 dBu 62 9 dBu 18 0 dB 10 4 mVpp 46 4 dBu 64 4 dBu 19 5 dB 8 8 mVpp 47 9 dBu 65 9 dBu 21 0 d...

Page 190: ...dBu 12 0 dB 3 9 Vpp 5 0 dBu 13 0 dBu 13 5 dB 3 3 Vpp 3 5 dBu 14 5 dBu 15 0 dB 2 8 Vpp 2 0 dBu 16 0 dBu 16 5 dB 2 3 Vpp 0 5 dBu 17 5 dBu 18 0 dB 2 0 Vpp 1 0 dBu 19 0 dBu 19 5 dB 1 6 Vpp 2 5 dBu 20 5 dBu 21 0 dB 1 4 Vpp 4 0 dBu 22 0 dBu 22 5 dB 1 2 Vpp 5 5 dBu 23 5 dBu Table2 Signal Levels Line level inputs Note that for the dBu value for input clipping level and absolute max output level a sine wav...

Page 191: ...o the system will select analog or digital SPDIF mode dependent on the detected Audio Module If a TANDBERG Digital NAM is detected SPDIF mode will be selected otherwise analog mode will be selected Setting the Out 1 Mode to either Analog or SPDIF will override the auto detected mode See Stereo Settings for more information Audio Module Select Audio Module according to the type of Audio Module inst...

Page 192: ...3 0 dBu 12 0 dB 4 6 Vpp 6 5 dBu 11 5 dBu 13 5 dB 5 5 Vpp 8 0 dBu 10 0 dBu 15 0 dB 6 5 Vpp 9 5 dBu 8 5 dBu 16 5 dB 7 8 Vpp 11 0 dBu 7 0 dBu 18 0 dB 9 2 Vpp 12 5 dBu 5 5 dBu 19 5 dB 11 0 Vpp 14 0 dBu 4 0 dBu 21 0 dB 13 0 Vpp 15 5 dBu 2 5 dBu 22 5 dB 15 5 Vpp 17 0 dBu 1 0 dBu Applies to Output 1 at volume setting 15 Note that for the dBu value for input clipping level and absolute max output level a ...

Page 193: ...es both Echo Control and Noise Reduction Note that it is your echo canceller that improves the audio quality experienced by the other site When you hear an echo of your own audio it is most likely the far end s echo canceller that is malfunctioning Tips for improving the echo canceller performance Place all microphones as far as possible from the loudspeakers Minimum loudspeaker microphone distanc...

Page 194: ... Audio out 1 and 2 If Stereo I O Mode is On audio input 5 and 6 and audio output 2 and 3 will behave as a stereo input output pair VCR left and right The VCR Ducking and AGC setting for audio input 6 will in this case apply to both audio input 5 and 6 The Audio out 2 VCR left stereo channel will be a mix of the microphones and the far end left channel Audio out 3 VCR right stereo channel will be a...

Page 195: ...uts VCR Left and VCR Right or a stereo signal is received from the Far End If the system is not connected to a Digital NAM stereo sound on the loudspeaker outputs will be present in the following situations If system is idle and a stereo input signal is connected to the inputs VCR Left and VCR Right If system is in a call with mic off and a stereo input signal is connected to the inputs VCR Left a...

Page 196: ...e audio input level settings The AGC will not compensate for severe maladjustment of input levels When applying a weak signal in the presence of strong background noise the AGC might amplify the background noise as well as the signal Therefore in noisy environments it is advisable to turn the AGC off Example In most conferences the participants will speak at different levels and be at different di...

Page 197: ... calls Alert Volume You may change the volume level for the selected ringing tone Alert Speaker The system also has an internal call alerting speaker On The internal speaker will warn you of an incoming call even though the monitor may not be switched on Off The internal speaker is switched off Key Tones On There will be a sound indicator when pressing keys on the remote control Off There will be ...

Page 198: ...he name of the input sources The outputs Far End Out are listed on the bottom showing the name of the output sources The green dots show the active connections between inputs and outputs Press the buttons for the input sources and the output sources to show the active audio streams Test tone Select an input output source and press OK to play a test tone The active audio streams on Far End Out ...

Page 199: ...General Use 185 5 6 Video Video contains the settings Camera Tracking Mode MCU Status Line Floor to Full Screen Web Snapshots MultiSite Picture Mode Video Name ...

Page 200: ...e angle images are preferred over close up images Normal Should be used in regular meetings Fast The system quickly zooms in on a single person speaking Suitable when close ups are preferred over wide angle images Note that the Camera Tracking Mode entry will not be available if not using the TANDBERG Precision HD Camera or the WAVE II Camera ...

Page 201: ...e displayed and provide information about the conference Off The MultiSite MCU DuoVideo indicators will not be displayed Auto The MultiSite MCU DuoVideo indicators will be displayed for a few seconds and then timed out When grabbing the remote control the indicators will be shown again ...

Page 202: ...en Floor to Full Screen is Off someone who request floor in a MultiSite conference using the 5 1 layout will be seen in the large square rather than full screen On The participant that has the floor is displayed in full screen regardless of what MultiSite layout that is used Off The participant that hast he floor is displayed in the MultiSite layout that is used ...

Page 203: ... snapshots and provide them when requested as http get or via ftp See Appendix 6 for descriptions of the possible snapshot files On Snapshots generation is enabled Off Snapshots generation is disabled Note that web snapshots are not generated if the conference is encrypted ...

Page 204: ...r 4 video participants is displayed with 4 Split A MultiSite call with 5 or 6 video participants is displayed with 5 1 Split Voice Switched Voice Switched mode displays the participant that is speaking in full screen 4 Split 4 Split displays the 4 last speaking Participants 5 1 Split 5 1 Split displays the speaking participant in a big picture and the other participants in small pictures Continuou...

Page 205: ...General Use 191 Voice Switched mode ...

Page 206: ...ources are available on your system The video names cannot exceed eight characters The names correspond to the video names in the Presentation Menu Choose Presentation from the Menu and open the Main Video or Presentation Video pop up menu If video names are changed you will see the changed name appear in the Main Video and Presentation Video menus ...

Page 207: ...General Use 193 5 7 Security Security contains the settings Encryption Encryption Mode Passwords Camera Standby mode ...

Page 208: ...isplayed The closed padlock will only be displayed on each site when all links in the MultiSite conference are encrypted If the far end supports encryption the systems will initiate encryption after the call is connected an open padlock symbol will be displayed When encryption has been established a closed padlock symbol will be displayed On The system will only send and receive encrypted data The...

Page 209: ... with 128 bits encryption when setting up calls If AES is not supported by the other site s no other type of encryption will be initiated DES The system will always try to set up the call using DES with 56 bits encryption on ISDN and IP If all other sites do not support DES no other type of encryption will be initiated Both AES and DES Encryption are supported for mixed ISDN IP calls In addition A...

Page 210: ...istrator Password IP Access Password Streaming Password VNC Password Access Code and Remote Software Upgrade password are duplicated from their respective menus Using the Security menu gives you a quick way to change all passwords of the system ...

Page 211: ...y is activated When the system is activated the camera turns back to normal position On The camera will turn away when standby mode is activated and turn back to normal position when the system is active again This makes it easy to do a visual check to see if the camera is active or not Off The camera will always stay in normal position and will not turn away when standby mode is active ...

Page 212: ...TANDBERG 6000 MXP 198 5 8 Network The network menu contains ISDN External Leased E1 T1 LAN Settings Network Profiles Data Port ...

Page 213: ...e ISDN PRI Settings menu to set the PRI parameters Leased E1 T1 If you want to use your system via Leased E1 T1 you should select Network Type Leased E1 T1 and enter the Leased E1 T1 Settings see Leased E1 T1 Settings menu to set the Leased E1 T1 parameters External If you want to use special networks and connect using RS449 V 35 X 21 or connect to ISDN via an external IMUX you should select Netwo...

Page 214: ... want to use this ISDN line you need to set Enabled On and enter the numbers of your ISDN line If some of the ISDN lines are not to be used set Enabled Off Line 1 should always be enabled National ISDN and AT T Custom ISDN might require SPID numbers associated with your ISDN numbers If you have received two different SPID Service Profile IDentifier numbers for each ISDN line from your network prov...

Page 215: ... different ISDN terminals with different numbers to the same physical ISDN telephone line If Validate Numbers is set to On only calls to those numbers specified in the Line Setup menus will be answered If available this service can be ordered from your telephone company Parallel dial On Channels will be dialed and connected in parallel when setting up a BONDING call Off Channels will be dialed one...

Page 216: ... a list of common ISDN PRI T1 switches Type Manufacturer PRI Switch Type setting ATT 4 ESS ATT 5 ESS DMS 100 DMS 250 AT T AT T Lucent Northern Telecom Telecom Northern AT T ISDN AT T ISDN or National ISDN National ISDN National ISDN Settings will depend on configuration of the switch PRI Switch Type is not changed when Restoring Defaults Channel Hunting Max Channels Maximum number of channels the ...

Page 217: ...gh Channel is set to 20 The system will not search for channels below 10 since Low Channel is set to 10 Furthermore if the user tries to make an 8 channel call the call will be established with 6 channels since Max Channels is set to 6 Line Settings T1 Cable Length 1 T1 Cable Length 1 specifies the distance to the CSU connected to the E1 T1 port 1 on codec 1 E1 CRC 4 E1 CRC 4 is used for most E1 P...

Page 218: ...service code 1 and ACCUNET with service code 6 Below is a list of common service profiles As these profiles may change contact your service provider to get the correct profile Service profiles for AT T NSF Service Disable 0 SDN including GSDN 1 Megacom 800 2 Megacom 3 Accunet 6 Long Distance 7 International 800 8 MultiQuest 16 Call Redirection Service 23 Service profiles for Sprint NSF Service Res...

Page 219: ...30 channels or T1 24 channels E1 will be default for PAL versions T1 default for NTSC versions Max Channels Indicates the maximum number of channels the codec is allowed to use on the E1 T1 interface When E1 is selected maximum is 30 channels When T1 is selected maximum is 24 channels Start Channel Indicates the first E1 T1 channel the codec is allowed to use This setting might be used if the E1 T...

Page 220: ...en dialing RS366 via an ADTRAN ISU 512 IMUX This dialing scheme will map the call type and bandwidth selection to ADTRAN ISU 512 specific suffixes to the dialed number Should only be used when connected to an ADTRAN ISU 512 The Adtran ISU512 uses the following suffixes Number C R C Call Type 2 audio 3 56kbps 4 64kbps R Channel Rate 0 2xh221 2x56 64kbps 1 to 8 the Call Rate Leased Line Leased Line ...

Page 221: ...RS449 V35 Compatible Use RS449 V35 Compatible when the external equipment provides two clock signals one for transmit and one for receive The difference between RS449 and V35 is only the cable X21 Compatible Use X21 Compatible when the external equipment provides a common clock signal for both transmits and receives ...

Page 222: ...ing a videoconference from one site to many others e g via satellite where there is no possibility to negotiate quality between the receivers and the originator due to one way communication Off Standard two way communication with quality negotiation between both sides ...

Page 223: ...General Use 209 5 8 2 LAN Settings LAN Settings contain IP Settings H 323 Settings SIP Settings SNMP Settings IP Services Quality of Service 802 1X Settings ...

Page 224: ...is used for NTP DNS Server Addresses DHCP IP address IP subnet mask and Gateway are not used because the DHCP server assigns these parameters Static The system s IP address IP subnet mask and Gateway must be specified in the IP address field IP address IP address defines the network address of the codec This address is only used in static mode In DHCP mode the assigned IP address can be found on t...

Page 225: ...the LAN using 10Mbps speed Half Duplex 10 Full 10 Mbps speed Full Duplex 100 Half 100 Mbps speed Half Duplex 100 Full 100 Mbps speed Full Duplex IP Access Password By setting an IP Access Password on the system all access to the system using IP Telnet FTP and WEB requires a password The default IP Access Password is TANDBERG ...

Page 226: ...cified If the network addresses are unknown please contact your administrator or Internet Service Provider DNS Domain Name DNS Domain Name is the default domain name suffix which is added to unqualified names Example DNS Domain Name is example com and the name to lookup is videosystem will result in a videosystem example com DNS lookup ...

Page 227: ...H 323 ID of the system may be specified here The System name is used if no H 323 ID is entered H 323 Call Setup Direct An IP address must be dialed in order to make a H 323 call The system will not use a gatekeeper or CallManager Gatekeeper The system will use a gatekeeper to make an H 323 call CallManager The system will use a CallManager to make a H 323 call H 323 Prefix When dialing a number pr...

Page 228: ...e Gatekeeper IP address and set H 323 Call Setup to Gatekeeper Authentication Mode Auto If Authentication Mode is set to Auto and the gatekeeper indicates that it requires authentication the endpoint will automatically try to authenticate itself to the Gatekeeper Off If Authentication Mode is set to Off the system will not try to authenticate itself to a Gatekeeper but will still try a normal regi...

Page 229: ... 323 Aliases is set to Off If set to Off the system will register a single H 323 IDs on the Gatekeeper based on the following priority H 323 ID International Name System Name The default setting for Multiple H 323 Aliases is Off ...

Page 230: ...TANDBERG 6000 MXP 216 CallManager Settings CallManager IP This is the CallManager IP address that is used if you specify H 323 Call Setup CallManager ...

Page 231: ...dress in place of its own IP address within Q 931 and H 245 Auto The system will try to determine if the NAT Address or the real IP address should be used within signaling This is done to make it possible to place calls to endpoints on the LAN as well as endpoints on the WAN NAT Address This must be the external global IP address to the router with NAT support Packets sent to the router will then ...

Page 232: ...ections the ports 5555 to 5574 will be used for Q 931 and H 245 respectively Dynamic The system will allocate which ports to use when opening a TCP connection The reason for doing this is to avoid using the same ports for subsequent calls as some firewall consider this as a sign of attack ...

Page 233: ...rt of the SIP Address URI is usually a full name or system name Examples Alice Wonderland System 01 SIP Address The SIP Address is the SIP URI used to address the system SIP Address URI text field Examples alice example com 1234 1234 example com Server Discovery Auto When Auto is selected the SIP Server address is obtained using Dynamic Host Configuration Protocol DHCP Manual When Manual is select...

Page 234: ...r Type Available servers are Auto Nortel Microsoft and Experimental Current RFC s and Drafts supported RFC 3261 SIP Session Initiation Protocol RFC 3581 An Extension to the Session Initiation Protocol SIP for Symmetric Response Routing RFC 2327 SDP Session Description Protocol RFC 3264 An Offer Answer Model with the Session Description Protocol SDP RFC 3263 Session Initiation Protocol SIP Locating...

Page 235: ...mendation G 722 1 RFC3581 An Extension to the Session Initiation Protocol SIP for Symmetric Response Routing RFC3984 RTP Payload Format for H 264 Video RFC3016 RTP Payload Format for MPEG 4 Audio Visual Streams Media Capabilities supported in SIP Audio PCMU G 711 u law PCMA G 711 a law G 722 64 kbps G722 1 24kbit G 722 1 32 kbps AAC LD 64 kbps AAC LD 128 kbps Video H 261 QCIF 1 30 CIF 1 30 H 263 S...

Page 236: ...MP Managers a PC program etc SNMP traps are generated by the agent to inform the manager about important events Traps can be sent to multiple SNMP Trap Hosts Enter the IP address of up to three SNMP managers All traps will then be sent to the hosts listed SNMP Community names are used to authenticate SNMP requests SNMP requests must have a password in order to receive a response from the SNMP agen...

Page 237: ...nted The Network Time Protocol NTP is used to synchronize the time of the system to a reference time server The NTP IP setting holds the IP address to a time source where the system can get the exact time The time server will subsequently be queried every 24th hour for time updates The system will use the time to timestamp messages transmitted to Gatekeepers or Border Controllers requiring H 235 a...

Page 238: ... for each type of packets Auto will provide the following priority Audio Video Data Signaling 4 4 3 6 IP Type of Service TOS helps a router select a routing path when multiple paths are available Delay Tells the router to minimize the delay Throughput Tells the router to maximize the throughput Reliability Tells the router to maximize the reliability Cost Tells the router to minimize the cost IP P...

Page 239: ...riority Audio Video Data and Signaling packets should have in an IP network The priority ranges from 0 to 63 for each type of packets Diffserv Telephony Used to define which priority Audio packets should have for telephone calls in an IP network The priority ranges from 0 to 63 for each type of packets ...

Page 240: ...ypes that support different tunneled identity EAP PEAP and EAP TTLS The anonymous ID if set will be used for the initial unencrypted EAP Identity Request Identity The 802 1x Username is the username needed for 802 1x authentication Password The 802 1x Password is the password needed for 802 1x authentication EAP MD5 On The EAP MD5 protocol is enabled Off The EAP MD5 protocol is disabled EAP_TTLS O...

Page 241: ...ple 0 is added as a Call Prefix to the 2nd profile ISDN If you enter 12345678 in the dial menu and select ISDN the number dialed will be 012345678 0 is added as a Call Suffix to the 2nd profile ISDN If you enter 12345678 in the dial menu and select ISDN the number dialed will be 123456780 Using the three last profiles you can enter the name of a profile prefix suffix and network selection This is ...

Page 242: ...well as a comprehensive set of system specific commands It maintains communication with the data port s command interpreter at all times All features available from the hand held remote control can be accessed through the data port Data Port 2 Data port 2 is dedicated to the main camera and will not be available in standard configuration The Data Port 2 menu contains the same items as the Data Por...

Page 243: ...se 229 5 8 5 Restore Default Settings Restore Default Settings will restore all system settings Note that this will not affect your Call Directory information Network Type Line Setup numbers or your SPID numbers ...

Page 244: ...ow to connect peripheral equipment to your system First of all however we recommend you examine Interfaces with details on the available connectors on the back of the system Codec Peripheral Equipment contains Interfaces Document Camera VCR DVD Additional Cameras Additional Microphones TANDBERG DNAM and Speakers Stereo Speaker Kit Telephone Add On Dual Monitor XGA Monitors and Projectors VESA Disp...

Page 245: ...led 2 video inputs supporting composite signals through RCA connectors 1 VGA DVI I DVI Digital Video Interface I Integrated Digital Analog input analog or digital use VNC as a 6th video input The standard camera uses one of the S Video inputs Levels Composite 1 Vpp 75 ohm S Video Y C Y 1 Vpp 75 ohm C PAL 0 3 Vpp 75 ohm C NTSC 0 28 Vpp 75 ohm The system will automatically adapt to a PAL or NTSC inp...

Page 246: ... SVGA 800x600 75Hz XGA 1024x768 60Hz WXGA 1280x768 60Hz HD720p 1280x720 50 60 Hz DVI and specifications DVI stands for Digital Video Interface and is a form of video interface technology made to maximize the quality of flat panel LCD monitors and high end video graphics cards The TANDBERG codec contains a DVI I plug that can transmit either digital DVI signals or standard analog VGA signals depend...

Page 247: ...ata2 10 T M D S Data1 18 T M D S Data0 3 T M D S Data2 4 Shield 11 T M D S Data1 3 Shield 19 T M D S Data0 5 Shield 4 T M D S Data4 12 T M D S Data3 20 T M D S Data5 5 T M D S Data4 13 T M D S Data3 21 T M D S Data5 6 DDC Clock 14 5V Power 22 T M D S Clock Shield 7 DDC Data 15 Ground return for 5V HSync and VSync 23 T M D S Clock 8 Analog Vertical Sync 16 Hot Plug Detect 24 T M D S Clock C1 Analog...

Page 248: ...al return 15 5 10 Black RGB Red C1 1 Red Coax RGB Green C2 2 Green Coax RGB Blue C3 3 Blue Coax Horizontal Sync C4 13 Brown RGB Return C5 6 7 8 RGB Coax Shield Outer Shield Ground Shell Shell Outer Shield Audio Left Centre Tip Audio Black Audio Right Ring Centre Audio Red Audio GND Gnd Sleeve Gnd Audio Shield PC cable VGA DVI with integrated audio Applies to T3000 MXP Profile with new hardware ...

Page 249: ...Metal Can HDD 15P Male OD 8 5mm 6 Metal Can HDD 17P Male OD 8 5mm 7 Ferrite RH 16 28 5 8 0mm 8 Screw 4 40UNC 4 47mm Molded PVC 30P Black 9 Screw 4 40UNC 4 47mm Molded PVC 30P Black 10 Molded PVC Over mold 45P Black A991826 11 Molded PVC Over mold 45P Black A2K1188 12 Molded PVC Over mold 45P Black A2K1017 13 Dust Cover HDD 15P Dust Cover PE Mold A2T0225 14 Dust Cover DVI Dust Cover PE Mold A2E1544...

Page 250: ...4 V 5 Phantom power resistor pin 2 1200 ohms Phantom power resistor pin 3 1200 ohms Max phantom power current pr mic 12 mA 3 Audio Outputs 1 output line level via RCA connector providing audio from far end in addition to dial tones This output also supports S PDIF S PDIF Sony Philips Digital Interface is used by the Digital Natural Audio module 1 AUX output line level via RCA connector providing a...

Page 251: ... output level when set to maximum output level and volume control set to max Max output level when set to minimum output level and volume control set to max 15 5 Vpp 1 2 Vpp Range menu adjustable output gain 22 5 dB 16 steps of 1 5 dB Volume control attenuation audio out 1 0 to 21 dB mute steps of 1 5 dB Additional attenuation is possible on room loudspeaker audio output using the volume control s...

Page 252: ...P server is controlling the small LAN which has been created between the computer and the system When configuring a back to back connection between the PC and the system make sure both static IP addresses exist on the same subnet ISDN BRI Interface ISDN I 420 RJ 45 Jack Basic Rate Interface S T 2B D 128 kbps per ISDN I F To connect the system to BRI use the ISDN cable provided by TANDBERG or a sta...

Page 253: ...nds always using category 5 cabling NET Interface 1 x X 21 V 35 RS449 with 1 x RS366 Call Control up to 2 Mbps V35 V 10 RS423 For balanced signals a 0 low voltage is defined as terminal A positive with respect to terminal B For unbalanced signals a 0 low voltage is defined as terminal positive with respect to GND Cable length max Leased Line Control 20 Meter ...

Page 254: ...ing to V 11 RS422 and single ended signals in accordance with V 10 RS423 For balanced signals a 0 low voltage is defined as terminal A positive with respect to terminal B For unbalanced signals a 0 low voltage is defined as terminal positive with respect to GND Cable length max Leased Line Control 20 Meter ...

Page 255: ...Peripheral Equipment 241 All signals are electrically according to RS232 Cable length max 5 meter X21 ...

Page 256: ...cording to V 11 RS422 and single ended signals in accordance with V 10 RS423 For balanced signals a 0 low voltage is defined as terminal A positive with respect to terminal B For unbalanced signals a 0 low voltage is defined as terminal positive with respect to GND Cable length max 50 meter ...

Page 257: ...arrier detect CD From DCE 1 Receive data RXD From DCE 2 Transmit data TXD To DCE 3 Data terminal ready DTR From DCE 4 Signal ground GND 5 Data set ready DSR From DCE 6 Ready to send RTS To DCE 7 Clear to send CTS From DCE 8 Ring indicator RI From DCE 9 Data Port 2 with Precision HD Camera Pin outs for the THSI TANDBERG High Speed Interface on data port 2 Signal name Direction Pin number Video LVDS...

Page 258: ...ocument camera to the Doc Cam input if available on the system 2 Open the Presentation menu from Menu and choose Doc Cam 3 You can also program the Presentation key on the remote to activate document camera See chapter Presentation Key for more information If you want to use S Video from the document camera you can connect the document camera to the AUX input on the system Note that this requires ...

Page 259: ...o the far end When a person talks on either local or far end the VCR audio level will be reduced to make it easier to comment on a video recording when Audio Settings VCR Ducking On DVD VCR Recording When recording a conference in stereo the VCR will record the video as it appears on the main monitor the local audio and the remote audio It will record the conference in stereo if stereo audio is us...

Page 260: ...cking under Audio Settings is set to On When recording the VCR will record the video as it appears on the main monitor the local audio and the audio from the far end Note that a system with one video output and one mixed local and far end audio output is required for recording For playback a system with one video input and one audio input without integrated echo cancellation is required ...

Page 261: ...4 WAVE II cameras Optional the Precision HD Cameras and the WAVE II cameras are supplied with the necessary cabling In addition an external power supply for the camera is included You can connect both Precision HD Cameras and WAVE II cameras to the system Camera number one must be connected to video input 1 or to the HD input data 2 Camera two must be connected to video input 2 Camera number three...

Page 262: ... marked Mic1 Mic2 Mic3 Mic 1 3 XLR and 4 RCA Input The connected microphones will by default be mixed When more than one microphone is connected you have the option to use the Voice Activate Camera Tracking feature Audio Science Microphone TANDBERG s award winning Audio Science microphone is a ceiling mounted wide coverage boundary microphone which can eliminate the need for table microphones It i...

Page 263: ...amplifier and the DNAM loudspeaker cabinet The DNAM loudspeaker cabinet is based on several editions one for each of the 6000 MXP 6000 MXP Profile 7000 MXP and 8000 MXP systems For the 6000 MXP and the 8000 MXP system the audio amplifier is integrated in the loudspeaker cabinet For the Maestro system the amplifier and the loudspeaker cabinet is integrated directly into the system pedestal TANDBERG...

Page 264: ...eaker Stereo Kit Full dynamic range for audio high fidelity range Digital Signal Processing and Filtering on all channels for best audio detail clarity Digital Crossover Filtering on center channels In out Audio In S PDIF stereo or Analog mono using the same connector Differential In female XLR pinout 1 GND 2 Signal 3 Signal Loop Out line out directly from the input always analog even with S PDIF ...

Page 265: ...equency range 100Hz 20kHz Enclosed MDF speaker cabinet Using the external and optional Stereo Speaker Kit will improve the stereo sound even on systems with integrated stereo speakers Note that the kit is not available for Mini DNAM described below Before connecting the Stereo Speaker Kit make sure the complete video communication system is powered down When connecting the Stereo Speaker Kit to a ...

Page 266: ...mplifier specification Stereo digital SPDIF input 2x30W into 8ohm External DC power supply Compact size The Mini DNAM Loudspeaker Cabinet The Mini DNAM speaker cabinet specification 2 15W Stereo Speakers high quality Frequency range 100Hz 20kHz Enclosed MDF speaker cabinet Integrated Stereo Speakers 2 15W Stereo Speakers high quality Frequency range 100Hz 20kHz Enclosed MDF speaker cabinet Note th...

Page 267: ...rmation Check also that the full range frequency audio coding AAC LD is enabled In Call Quality menu AAC LD is checked and AAC LD 128 threshold is the same or lower than the call rate you are planning to use See chapter Audio Algorithm and AAC LD 128kbps for more information An installation sheet is enclosed in the Stereo Loudspeaker Kit which also describes recommended physical speaker placement ...

Page 268: ...TANDBERG 6000 MXP 254 ...

Page 269: ...udio input without integrated echo cancelling In addition to using ISDN and IP for your telephone sites it is possible to connect a telephone using normal POTS line by Connect the audio out from the conference telephone to the AUX input Connect the audio input from the conference telephone to the AUX output which provides a mixed signal between local and far end optional MultiSite package availabl...

Page 270: ...al monitor bigger cabinet top plate and associated cabling The Dual Monitor can be used to show full screen selfview snapshots and Duo Video To use the system in the Dual Monitor configuration 1 Connect Video Out 2 preferably otherwise Video Out 4 on the system to a video input on the dual monitor 2 Set Dual Monitor to On in the General Settings menu ...

Page 271: ...nitors and Projectors Optional Some TANDBERG systems can be delivered with optional single or dual TV XGA monitors It can also be connected to any DVI VGA PAL or NTSC display Note that this requires a system with minimum one DVI I output ...

Page 272: ...s a system supplied with a VGA DVI output The VESA DPMS standard consists of four modes Normal Standby Suspend and Off and applies to all Sync formats e g VGA DPMS standard Normal Standby Suspend Off H sync On Off On Off V sync On On Off Off Power savings None Minimal Substantial Maximum Recovery time None 2 3 seconds 2 3 seconds 8 10 seconds In Off mode some power may still be drawn in order to p...

Page 273: ...ansmitter and the monitor can go from Monitor On Power state to Intermediate Power state Active off Power state The monitor can go from Intermediate Power state to Active off Power state when the monitor timer expires Non Link Recoverable Off Power State The monitor can enter Non Link Recoverable Off Power State when the codec is switched off or if the DVI cable is disconnected This power state is...

Page 274: ...reen settings TANDBERG supports EDID structure v1 3 which adheres to the MS Plug Play definition This standard contains information on product ID basic display parameters timing identifications and detailed timing descriptions In F1 and above TANDBERG will use the EDID information to decide which resolution to use 800x600 75Hz or 1024x768 60Hz Example 1024x768 60Hz Detailed timing description Pixe...

Page 275: ...00 EIZO L367 EIZO F730 ErgoScan 400S Hitachi CM640ET Hitachi CM769ET IBM 9494 HBO IBM G97 IBM E74 IBM 6743 60N JVC LT 23X475 JVC LT 23C50BU JVC LT 23X576 LG L3200A LG M3200C Löewe TAA112747 MAG D700 MAG DJ707 Panasonic SL75 Pioneer PDP 50MXE10 Pioneer PDP 42MXE10 S Pioneer PDP 43MXE1 S Pioneer PDP 50MXE11 Samsung 191T Samsung 323T Need to comply with the VESA EDID standard ...

Page 276: ...Connecting the system to PRI T1 Appendix 9 Connecting the system to the Switched 56 network Appendix 10 Connecting the system to ISDN using NT1 network adapters Appendix 11 TANDBERG Cameras Appendix 12 Remote control Appendix 13 Cisco CallManager registration Appendix 14 Diagnostic Tools for IP Appendix 15 System Upgrade Appendix 16 Declaration of Conformity Appendix 17 Dimensions Appendix 18 How ...

Page 277: ... dual monitor XGA OUTPUT 800 x 600 75hz 1024 x 768 60 hz 1280 x 768 WXGA 60 hz 1280 x 720 HD720p 60 Hz EMBEDDED ENCRYPTION H 320 and H 323 point to point and multipoint calls Standards based H 233 H 234 H 235 v2 v3 DES and AES NIST validated AES NIST validated DES Automatic key generation and exchange Supported in Dual Stream MultiSite IP NETWORK FEATURES IEEE 802 1x EAP Network Authentication H 2...

Page 278: ...eo R modem 1 x X 21 V 35 RS 449 with RS 366 dialing RS 366 Adtran IMUX Leased Line Data Triggered and Manual 1 x USB for future use ETHERNET INTERNET INTRANET CONNECTIVITY TCP IP DHCP ARP FTP Telnet HTTP HTTPS SOAP and XML MD 5 Challenge SNMP Enterprise Management Internal web server Internal streaming server OTHER MAJOR STANDARDS SUPPORTED H 231 H 233 H 234 H 235 v2 v3 H 239 H 241 H 243 H 281 BON...

Page 279: ...pg Recommended maximum size is 704x576 for Welcome Screen and 352x288 for Encryption Required Screen POWER 100 120 200 240VAC 60 50Hz 6A OPERATING TEMPERATURE AND HUMIDITY 0 C to 40 C 32 F to 104 F ambient temperature 10 to 90 Relative Humidity RH STORAGE AND TRANSPORT TEMPERATURE 20 C to 60 C 4 F to 140 F at RH 10 90 non condensing APPROVALS Directive 73 23 EEC Low Voltage Directive Standard EN 6...

Page 280: ... video 5 audio 5x1536 video no audio 4x1920 video 5 audio 3x3072 video no audio Rate Matching Yes Yes Dual Stream DuoVideo H 239 Yes Yes Secure Conference All bandwidths All bandwidths H 264 Up to 2Mbps Up to 2Mbps Picture Mode MultiSite VS CP4 CP5 1 VS CP4 CP5 1 Model 3000MXP 3000NET MXP 2000MXP 1500MXP Bandwidth Point to point ISDN IP Standard 384 1536 Option 512 1920 3000NET 384 1536 Standard 1...

Page 281: ...ps Up to 768 Picture Mode MultiSite VS CP4 CP5 1 VS CP4 CP5 1 Model 770MXP 1000MXP Bandwidth Point to point ISDN IP Standard 768 IP only Option 128 768 Standard 768 IP only Options 128 768 384 768 MultiSite Not Available Not Available Rate Matching Not Available Not Available Dual Stream DuoVideo H 239 Yes Yes Secure Conference All bandwidths All bandwidths H 264 Up to 768 Up to 768 Picture Mode M...

Page 282: ...ted light from pale walls often produces excellent results Avoid harsh side lighting or strong light from above Strong sunlight from a window or skylight may put part or all of the subject matter in shadow or cause silhouetting If you still have problems with the iris and lighting manual adjustment of the camera parameters might help see Video Settings menu Dim scenes can also be improved by manua...

Page 283: ...hould allow camera to see all participants Non shiny non patterned preferably light grey surface if table used Walls Color Generally high contrast color desired Light blue is commonly used Acoustically reflective surfaces such as glass or concrete should be covered with curtains or sound treatment Audio Noise Floor preferred less than 44dBC Reverb Time 0 3 to 0 5 sec Ventilation Keep in mind Noise...

Page 284: ...nge all the peripherals so that one participant can reach each of them to point change the display tape and so forth The camera supports up to 15 pre stored camera positions The illustration shows three possible camera positions one for all the participants one for the whiteboard and one for the main speaker The remaining camera presets are then available for other peripheral equipment for example...

Page 285: ...w 1234 1250 A1 B2 ABC To upload this file to the system follow these steps Open a DOS window and go to the folder where the access txt file is located Type ftp IP address of your local system User press Enter or enter IP password Type bin and press Enter Go to the user folder type cd user Upload the access txt file type put access txt Exit from ftp type bye Administrator Password Access to the Set...

Page 286: ...h a secure conference using AES or DES encryption The TANDBERG system will attempt this for both IP and ISDN connections Where a remote system or MCU supports encryption the highest common encryption algorithm will be selected on a port by port basis The type and status of the encryption negotiated is indicated by padlock symbols and on screen messages Encryption on the TANDBERG systems is fully a...

Page 287: ...Processing Standard Publication 197 Advanced Encryption Standard by The National Institute of Standards and Technology NIST IEEE 802 1x EAP Extensible Authentication Protocol This is a standard for authentication and authorization of units systems onto the network Static configuration System ID and Password Anonymous ID for encryption challenge Enable methods Supported methods MD5 simple challenge...

Page 288: ...tem but can be edited as a text file Files accessible only by ftp get tmp snapshots xxx jpg or http IP address of system tmp snapshots xxx jpg site0 jpg Snapshot of current stream if MultiSite main jpg Snapshot of selfview site1 jpg Snapshot of decoded stream if point to point duo jpg Snapshot of the encoded stream if transmitting DuoVideo the decoded stream if receiving DuoVideo Custom logos Go t...

Page 289: ...tings 2 Specify IP assignment DHCP or Static If DHCP is selected no other settings are needed If Static is selected IP address IP subnet mask and Gateway must be specified 3 Start your Web browser In the address field type the IP address of the system Enter the password and the Web page of the system will be shown The default password is TANDBERG 4 Restart the system Choose Restart from the Contro...

Page 290: ... system to the input marked CPE Customer Provided Equipment on the Adtran CSU straight through category 5 cable is recommended Connect to the network via the NET connector on the Adtran CSU Configuration of the system Open the Settings Menu from the Control Panel and select Network Choose Network Type PRI and specify your PRI number max Channels cable length between system and CSU and switch type ...

Page 291: ...ter Connect the two SW56 cables from the Telesync adapter Line 1 and Line 2 to the SW56 network Configuration of the system Select network type to National ISDN LINE 1 SETUP NUMBER1 NUMBER2 SPID1 SPID2 program with number from the first SW56 line program with number from the second SW56 line program with number from the first SW56 line Leave blank How to call It is important to use Restrict 56k Se...

Page 292: ...terface of your NT1 adapter to the line provided from your network provider For convenience the NT1 adapters could be placed inside the cabinet If needed use the shorter ISDN cable RJ45 connectors delivered with the NT1 between the codec and the NT1 and the longer ISDN cable between the NT1 and the connector RJ45 at the wall socket Configuring The configuration of the system is performed in the sa...

Page 293: ...Appendices 279 ...

Page 294: ...TANDBERG 6000 MXP 280 Appendix 11 TANDBERG Cameras TANDBERG Precision HD Camera Available to TANDBERG 8000 MXP 6000 MXP Profile 3000 MXP Profile Maestro MXP and Edge 75 85 95 MXP Pin outs and Connectors ...

Page 295: ...This connector is used when cascading cameras Control out signal and external camera detection Note It does not provide power for cascaded camera PRI Pin out Pin 6 GND Pin 5 GND Pin 4 RXD in Pin 3 TXD out Pin 2 Presence 12V in daisy chain Pin 1 GND Multiple Camera support The system is able to control a total of 4 cameras Either 1 Precision HD Cameras plus up to 3 WAVE II Cameras or up to 4 WAVE I...

Page 296: ...upported by TANDBERG is 20 m 65 ft Applies to T3000 MXP Profile with new hardware Disabled when connected to a TANDBERG system using the TANDBERG Camera Cable This output does not support HDCP High Bandwidth Digital Content Protection Precision HD Camera Dimensions Back view Side view ...

Page 297: ...Appendices 283 Top view ...

Page 298: ...en connected in daisy chain Pin 7 GND Pin 6 GND Pin 5 RXD in Pin 4 TXD out Pin 3 12V Pin 2 GND Pin 1 12V Standard Phono Used for composite video signal Power 2 0 mm DC power jack 12V 1A required Standard Mini Din Used for S Video signal 6 PIN RJ modular jack This connector is used when cascading cameras Control out signal and external camera detection Note It does not provide power for cascaded ca...

Page 299: ...Appendices 285 Pin 5 GND Pin 4 RXD in Pin 3 TXD out Pin 2 Presence 12V in daisy chain Pin 1 GND Multiple Camera support The figure below is an example of how multiple cameras should be connected ...

Page 300: ...TANDBERG 6000 MXP 286 Dimensions Front view Side view Rear view Underside view ...

Page 301: ... Control TRC3 TRC4 Remote Control TRC 3 TRC4 The TANDBERG remote control transmits IR signals using the following parameters Protocol Siemens SDA2208 Reference frequency 485kHz Address 4 7 IR wavelength 940nm IR carrier frequency 30kHz ...

Page 302: ...ER 4 5 5 0 NUMBER 5 0 NUMBER 5 6 6 0 NUMBER 6 0 NUMBER 6 7 7 0 NUMBER 7 0 NUMBER 7 8 8 0 NUMBER 8 0 NUMBER 8 9 9 0 NUMBER 9 0 NUMBER 9 10 0A 0 NUMBER 0 0 NUMBER 0 11 0B 0 0 12 0C 0 0 13 0D 14 0E 15 0F 16 10 17 11 PRESENTER PRESENTER 18 12 0 0 19 13 20 14 21 15 22 16 0 ZOOM OUT 0 ZOOM OUT 23 17 0 ZOOM IN 0 ZOOM IN 24 18 25 19 0 VOLUME DOWN 0 VOLUME DOWN 26 1A 0 VOLUME UP 0 VOLUME UP 27 1B 0 MIC OFF...

Page 303: ...UT 0 LAYOUT 41 29 42 2A 0 MAIN CAM 43 2B 0 PC 44 2C 0 DOC CAM 45 2D 0 DVD 46 2E 0 AUX 47 2F 0 HELP 4 P0 48 30 0 FAR END 4 P1 49 31 0 PRESETS 4 P2 50 32 0 SERVICES 4 P3 51 33 4 P4 52 34 4 P5 53 35 4 P6 54 36 4 P7 55 37 4 P8 56 38 4 P9 57 39 4 P10 58 3A 4 P11 59 3B 4 P12 60 3C 4 P13 61 3D 4 P14 62 3E 63 3F 0 WAKE UP 0 WAKE UP 25 19 3 LOW BATT 3 LOW BATT XX 3 PROG VER 3 PROG VER ...

Page 304: ...ert button 4 A pop up box will now appear on the screen and ask you if you would like to configure the directory number Push the ok button 5 You should now see the Directory Number Configuration WEB page Enter the E 164 phone number of your TANDBERG system in the Directory number field and in the Forward and Pickup Settings enter the time of No Answer Ring Duration The time selected has to have a ...

Page 305: ...gatekeeper or to the endpoint In case you have problems one would first ping the default gateway then the gatekeeper and then the other endpoint Traceroute Traceroute does exactly that it traces the route an IP packet takes to reach its destination and displays all router hops Traceroute is very useful for seeing exactly where there is a routing problem in the IP network and for checking where tra...

Page 306: ...While using MultiSite if a site is disconnected and reconnected without terminating the entire conference the next site to be connected will have a H 245 port outside of the specified range If this functionality is required through a firewall the range of TCP ports can be extended past 5564 However if a site is disconnected and reconnected without ending the conference enough times one can quickly...

Page 307: ...ry If the system upgrade process is aborted before it s complete the system will work as normal with the original software The TANDBERG MXP systems can be upgraded in three different ways Using the web interface Using FTP Using ISDN A To upgrade using the web interface please do the following steps 1 Type the IP address of the TANDBERG MXP system that shall be upgraded for instance 10 0 8 77 in a ...

Page 308: ...TANDBERG 6000 MXP 294 The following page will now be displayed Figure 1 3 Enter the Release key in the Release Key field and press the Install Software button ...

Page 309: ... click on the restart button and press OK to restart the system in order to activate the new software Once verified the system will reboot once more to complete the upload of all systems parameters kept from the old software revision 7 To verify that the new sw is installed refresh the page shown in figure1 after restart The Software Version should now show the new software version uploaded to the...

Page 310: ...from another TANDBERG MXP system using ISDN Please note that both systems must be on software version F3 0 or newer for this functionality Please also note that both systems must be on software version F3 0 or newer for this functionality 1 Connect to the system that shall be upgraded using ISDN 2 Copy the new software file to a folder on your computer for instance c software 3 Type the IP address...

Page 311: ...Enter the password set at the far end for remote upgrade default password is TANDBERG 8 Press Install Software The system will now use about 90 of the call capacity to transfer the software file across During this time audio and video will be turned off 9 Once the software has been transferred and verified at the far end you will get a new webpage with information that the upgrade of the far end w...

Page 312: ...TANDBERG 6000 MXP 298 In the menu on the system under Control Panel System Information the installed software should now be displayed as the Software Version ...

Page 313: ... Directives LVD 73 23 EEC EMC 89 336 EEC R TTE 99 5 EEC This product complies with harmonised Standards EN 60950 1 2001 A11 EN 55022 1994 A1 A2 EN 55024 1998 A1 A2 EN 61000 3 2 2000 EN 61000 3 3 1995 A1 TBR 3 Layer 1 2 and 3 TBR 4 Layer 1 2 and 3 TECHNICAL CONSTRUCTION FILE NO X13497 YEAR WHICH THE CE MARK WAS AFFIXED 2005 For an official signed version of this document or details regarding docume...

Page 314: ...TANDBERG 6000 MXP 300 Appendix 17 Dimensions Dimensions with the Precision HD Camera ...

Page 315: ...Appendices 301 ...

Page 316: ...TANDBERG 6000 MXP 302 Dimensions with the WAVE II Camera Front view 50 monitor Top view with base ...

Page 317: ...Appendices 303 Top view 50 monitor ...

Page 318: ...TANDBERG 6000 MXP 304 Codec ...

Page 319: ...Appendices 305 Appendix 18 How to Remove the Codec TANDBERG 6000 MXP Profile How to remove the codec Pull out codec and remove cables ...

Page 320: ...TANDBERG 6000 MXP 306 ...

Page 321: ...terface Max number of simultaneous connection 8 in addition to the RS232 connection TELNET Challenge TMS Tandberg Management Suite uses MD5 Challenge Response algorithm RFC 1321 Telnet access for encryption of password over the IP network SNMP Simple Network Management Protocol A standard network protocol for management and surveillance of TCP IP networks RFC 1157 SNMP v1 RFC 1213 MIB II DHCP Dyna...

Page 322: ...relatively limited area for example a building WAN Wide Area Network A communications network connecting geographically separated computers printers and other devices SSL Secure Sockets Layer SSL is a proposed open standard for establishing a secure communications channel to prevent the interception of critical information ...

Page 323: ... 8 NB2 Output x Digit bit 2 9 NB4 Output x Digit bit 3 10 NB8 Output x Digit bit 4 11 SD A SD A T A Output x x x Send Data Transmit 12 SD B SD B T B Output x x x Send Data Transmit 13 RD A RD A R A Input x x x Receive Data 14 RD B RD B R B Input x x x Receive Data 15 SCR A SCR A S A Input x x x Signal Clock Receive Receive Timing 16 SCR B SCR B S B Input x x x Signal Clock Receive Receive Timing 1...

Page 324: ... for cables not using DTR RI or RLSD data triggered applications Cable type o Shielded Connector housing o Metal with cable shield connected to metal housing at 26 pin connector end Signal Name Female 26pin DSUB Pin number Male 34pin Winchester Pin number Comments Frame ground 1 A Signal ground 19 23 B TX A transmit data TX B 11 12 P S Twisted pair RX A receive data RX B 13 14 R T Twisted pair RCL...

Page 325: ...elded Connector housing o Metal with cable shield connected to metal housing at 26 pin connector end Signal Name Female 26pin DSUB Pin number Male 34pin Winchester Pin number Male 25pin DSUB Comments Frame ground 1 A Signal ground 19 23 B TX A transmit data TX B 11 12 P S Twisted pair RX A receive data RX B 13 14 R T Twisted pair RCLK A rcv clock RCLK B 15 16 V X Twisted pair TCLK A xmt clock TCLK...

Page 326: ...end Pin Number Male 37pin DSUB DCE end Pin Number Comments Frame Ground 1 1 Do not connect shield to FGND Signal Ground 19 23 19 30 Send Data A Send Data B 11 12 4 22 Twisted Pair Send Timing A Send Timing B 17 18 5 23 Twisted Pair Receive Data A Receive Data B 13 14 6 24 Twisted Pair Receive Timing A Receive Timing B 15 16 8 26 Twisted Pair Terminal Ready A 26 12 Receiver Ready A Receiver Ready B...

Page 327: ...Number Comments Frame Ground 1 1 Do not connect shield to FGND Signal Ground 19 19 30 Send Data A Send Data B 11 12 4 22 Twisted Pair Send Timing A Send Timing B 17 18 5 23 Twisted Pair Receive Data A Receive Data B 13 14 6 24 Twisted Pair Receive Timing A Receive Timing B 15 16 8 26 Twisted Pair Terminal Ready A 26 12 Receiver Ready A Receiver Ready B 22 23 13 31 Twisted Pair Incoming Call A 24 1...

Page 328: ...6pin DSUB Tandberg end Pin Number Male 25pin DSUB RS 530 DCE end Pin Number Comments Frame Ground 1 1 Do not connect shield to FGND Signal Ground 19 7 Send Data A Send Data B 11 12 2 14 Twisted Pair Send Timing A Send Timing B 17 18 15 12 Twisted Pair Receive Data A Receive Data B 13 14 3 16 Twisted Pair Receive Timing A Receive Timing B 15 16 17 9 Twisted Pair Terminal Ready A Terminal Ready B 20...

Page 329: ... 25pin DSUB RS 366 Pin Number Comments Frame Ground 1 1 Do not connect shield to FGND Signal Ground 19 7 Send Data A Send Data B 11 12 2 14 Twisted Pair Send Timing A Send Timing B 17 18 15 12 Twisted Pair Receive Data A Receive Data B 13 14 3 16 Twisted Pair Receive Timing A Receive Timing B 15 16 17 9 Twisted Pair Terminal Ready A Terminal Ready B 20 21 20 23 Receiver Ready A 22 8 Twisted Pair R...

Page 330: ...9 o DSUB 37 pin Male Signal Name Female 26pin DSUB Tandberg end Pin Number Male 37pin DSUB DCE end Pin Number Comments Frame Ground 1 1 Do not connect shield to FGND Send Data A Send Data B 11 12 4 14 Twisted Pair Send Timing A Send Timing B 17 18 15 12 Twisted Pair Receive Data A Receive Data B 13 14 3 16 Twisted Pair Receive Timing A Receive Timing B 15 16 17 9 Twisted Pair LOS 25 31 Signal Grou...

Page 331: ...rn you of an incoming call even though the monitor may not be switched on Audio call Audio call equals a telephone call You can make a call with the video system with audio only Audio input 4 Intended for connection to an external microphone amplifier or an external fixed mixer Audio input 5 Intended for connection to external playback devices or to telephone add on hybrids Audio input 6 Intended ...

Page 332: ...ll automatically view the current speaker Chair control Enables one participant to control the meeting by selecting which of the conference participants that is to be broadcasted to the other participants Channel status Comprehensive information about the call progress listing the numbers called and if an error occurs a cause code is displayed CIF Common Intermediate Format 352x288 pixels Closed C...

Page 333: ...for PAL versions Echo canceller Continuously adjusts itself to the audio characteristics of the room and compensates for any changes it detects in the audio environment Echo control When set to On the far end is prevented to hear their own audio Encryption Use encryption to make a secure call The system will try to make point to point calls using encryption If the far end system supports encryptio...

Page 334: ...your TANDBERG representatives Humfilter A highpass filter which reduces very low frequency noise I iCIF Interlaced CIF 352x288 pixels 50 fields per second Incoming call Someone calls in to your system Incoming MCU Calls If occupied in a call the system will provide a visual audio indication of an incoming call and ask to accept or reject the call IP address Defines the network address of the syste...

Page 335: ...not available on all systems MultiSite cascading By connecting up to 4 or 6 depending on the system capacity MultiSite systems together to achieve a higher number of participants in a multipoint call N NAT Network Address Translation NAT support in the video communication system enables proper exchange of audio video data when connected to an external video system when the IP traffic goes through ...

Page 336: ...g When connected the PC image is displayed on the monitor PC SoftPresenterTF Shows PC images via the LAN connection PIP Picture In Picture point to point call A call with two participants including your self POP Picture Outside Picture POP is a picture layout mode that is optimized for wide screens Full screen 1 3 layout and emulated dual monitor layout Precision HD Camera High Definition camera d...

Page 337: ...ensitive SNMP Trap Host Identifies the IP address of the SNMP manager SNMP traps Generated by the agent to inform the manager about important events SoftMux Ensures high reliability and includes the unique Downspeeding feature It also makes it possible to dial to another video communication equipment phones and mobile phones in a uniform way and provides an on screen real time feedback on the prog...

Page 338: ...he systems use restricted coding this should be selected Take chair Request chairmanship of the conference If no one else is chairman the request is granted TCS 4 Used to address different systems on a LAN when dialing in via a gateway Terminal Names Lists the site numbers or name if supported of other sites connected in the conference Terminate meeting The chairman can terminate the conference i ...

Page 339: ...te will be displayed in full screen during a MultiSite conference W WAVE II Camera Wide Angle View Camera delivers the widest angle of view in the industry Welcome menu The welcome menu displays the Menu when you are outside a call X XGA extended Graphics Array 1024 x 768 ...

Page 340: ...4 Duo Video Quality 166 E Echo Control 179 EDID 260 Encryption 194 End Call 49 External Network Configuration 206 External Network Settings 199 Extra cameras 247 F Far End Camera Control 69 Far End Control 70 G Gatekeeper 214 Group Layout 88 H H 239 81 151 152 154 H 331 Settings 208 Hardware serial number 101 I Indicators 35 Interfaces 231 IP Address Conflict Check 111 IP Settings 212 ISDN BRI Set...

Page 341: ... mode 180 Stereo speakers 180 System Information 101 System Name 119 T Take Chair 90 Take new snapshot 82 83 Telephone Add On 255 Telephone Call 42 Terminate Meeting 94 Test Subsystem 105 Timeout 136 To connect a PC to Dataport 1 228 Touch Tones 33 U User Guide 115 V Video Algorithm 161 Video Call 40 Video cassette recorder VCR 245 Video Name 192 Video Quality 166 View Administrator Settings 106 V...

Reviews: