13
W536-0761E
G - 2
G - 2
Boom (Five-Section Boom)
2. Disassembly
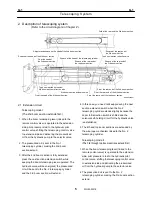
The procedure to remove the 2nd boom section and
further sections as an assembly is described below.
2.1 Removing the 2nd boom section
1. Retract the boom fully and set the crane level.
2. Remove the hook block and the rope socket.
Wind up the wire rope on the drum.
3. Swing the boom to place where there is enough
clearance, then lower the boom to 0° and stop the
engine.
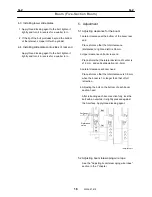
4. Remove the wiring connector, loosen the wiring
clip and secure the cable end using a tape at the
cable guide (a) located closest to the cord reel.
IW536-0620E03
Cable
Cable guide (a)
Wiring clip
5. Remove the high-pressure hoses (2 pieces) and
the hose leading to the hose reel from the
telescoping cylinder.
[NOTICE]
To prevent the hose reel from spinning, attach a
wire to the hose to the pipe sleeve of the hose and
secure the wire to the swing frame.
IW536-0620E04
Hose reel
High-pressure hose
Telescoping cylinder
6. Pull out the connecting pin that connects the base
boom section and the No. 1 telescoping cylinder
by removing the retaining ring. Then loosen the
nut and remove the bolt.
IW536-0620E05
Connecting pin
Bolt
Nut
7. After removing the retainer on the top of the base
boom section head and removing the slide plate,
pull out the 2nd boom section by approx. 1 m.
8. While lifting up the 2nd boom section slightly,
remove the retainer from the bottom of the base
boom section head.
9. Lift up and pull out the 2nd boom section using a
crane, and place it on a level platform.
Summary of Contents for TR-800XXL4
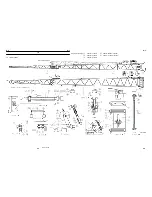
Page 47: ...B 9 B 9 Rotary Joint 27 W181 0440E Upper view A Lower view B...
Page 119: ...F 1 F 1 Winch System 1 WF02 0251E F 1 Winch System 1 General Hydraulic Circuit for Winch...
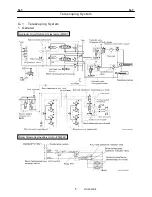
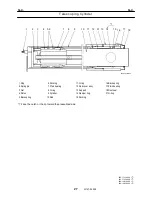
Page 135: ...G 1 G 1 Telescoping System 3 WG02 0321E Telescoping cylinder at select...
Page 143: ...G 2 G 2 Boom Five Section Boom G 2 11 W536 0761E 11...
Page 196: ...13 13 W701 0220E K 2 K 2 Air Conditioner K 2 4 Layout 4 1 Overall layout 4 345 107 61000...
Page 197: ...14 14 W701 0220E K 2 K 2 Air Conditioner K 2 4 2 Overall layout 0 345 110 73000...
Page 198: ...15 15 W701 0220E K 2 K 2 Air Conditioner K 2 4 3 Evaporator section 5 345 107 02000...
Page 199: ...16 W701 0220E K 2 K 2 Air Conditioner 5 Compressor Assy...
Page 200: ...17 17 W701 0220E K 2 K 2 Air Conditioner K 2 6 Evaporator Assy...
Page 201: ...18 18 W701 0220E K 2 K 2 Air Conditioner K 2 7 Condenser Assy...
Page 202: ...19 19 W701 0220E K 2 K 2 Air Conditioner K 2 8 Electric 8 1 Electric circuit 0 363 205 60030...
Page 203: ...20 20 W701 0220E K 2 K 2 Air Conditioner K 2 8 2 Main harness A...
Page 204: ...21 21 W701 0220E K 2 K 2 Air Conditioner K 2 8 3 Main harness B...
Page 222: ...39 K 2 K 2 K 2 Air Conditioner 39 W701 0220E 12 2Compressor diagnosis chart 1 2...
Page 223: ...40 K 2 K 2 K 2 Air Conditioner 40 W701 0220E Compressor diagnosis chart 2 2...
Page 224: ...K 2 K 2 Air Conditioner 41 W701 0220E 13 Troubleshooting...
Page 225: ...K 2 K 2 Air Conditioner 42 W701 0220E...
Page 226: ...K 2 K 2 Air Conditioner 43 W701 0220E...
Page 227: ...K 2 K 2 Air Conditioner 44 W701 0220E...
Page 228: ...K 2 K 2 Air Conditioner 45 W701 0220E...
Page 229: ...K 2 K 2 Air Conditioner 46 W701 0220E...
Page 237: ...L 1 L 1 Control System 2 WL02 0090E 2 General of pneumatic control devices Pneumatic Circuit...
Page 291: ...T 5 T 5 Air Dryer 26 W232 0032E Heater View A 39 C B B A 58 59 2 IW232 0030E03...
Page 370: ...8 8 WZ03 3300E Z 5 Z 5 Electric Circuit MDT Carrier Upper Z 5 IWZ03 3300E01...
Page 372: ...10 Z 6 Z 6 Electric Circuit MDT Carrier Lower Z 6 10 WZ03 3310E IWZ03 3310E01...
Page 400: ...38 Z 24 Z 24 Harness Lower Sub 38 WZ04 2450E Z 24 Z 24 Harness Lower Sub 2 349 310 00200...

