- -
(7) Turn the printer off, and set DIP switches DIPSW1-4, DIPSW1-5, DIPSW1-6, and DIPSW1-7 to their original settings.
(8) Attach the DIP switch cover.
6-4-2. NE Sensor Adjustment Mode
(1) Check that the printer is turned off.
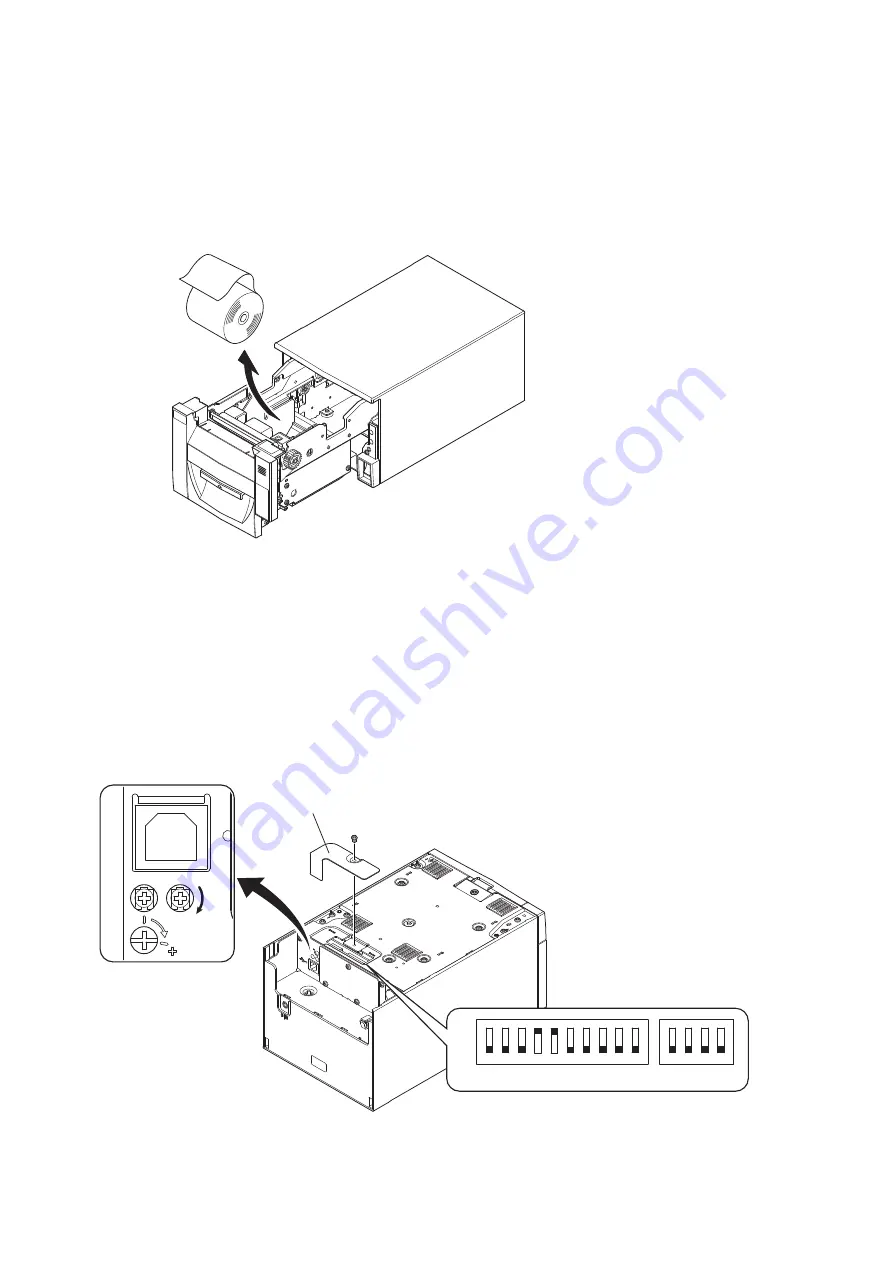
(2) Open the front cover, remove the paper roll from the printer, and close the front cover.
(3) Unfasten the screw holding the DIP switch cover at the bottom of the printer, and remove the cover.
(4) Using a pointed object, set DIP switches DIPSW1-4 and DIPSW1-5 to OFF and DIP switches DIPSW1-6 and DIPSW1-7
to ON. Then turn the printer on.
The lamps on the control panel will flash, and the printer will enter sensor adjustment mode.
(5) Turn VR2 clockwise all the way with a precision flat-blade screwdriver as shown in the figure below.
If the POWER lamp (green) is on at this point, proceed to step (7).
If the POWER lamp (green) is off, proceed to step (6).
DC
24V
VR1
VR2
1 2 3 4
1 2 3 4 5 6 7 8 9 10
OFF
ON
DIP-SW 1
DIP-SW 2
DIP switch cover

