ST7MDTU3-EMU2B Emulator User Manual
3 - STVD7
37/63
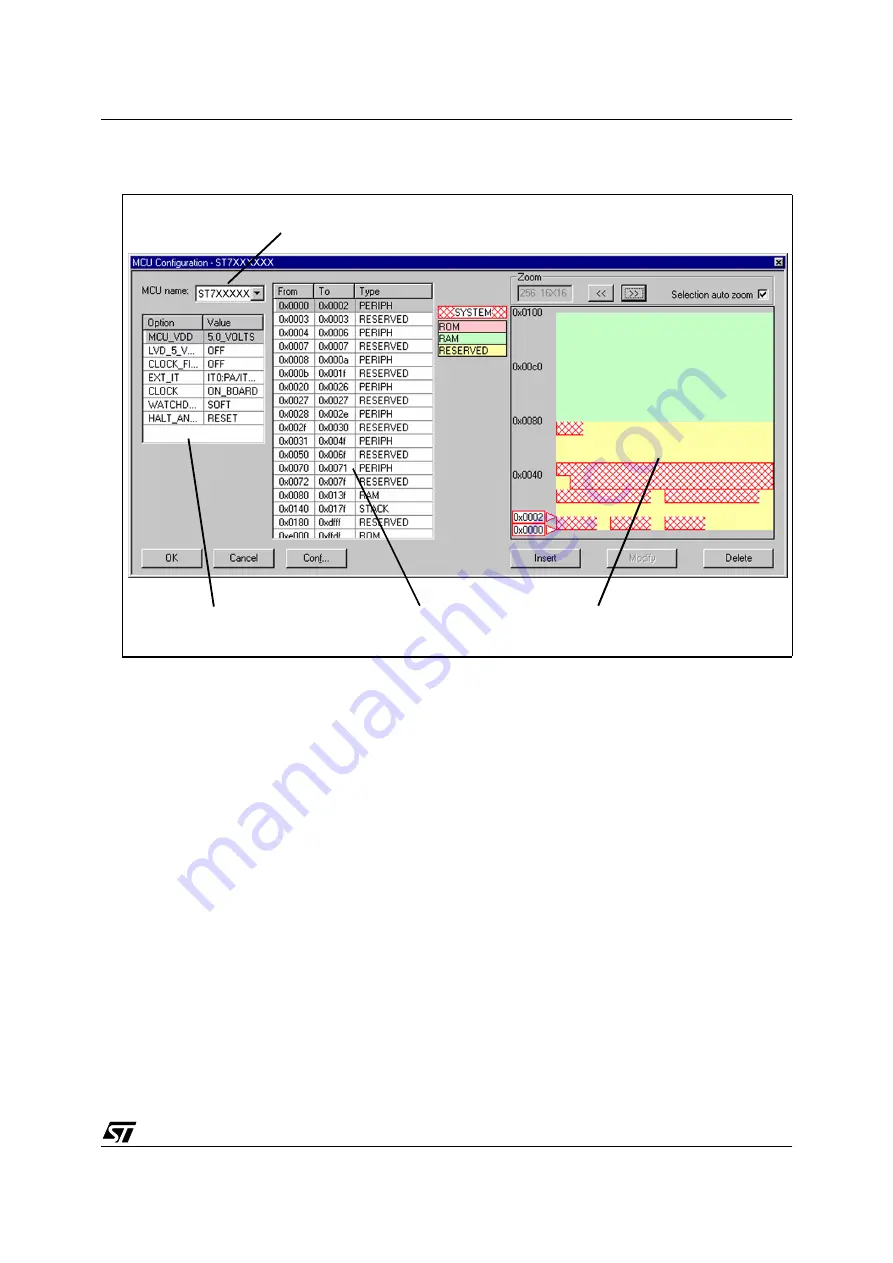
An example of a typical MCU Configuration window is shown in
Chapter 3
.
Note:
The options shown in the above example may not be available for your particular target MCU.
3
Set the Target MCU. In the MCU name field, select the target device for which
the application is intended from the dropdown box. Once a target MCU has
been chosen, the
Option configuration and the Memory configuration fields will
show the default values for this device.
4
Configure the MCU Options and On-Chip Peripherals. All of the
configurable options on your target hardware device are listed in the
Option
configuration fields. Beside each option, a default value is given. You may
change this value by clicking on it and choosing a new value from the drop
down list. This allows you to configure your target device’s options and on-chip
peripherals. Depending on the MCU selected, the default settings in the
Option
configuration fields will change. It is up to you to configure those options that will
impact your application so that the emulator accurately emulates your target
device.
Note:
For more information about the configurable options available on your target hardware
device, please consult your target MCU’s datasheet.
Figure 23: MCU Configuration window
Option configuration
fields
Memory configuration
fields
Graphic memory
configuration viewer
MCU Name field
Summary of Contents for HDS2 Series
Page 42: ...3 STVD7 ST7MDTU3 EMU2B Emulator User Manual 42 63...
Page 52: ...4 Emulator Features ST7MDTU3 EMU2B Emulator User Manual 52 63...
Page 56: ...Appendix A Troubleshooting ST7MDTU3 EMU2B Emulator User Manual 56 63...
Page 62: ...Product Support ST7MDTU3 EMU2B Emulator User Manual 62 63...


