Appendix B: Windows 2000/XP Host PC Software Installation
¤
2005-2010 SR Research Ltd.
81
11.3
Create the EyeLink 1000 Host Application partition
1. From the ‘Partitioning’ window select the newly formed ‘Free’ space (highlighted in gray)
which will appear on the top of the cylindrical drive diagram as illustrated in the left
side of Figure 11-5. Click the ‘Create’ icon which will bring up the ‘Create Partition’
window.
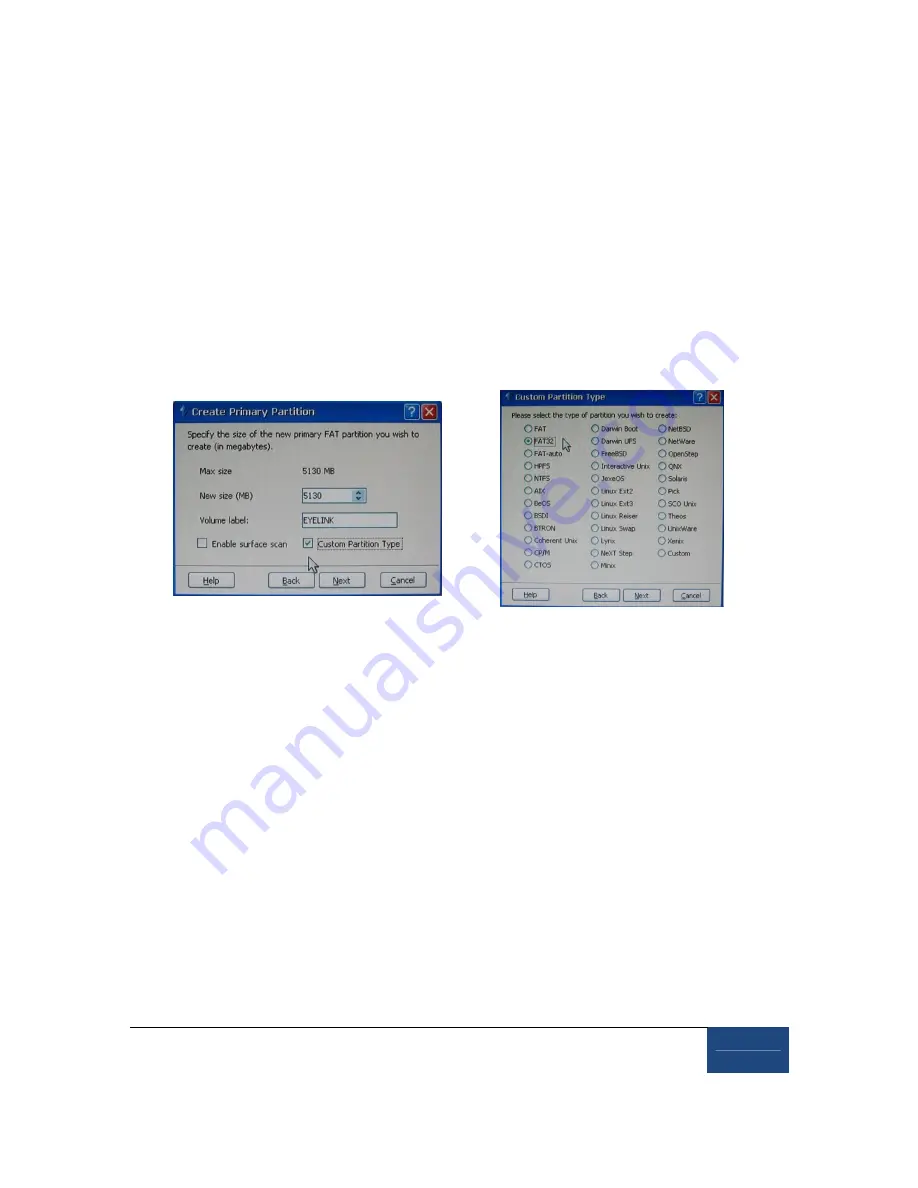
2. Select ‘Primary’ and click ‘Next’ which will bring up the ‘Create Primary Partition’
window as illustrated in the left side of Figure 11-6. In the ‘Volume label’ field type
EYELINK and
ensure that the ‘Custom Partition Type’ box is checked
. Click ‘Next’
to bring up the ‘Custom Partition Type’ window as illustrated in Figure 11-6, right, and
select ‘FAT-32’ then click ‘Next’. In the following ‘Warning!’ window, click ‘Proceed’.
Figure 11-6: Create a Custom FAT 32 Partition
3. Close the ‘Partitioning’ window by selecting the red “X” in the top right corner of the
window and exit System Commander by clicking "Start" at the bottom-left corner of the
screen selecting the "Exit" option. Eject the CD before the computer reboots.
4. Upon restart the computer will once again run the System Commander application. The
new EyeLink partition will appear as the icon with two question marks and will be
labeled ‘FAT-32 OS’ as illustrated in Figure 11-8. We will return to deal with this later.
For now, we wish to boot into Windows once again.
5. Select the Windows XP partition.
Windows XP should immediately determine that
the disk partitioning has changed and perform a number of system tests to
validate the hard drive. This is expected and should not be interrupted
.
6. Windows will reboot once its validation checks have been performed. From the System
commander menu select Windows XP a second time and boot into the Windows
operating system.


