Upgrading Your Computer’s Memory
159
3
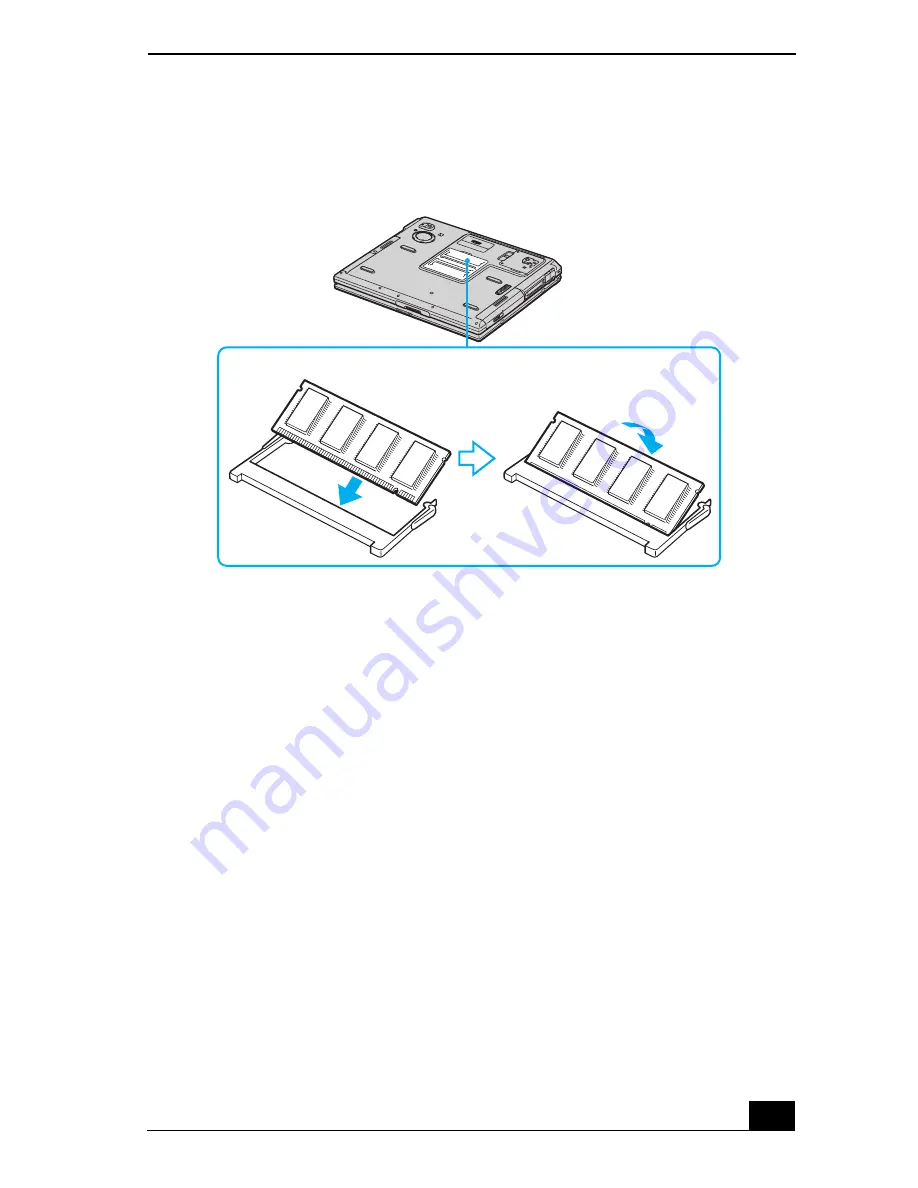
Snap the connectors into place when the board is correctly seated, and close
the computer cover.
4
Replace the fastening screws on the bottom of the computer.
5
Make sure the system memory matches the amount of installed memory. See
“Confirming added memory capacity” for more information.
Confirming added memory capacity
After you’ve installed a new memory module, make sure the operating system’s
memory corresponds with the memory upgrade.
To check your system’s memory
1
Turn on the computer.
2
Click
Start
on the Windows® taskbar, point to
All Programs
, and then
point to
Sony Notebook Setup
.
Installing a New Memory Module
Memory module
Summary of Contents for VAIO PCG-GRS100
Page 8: ...VAIO Computer Quick Start 8 ...
Page 30: ...VAIO Computer Quick Start 30 ...
Page 54: ...VAIO Computer Quick Start 54 ...
Page 70: ...VAIO Computer Quick Start 70 ...
Page 71: ...71 Printer Connections Printing With Your Computer ...
Page 76: ...VAIO Computer Quick Start 76 ...
Page 105: ...105 Connecting Mice and Keyboards Using External Mice and Keyboards ...
Page 110: ...VAIO Computer Quick Start 110 ...
Page 111: ...111 Floppy Disk Drives and PC Cards Using Floppy Disk Drives Using PC Cards ...
Page 154: ...VAIO Computer Quick Start 154 ...
Page 155: ...155 Memory Upgrades Upgrading Your Computer s Memory ...
Page 161: ...161 Port Replicators Connecting the Port Replicator ...
Page 165: ...165 Using the Recovery CDs Application and System Recovery CDs Using Your Recovery CDs ...