C
h
an
gi
ng
th
e
S
e
tt
in
gs
Settings
40
Pricing
• [3.5 × 5], [4 × 6], [5 × 7], [6 × 8], [8 × 10/8 × 12],
[CD Creation], [ID Print]
Set the unit price of each output service in the text
boxes above. Touch a text box to highlight it, and then
use the keypad to type the desired price (range: 0.00 to
99.99). To apply the desired price, touch the [Apply]
button.
• [InitialFee]
Set the initial fee necessary to use each output service.
Touch the text box to highlight it, and use the keypad
to type the desired price (range: 0.00 to 99.99). To
apply the desired price, touch the [Apply] button.
• [Currency]
This setting allows you to select the currency used by
default by the system. To modify the setting, touch the
arrow button and select the currency from the list.
Add to price above
• [Borders - Collage], [Index], and [Photo library] Used
to apply additional fees when using [Borders -
Collage], printing an index, and/or using Photo
Library data. If you decide to apply additional fees, it
is added to the base price of the output service before
being multiplied by the number of copies.
Limit per order
• [Max Prints]
This box contains the maximum number of
consecutive prints per order. To modify this number,
touch the text box to highlight it, and then use the
keypad to type the desired value (range: 1 to 999). To
apply the desired value, touch the [Apply] button.
• [Scan Max for CD]
This box contains the maximum number of pictures
scanned with a flatbed scanner that can be written to
CD-R. To modify this number, touch the text box to
highlight it, and then use the keypad to type the
desired value (range: 1 to 999). To apply the desired
value, touch the [Apply] button.
• [Prints Remaining]
Touch this button to limit the maximum number of
consecutive prints per order to the number of prints
remaining in the printer, at the selected size.
Tax
• [Sales Tax% (1)], [Sales Tax% (2)]
Set the tax rate used in calculating the price of an order
in the text box. Touch the text box to highlight it, and
then use the keypad to type the desired tax rate (range:
0.000 to 99.999). To apply the desired tax rate, touch
the [Apply] button.
• [Description of Tax (1)], [Description of Tax (2)]
Set the name of the taxes that you specified in [Sales
Tax% (1)] and/or [Sales Tax% (2)]. Touch the
[Keyboard] button to input the desired name.
For details about how to input text strings, see steps 5
and 6 of “Add Text to Pictures” (page 22).
Note
If you do not enter names for the taxes, they appear as
“Tax” and “Tax2”.
• [Calculation]
This setting allows you to select the rounding method.
Touch this button to select [RoundOff] (no rounding is
performed), [RoundDown] (prices are rounded
down), or [RoundUp] (prices are rounded up).
• [Included in price]
This setting allows you to enable/disable the inclusion
of tax in the price. Touch this button to enable ([On])
or disable ([Off]) the inclusion of tax.
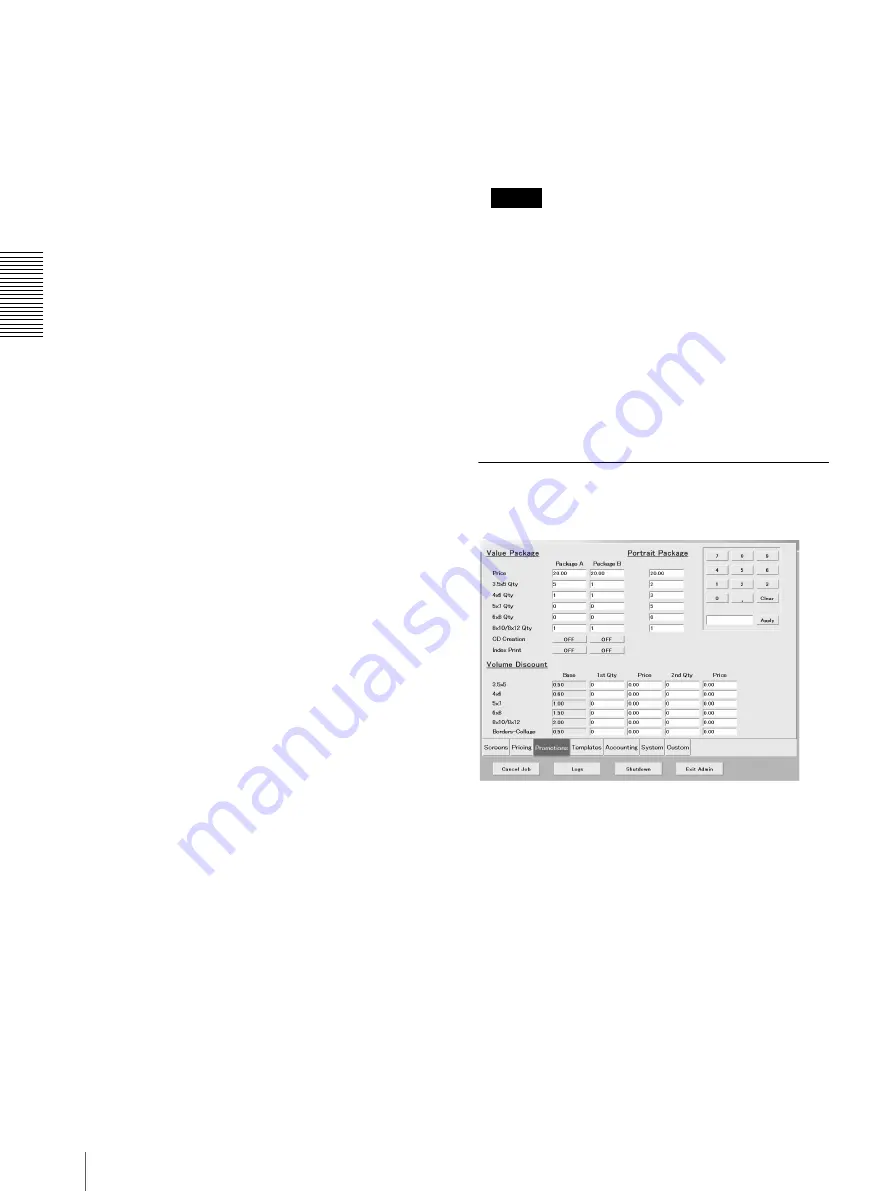
[Promotions] Tab
On this tab, you can make promotional package settings,
and set volume discounts.
Value Package
This package allows you to print the same or different
pictures data with quantities applied to each set size.
You can make changes to the package price, and
quantity for each size.
• [Price]
Set the price of the value package in this text box.
Touch the text box to highlight it, and then use the
keypad to type the desired price (range 0.00 to 99.99).
To apply the desired price, touch the [Apply] button.


