Op
erat
io
n
Cancelling Printing
13
Cancelling Printing
This procedure varies depending on the settings made in
the Administration screen. Follow the procedure that
applies to your situation.
If the unit is set to allow other operations during
printing
1
Make sure that the screen in step 1 of “Output”
(page 8) changes to the screen in step 1 of
“Selecting the Scanner as the Input Device”
(page 10).
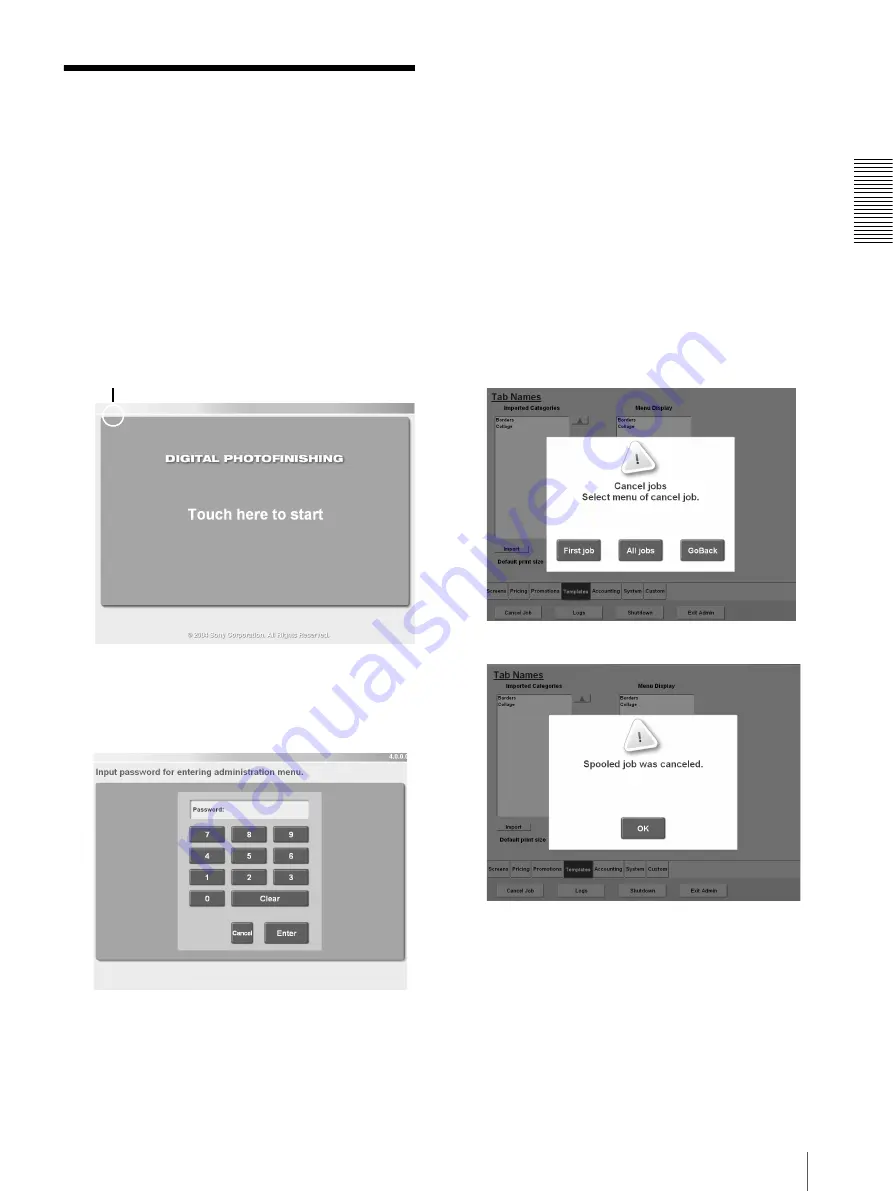
2
Touch the screen twice successively at the location
indicated below.
3
Touch the number buttons to reenter the password
that you entered prior to printing.
To correct the entry clear it by touching the [Clear]
button and reenter the password.
4
Touch the [Enter] button.
The Administration screen appears. The screen
differs according to the password that you enter
(administrator or sales clerk password).
5
Touch the [Cancel Job] button.
A screen allowing you to verify the cancellation
appears.
6
Select the items that you want to cancel.
• If you touch the [First job] button, only the
current print job is cancelled.
• If you touch the [All jobs] button, all the print
jobs are cancelled.
• If you touch the [Go Back] button, printing
continues normally.
7
Read the message and touch the [OK] button.
8
Touch the [Exit Admin] button.
The screen in step 2 appears again.
Touch here twice.


