Op
erat
io
n
Editing Pictures
16
3
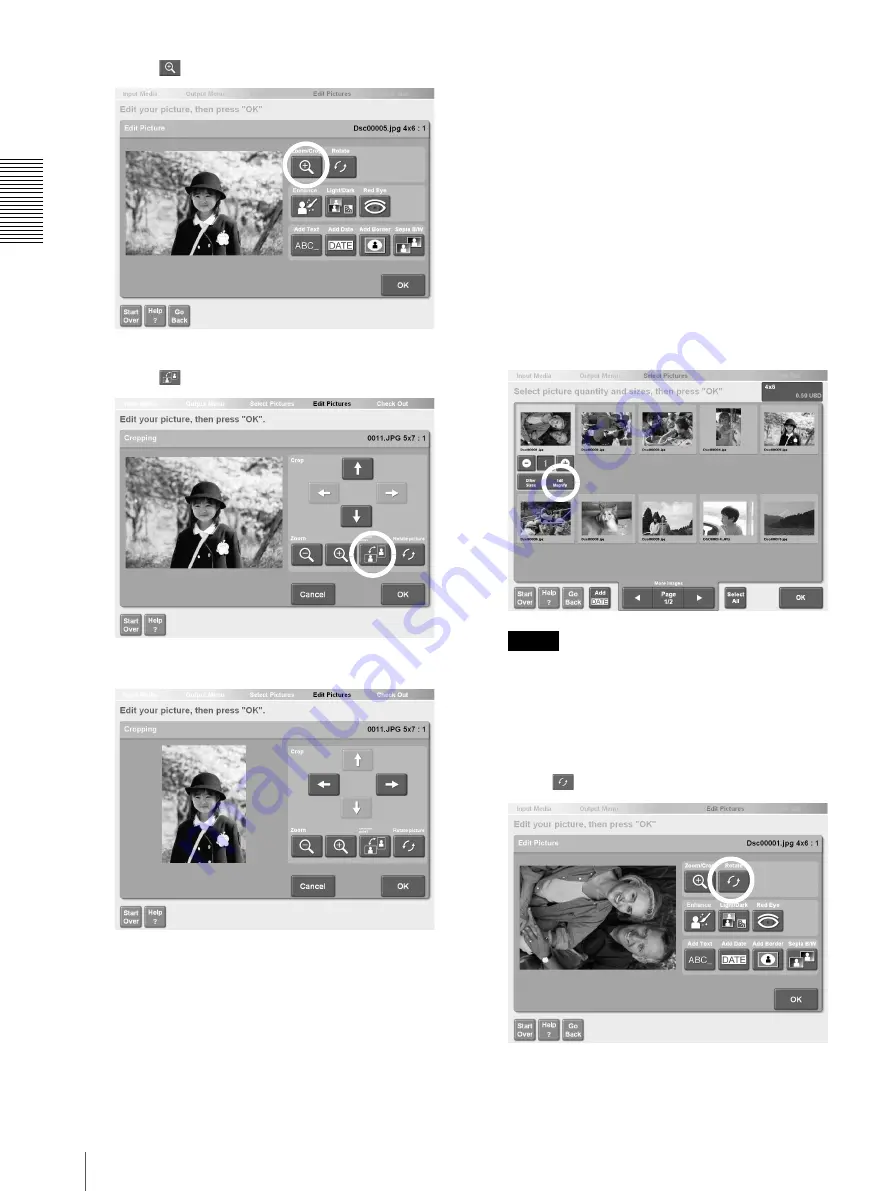
Touch
The composition adjustment screen appears.
4
Touch
The picture is re oriented and enlarged so that blank
margins do not show.
5
When you are finished re-orienting the picture,
touch the [OK] button.
The display returns to the screen at step 3.
6
Touch the [OK] button.
The display returns to the screen at step 1. You can
continue editing other pictures or return to the
output operation.
Rotating a Picture
Follow this procedure to rotate a picture relative to the
direction of printing.
1
To select a picture for rotation, touch the picture in
the screen used to specify the number of copies.
For details, see “Selecting the Pictures and
Specifying the Number of Copies to Print”
(page 6), step 2, or “Specifying the Number of
Copies to Print” (page 11), step 1.
Note
Rotating pictures in this way does not affect the
printing orientation.
2
Touch the [Edit/Magnify] button.
The picture editing screen appears.
3
Touch
The adjustment screen appears.


