Op
erat
io
n
Editing Pictures
22
4
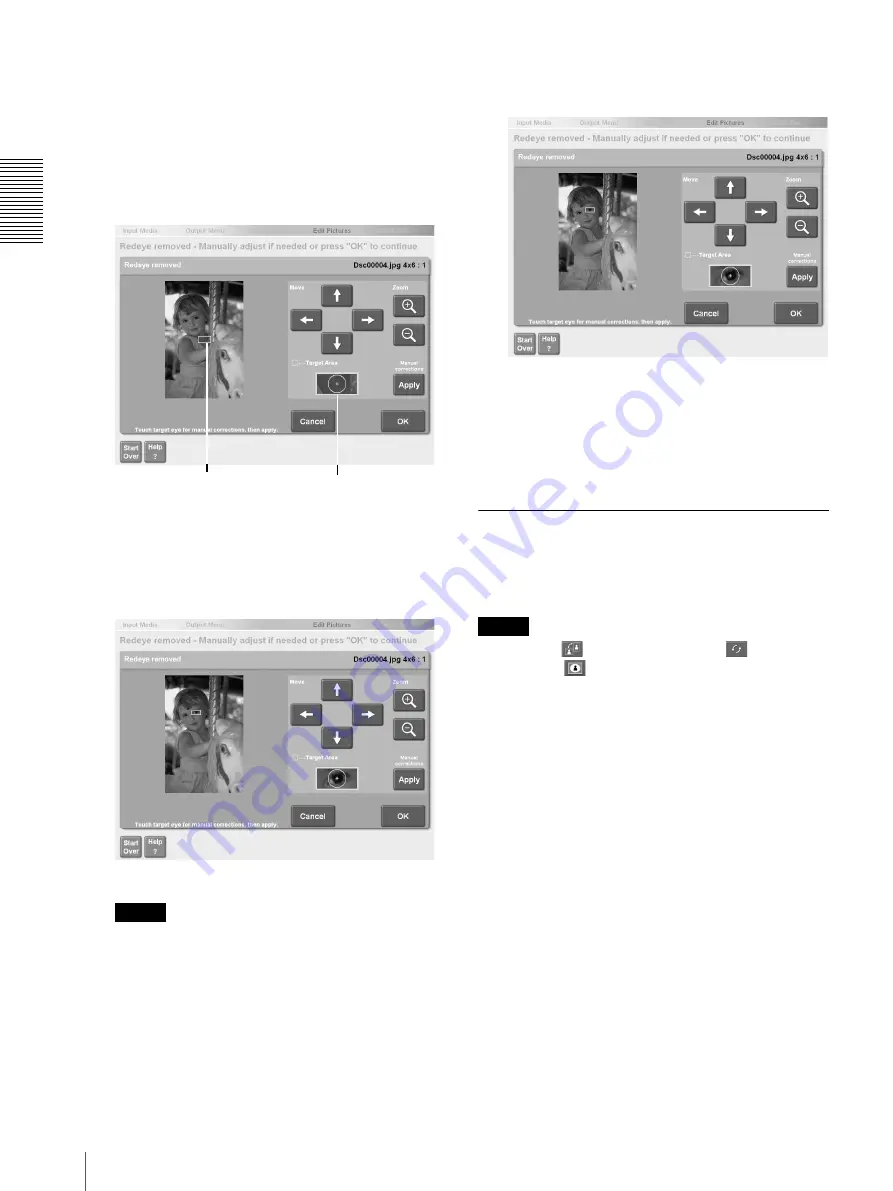
Verify the result.
If red eye was corrected to your satisfaction,
proceed to step 8. If not, proceed to step 5 and
correct it manually.
5
Touch the screen or the [Move] arrow buttons to
move the green frame and place it over the affected
eye.
6
Under [Zoom], touch the [+] button.
Align the cross in the green frame with the center of
the affected red eye.
7
Touch the [Apply] button.
The red eye is corrected.
Note
With some pictures, complete correction may not
be possible.
8
When you are done, touch the [OK] button.
To cancel the correction, touch the [Cancel] button.
The display returns to the screen at step 3.
9
Touch the [OK] button.
The display returns to the screen at step 1. You can
continue editing other pictures or return to the
output operation.
Add Text to Pictures
You can annotate pictures with any text that you want.
You can at a maximum of 4 blocks of text, each up to 30
characters long, to picture.
Note
If you select
(Landscape/portrait),
(Picture
Rotation), or
(Add Border) after adding text to a
picture, the added text will be lost. Make sure you
perform these operations before adding text to a picture.
1
To select a picture for annotation, touch the picture
in the screen used to specify the number of copies.
For details, see “Selecting the Pictures and
Specifying the Number of Copies to Print”
(page 6), step 2, or “Specifying the Number of
Copies to Print” (page 11), step 1.
Correction area (green frame) View inside the green frame


