
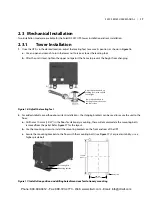


2.4 Module Installation
The SolaHD S5KC ships from the factory configured (modules prepopulated) and tested as a system to the customer’s
requirements� If any modules were removed to facilitate ease of installation, follow the steps below to reinsert them
properly�
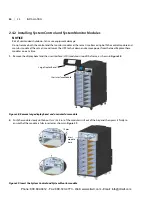
2.4.1 Installing Power Module, Battery Module and Charger Module
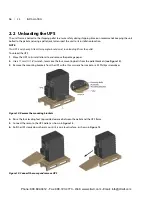
1. Lift module to appropriate bay, resting end of module on bay shelf�
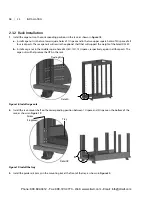
NOTE
Use caution not to rest the module on any of the bezels, this could damage the bezel.
Two battery modules must be installed in the same row to complete the battery string.
2. Push the module into the bay slowly� The module will not be locked until 1/3 is in�
a. At this point, lift the module up and continue pushing it until about 5cm of the module is still out of the bay�
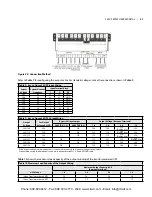
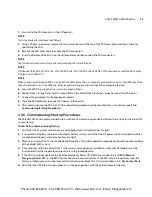
b. Push it firmly and smoothly to ensure that the module is fully inserted, as shown in
Figure 26
�
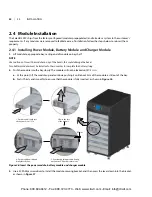
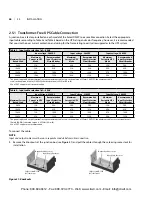
Figure 26: Insert the power module, battery module and charger module
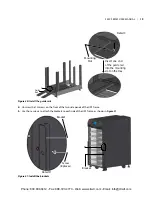
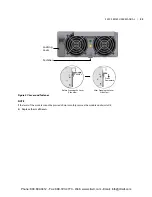
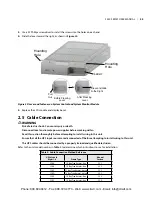
3. Use a #2 Phillips screwdriver to install the module-securing bracket, and then press the lever down into the bracket,
as shown in
Figure 27.
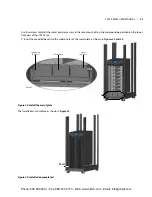
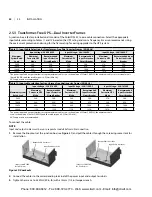
50mm
1� Push module slowly into
the bay until it is 1/3 in�
2� Raise the face
of the module�
3� Continue pushing module slowly|
until about 2” (50mm) remains out�
4� Push module quickly and
firmly into the bay�
22 | 2�0
INSTALLATION
Phone: 800.894.0412 - Fax: 888.723.4773 - Web: www.clrwtr.com - Email: [email protected]


